Overview:
Delete action removes items from the Xemelgo Inventory. Once deleted, these items cannot be restored. Use it to remove items that were created by mistake, such as duplicates, test items, or items onboarded incorrectly. For items that have been used, have expired, or are no longer on hand, use Consume or Archive instead so their history is kept.
Before You Begin
- You’ll need to have an Admin role.
- For CSV upload, have a .csv file ready with an EPC column (you can download the template in step 2).
On this Page:
- Delete items from the tracking page
- Delete items by CSV upload
- Track progress and review results
Delete items from the tracking page
1. Go to Inventory > Tracking and select the Items view. Use filters or search to narrow the list to the items you want to delete.
2. Check the box next to each item you want to delete. The action bar shows how many items are selected.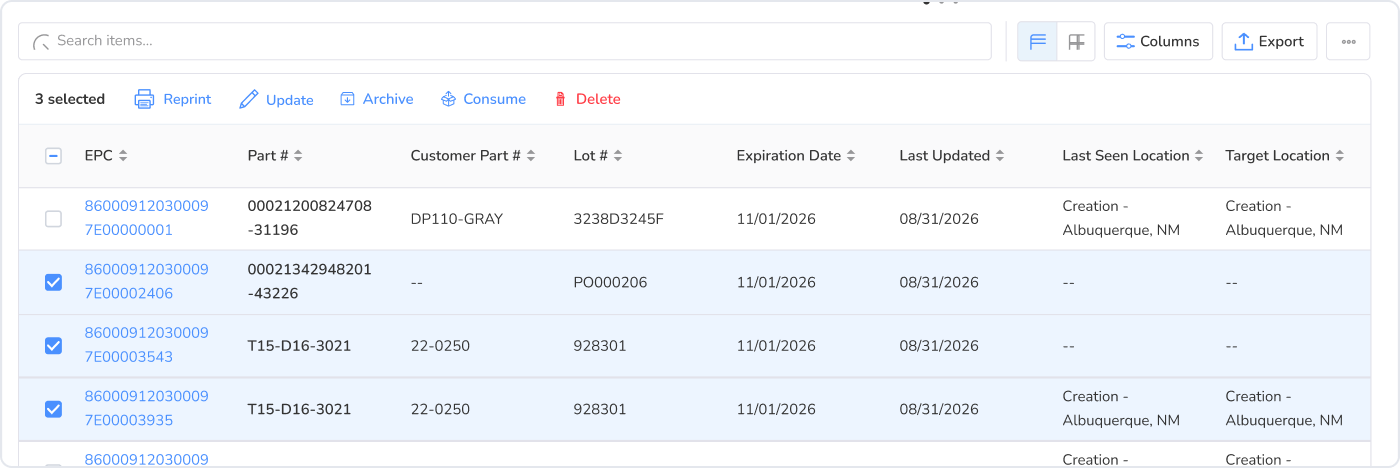
3. Click Delete in the action bar.
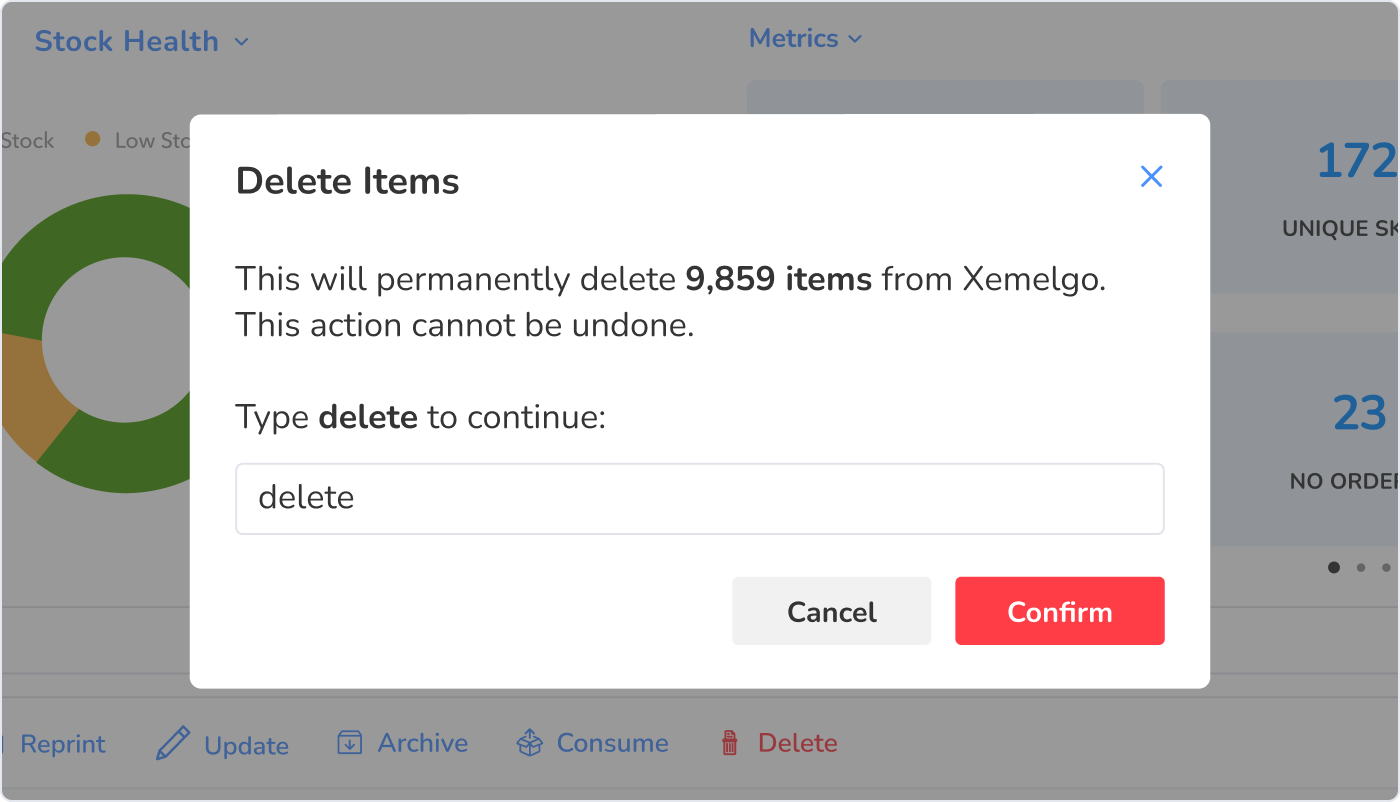
4. In the Delete Items dialog, type delete and click Confirm.
Delete items by CSV upload
1. On the tracking page, click Import CSV and select Delete.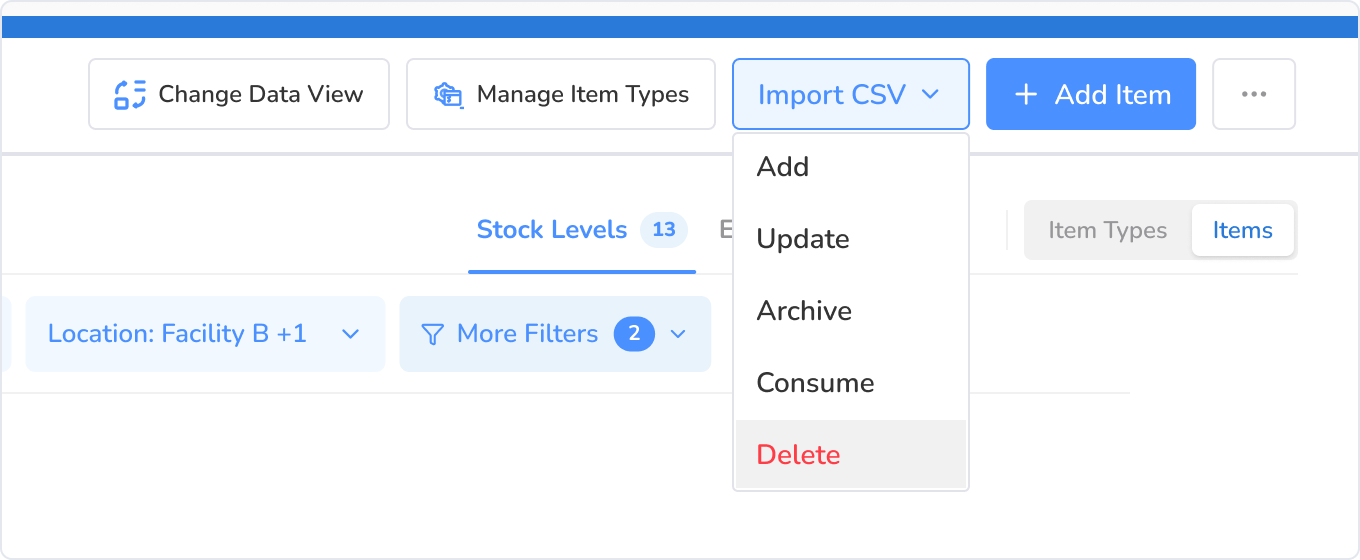
2. In the Import CSV - Delete panel, click Download Template. Add the EPC of each item you want to delete, one per row, and save the file as .csv.
3. Drag your file into the upload area, or click Browse to choose it.
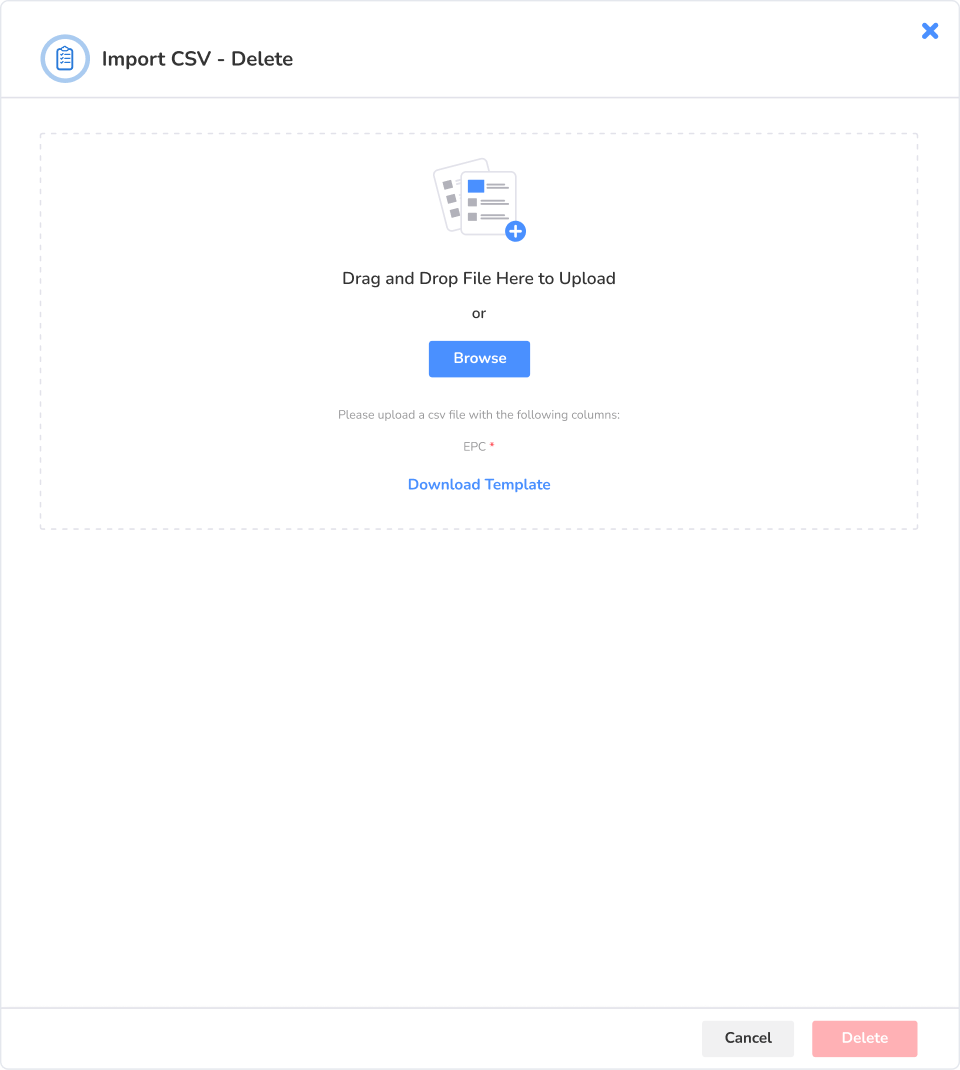
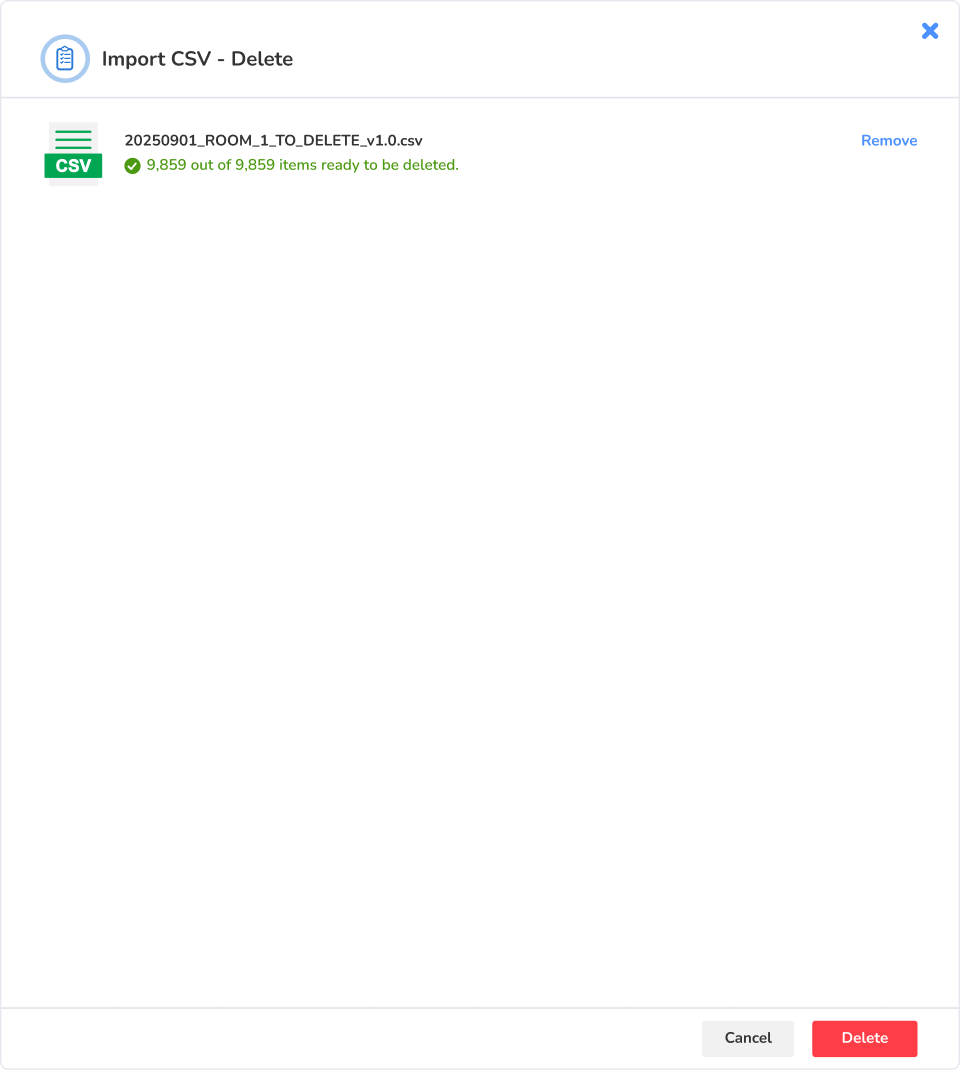
4. Review the summary. Xemelgo shows how many items are ready to be deleted.
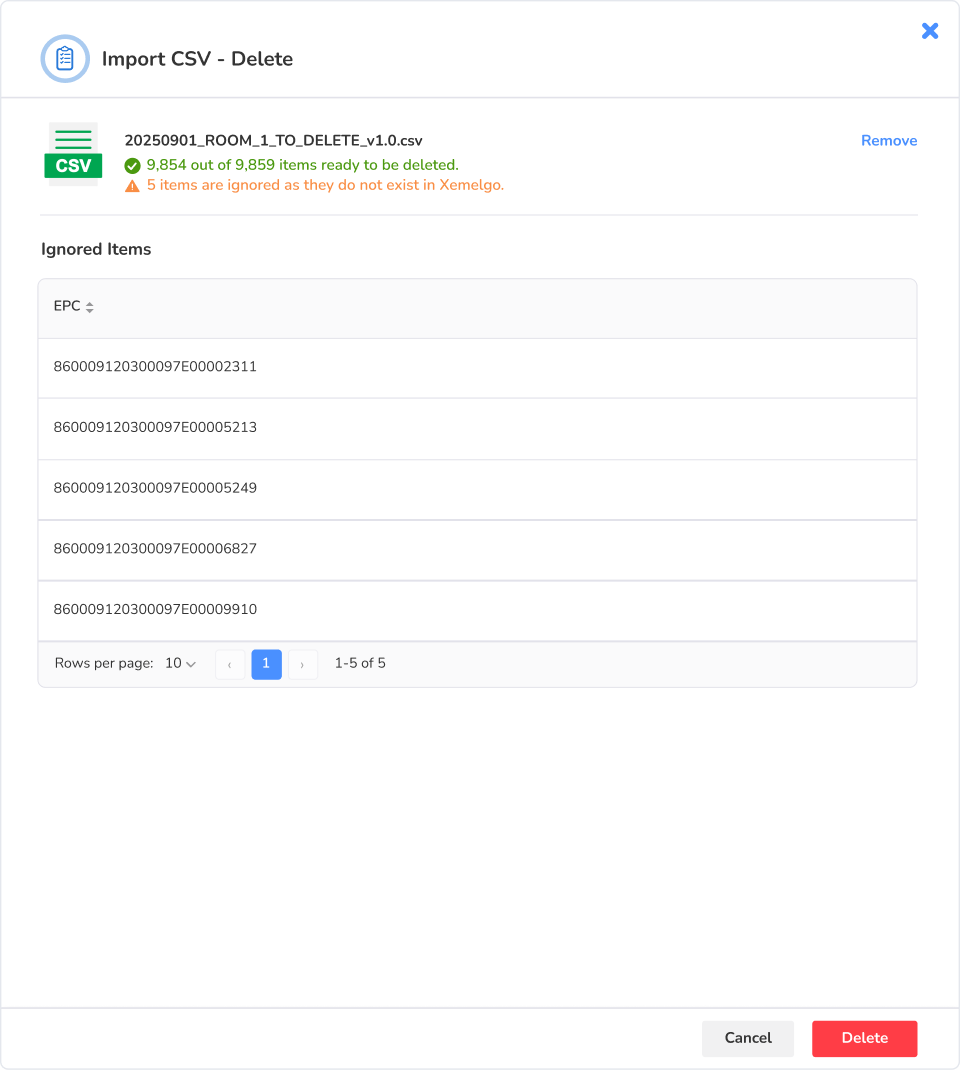
5. If any EPCs in your file don’t exist in Xemelgo, they’re listed under Ignored Items and won’t be deleted.
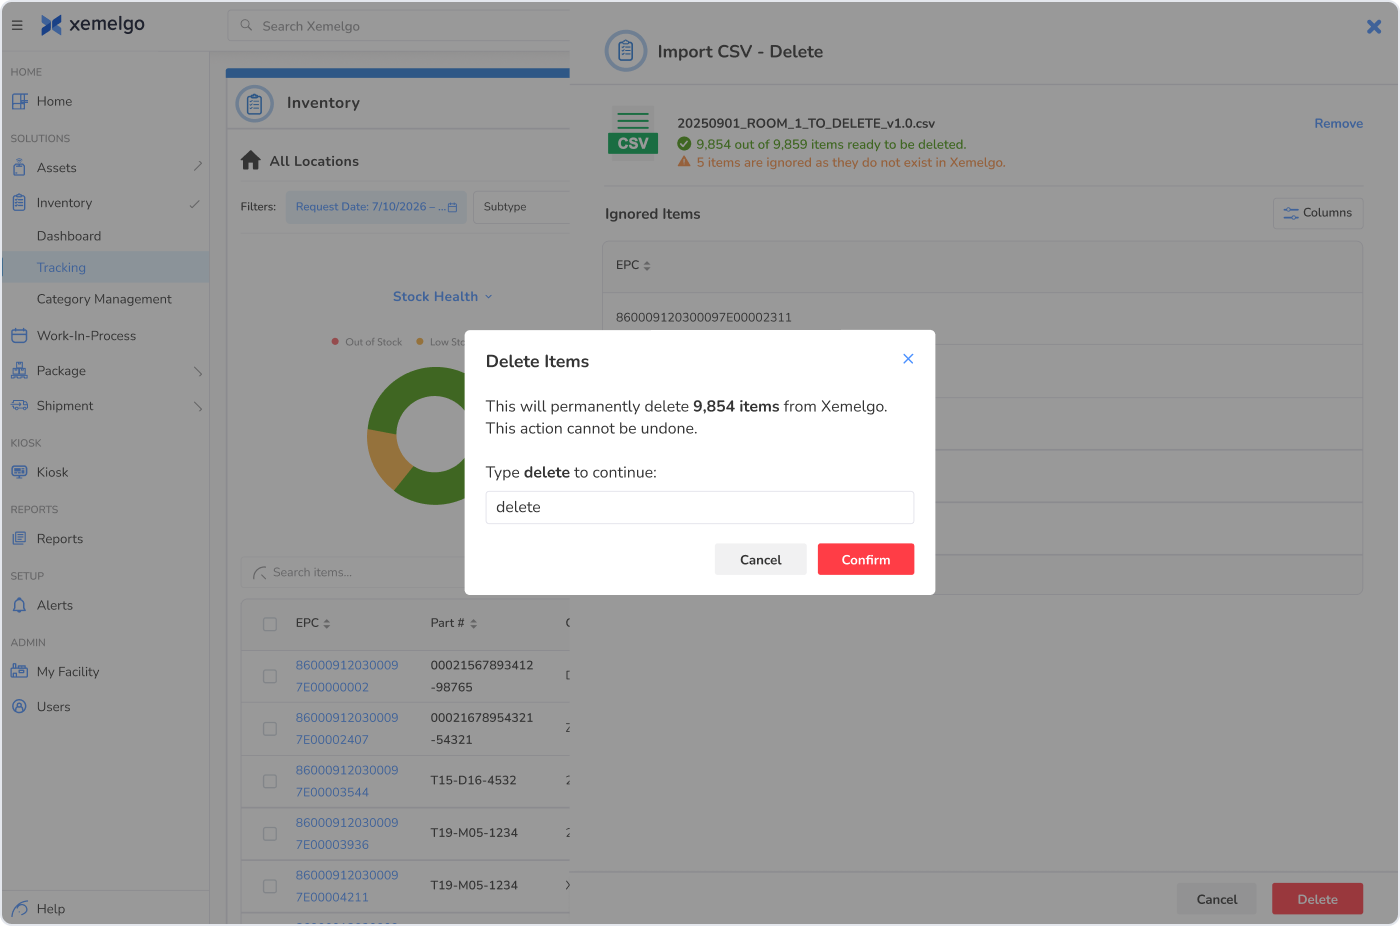
6. Click Delete. In the Delete Items dialog, type delete and click Confirm.
WARNING:
Ignored items are skipped, not deleted. If an EPC you expected shows up as ignored, check your file for typos, click Remove, and upload the corrected file.
Track progress and review results
1. After you confirm, deletion runs in the background. A progress message appears at the bottom of the page, and you can follow the task in Recent Tasks.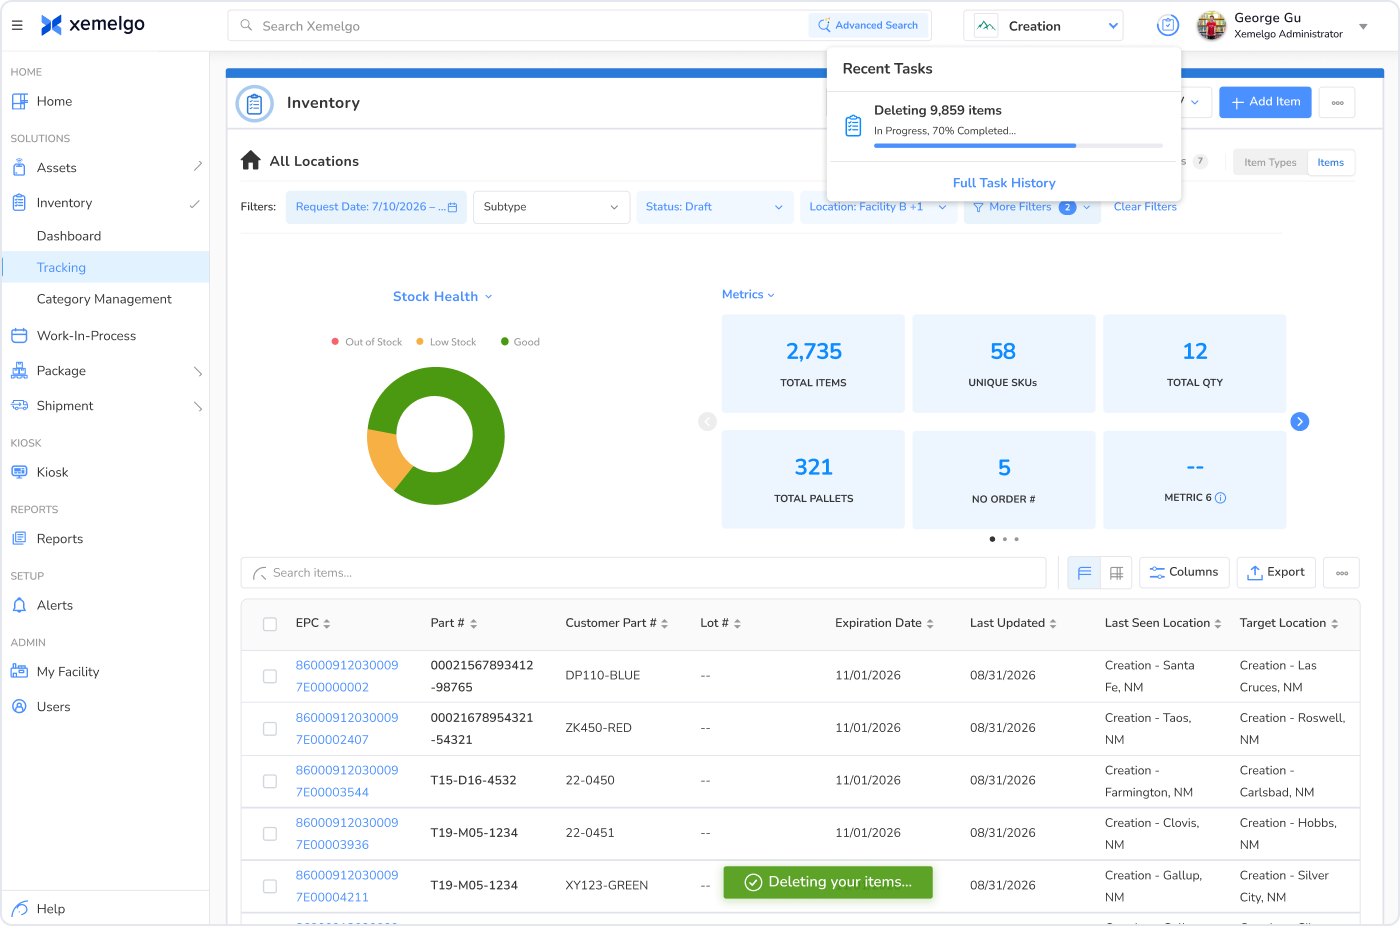
2. When the task finishes, the deleted items disappear from the list. If some items couldn’t be deleted, the task lists which ones and why.
NOTE:
One failed item doesn’t stop the rest. An item can’t be deleted if it’s part of a transfer order or if it contains other items (for example, a container that still holds items).
Was this article helpful?
That’s Great!
Thank you for your feedback
Sorry! We couldn't be helpful
Thank you for your feedback
Feedback sent
We appreciate your effort and will try to fix the article