TABLE OF CONTENTS
Overview:
This article explains how to access and manage individual items in the Inventory Dashboard, covering viewing location history, editing item details, deleting items, and adding new locations to individual items.
Instructions:
Navigate to the Inventory Dashboard, click an individual item, and click the item's Tag.

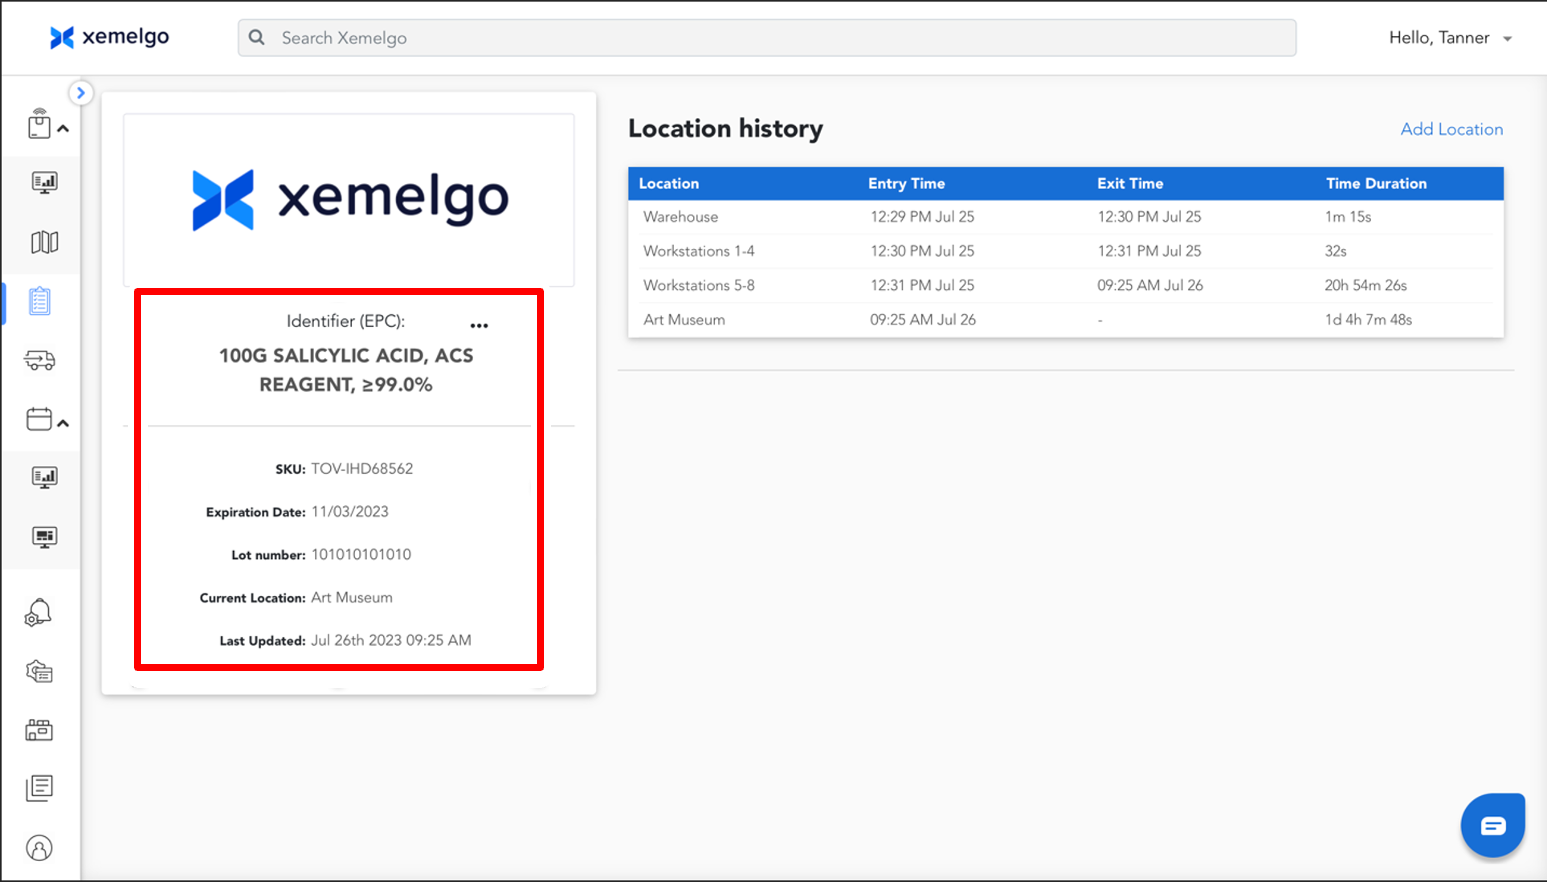
The Location History table displays all the locations the item has been at along with the Entry Time, Exit Time, and Time Duration the item spent at each location.

Additionally, the item SKU, Expiration Date, Lot Number, and Current Location are provided as well as a timestamp of when this information was Last Updated.
Editing Item Details:
To edit item details, click "..."

Next, click Edit Details.

Then, edit any information that needs to be edited.
Once you have finished, click Save.

Deleting an Item:
To edit item details, click "..."

Next, click Delete Item.

Then, confirm you are deleting the correct item.
Once you have confirmed the correct item is being deleted from the Xemelgo system, click Yes, Delete Item.

Adding a Location to Individual Item:
To add a new location to an individual item, click Add Location.

Next, select a location from the dropdown. Once you have selected the location you want to add, click Submit.

Was this article helpful?
That’s Great!
Thank you for your feedback
Sorry! We couldn't be helpful
Thank you for your feedback
Feedback sent
We appreciate your effort and will try to fix the article