Overview:
This article covers creating new users in the Xemelgo app, including entering their details, assigning roles (Admin or User), and specifying their assigned facility for location-based access restrictions.
Instructions:
Open the Xemelgo app.
Tap on the Settings icon located in the bottom menu bar.
Tap on Users.
Here you have the ability to search for users or create new ones.
To create a new user, simply tap on + New User.

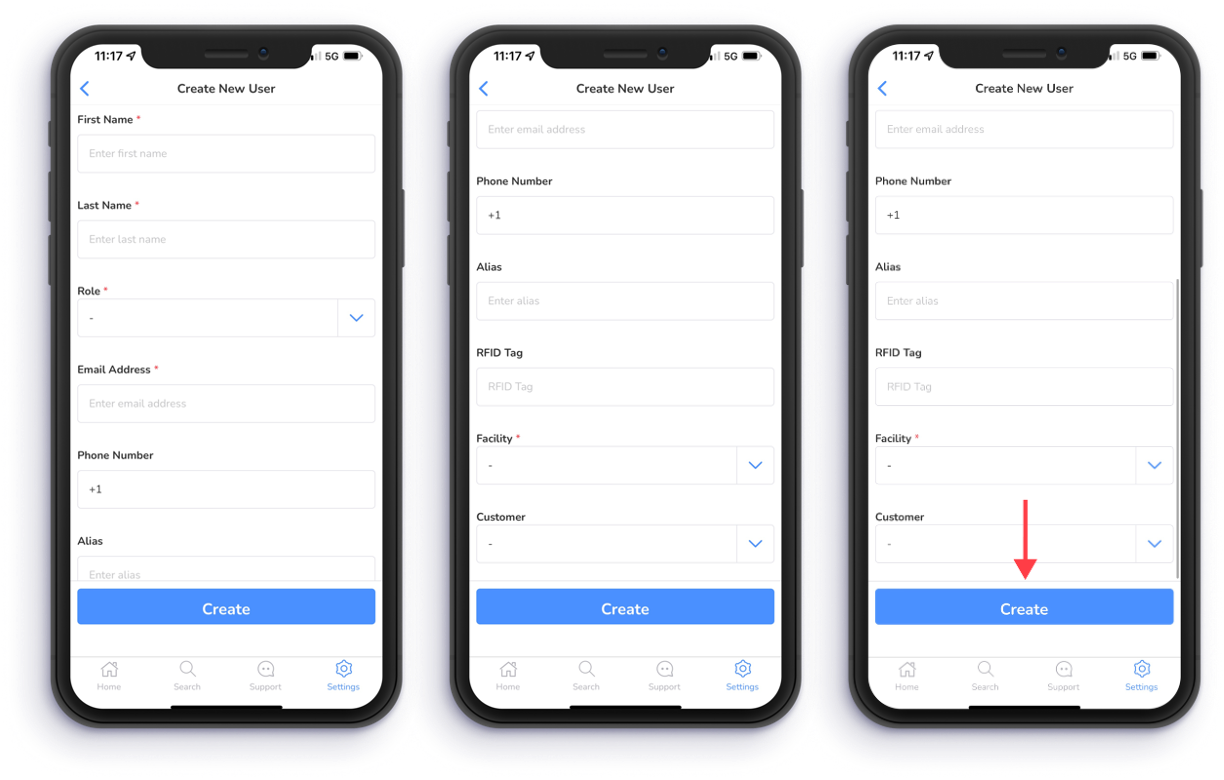
Enter relevant details such as the First Name, Last Name, Email, and Phone Number of the user, and choose between assigning the Admin role or the User role.
The admin onboarding the new user can also select the Facility they would like to assign to the user by tapping the Blue dropdown.
This will ensure that the user can only select and view items in that specific location in the app.
When you have finished entering all required information, tap Create.
Was this article helpful?
That’s Great!
Thank you for your feedback
Sorry! We couldn't be helpful
Thank you for your feedback
Feedback sent
We appreciate your effort and will try to fix the article