Audit for Inventory
Audit for Inventory
Overview
This article offers a step-by-step guide for conducting an inventory audit using the Xemelgo app. Learn how to select a location, identify new or unknown items, view item details, and mark items as accounted for or not. The article explains how to take actions like consuming items or undoing actions if needed. Finally, it guides users through the submission of the audit, providing a summary for verification and confirmation.
Instructions
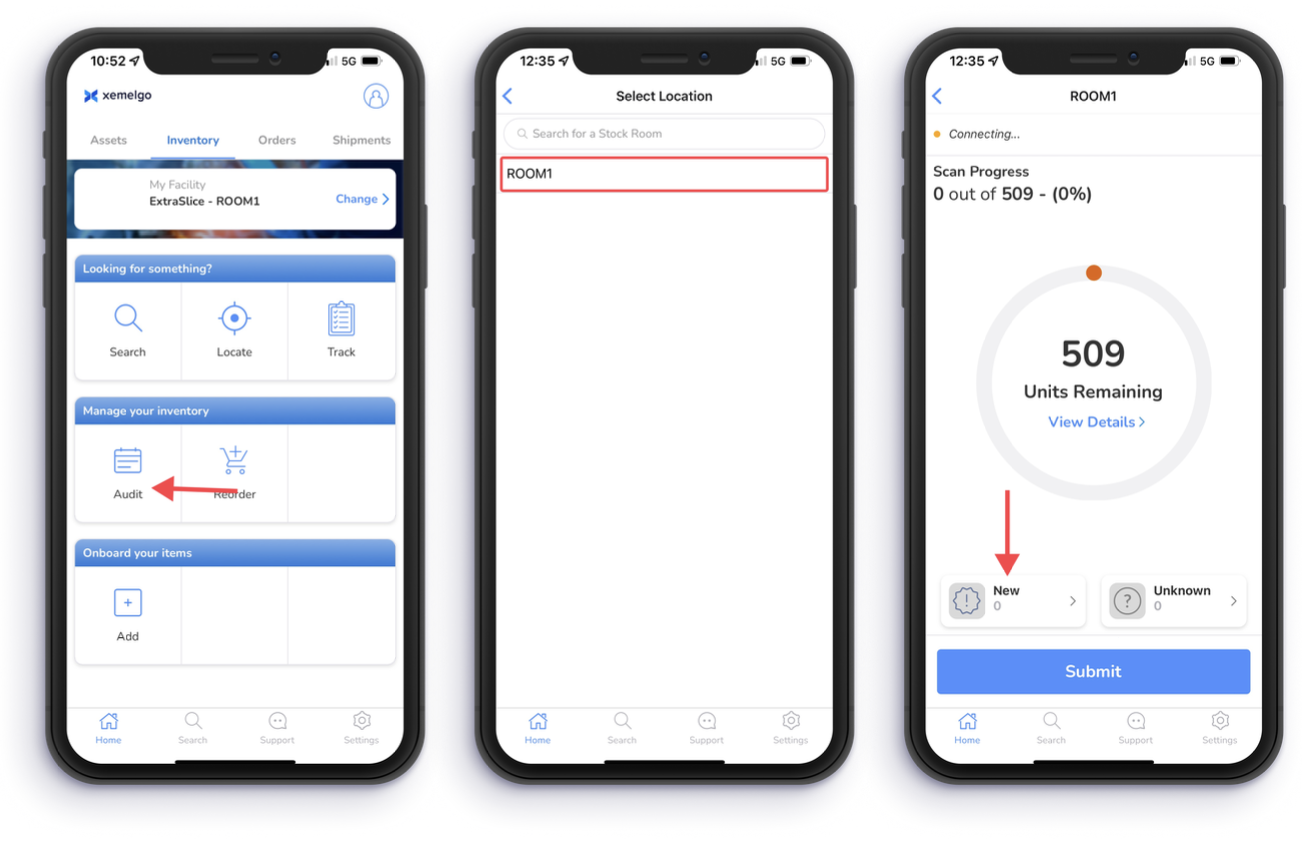
To begin performing an inventory audit, tap Audit under the Manage your inventory section of the Inventory user interface.
Next, tap on the location that you want to conduct the audit in.
Then, the Xemelgo app will automatically establish a connection to the RFID handheld device you are using.
If the RFID handheld device you are attempting to use has not been onboarded to the Xemelgo app before, please consult the Onboarding an RFID Device section of the Xemelgo Help Center.
After connecting your RFID handheld device, start the process of scanning for items.
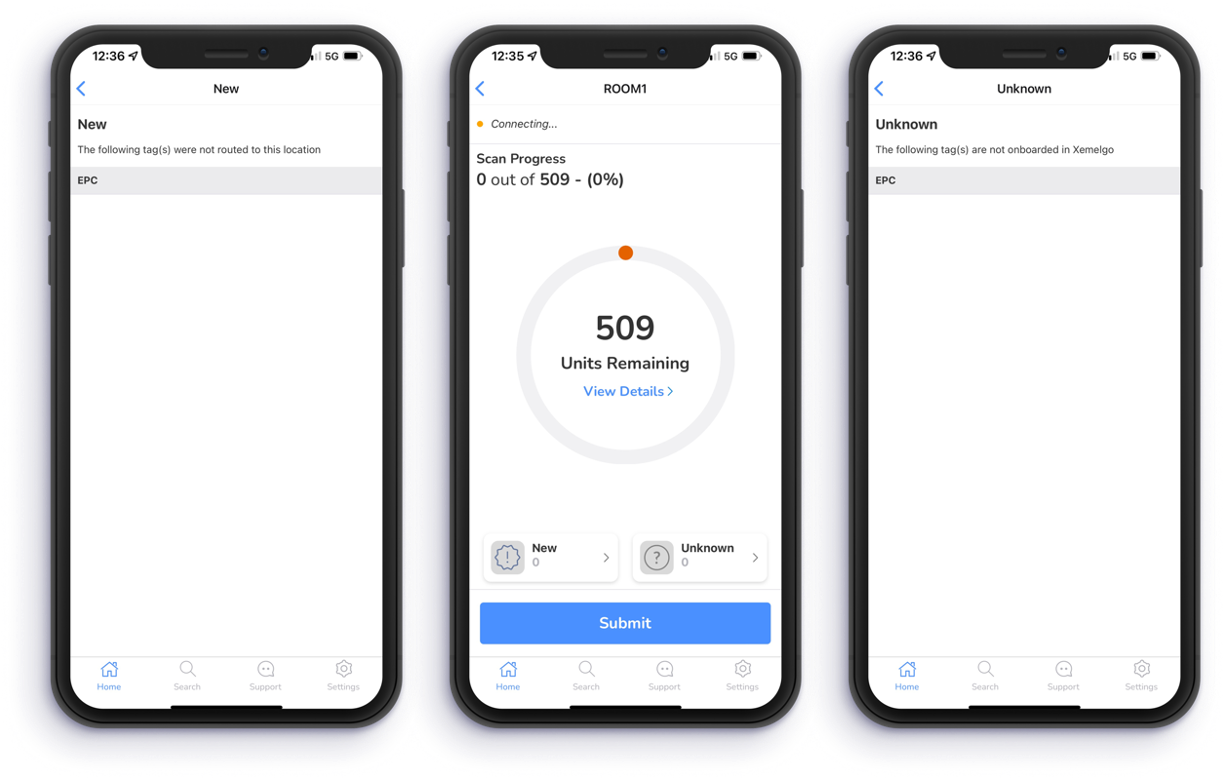
To see new items that have entered your inventory, tap New.
The New section will display known tags that the system does not expect at this location, and will be moved to this location after the audit is submitted.
To see unknown items that have entered your inventory, tap Unknown.
The Unknown section will display any tags that were not onboarded in the Xemelgo system but were detected during the audit.
To see which items have been accounted for or not accounted for in the audit, tap View Details.
To view more details on the item(s) you are looking for, tap the Blue arrow icon.
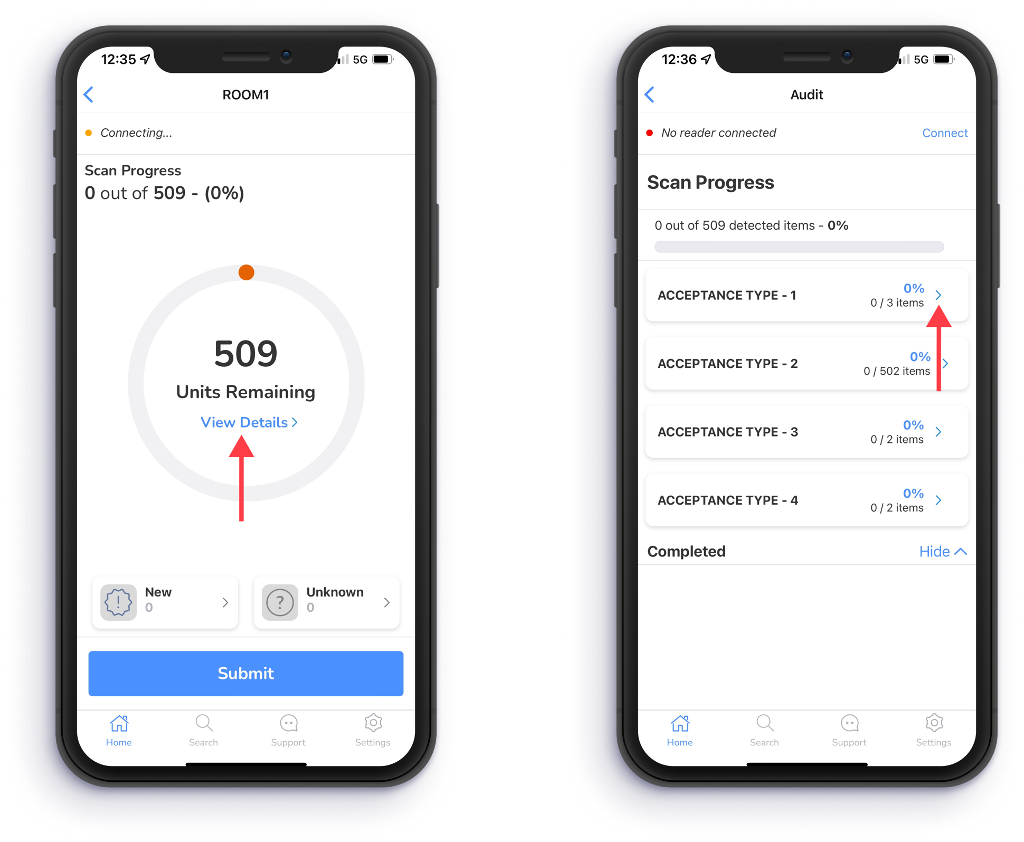
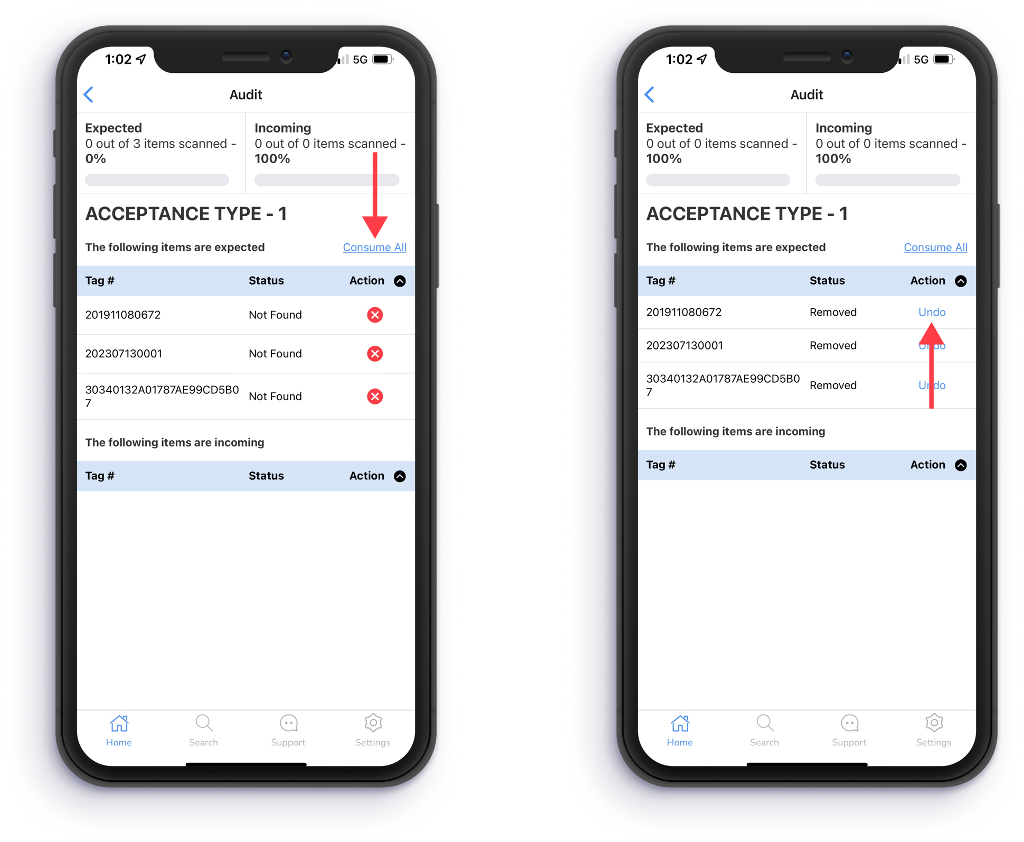
After selecting the Blue arrow icon, the Tag Number, Status, and Action will be displayed for each item.
If you have found the items that are not being detected by the RFID Handheld Device, tap Consume All.
If an item has been mistakenly consumed, tap Undo.
Once you have scanned for all of the items you could find, tap Submit.
After tapping Submit, a summary of the audit will be provided.
After verifying the counts, tap Confirm to submit the audit.
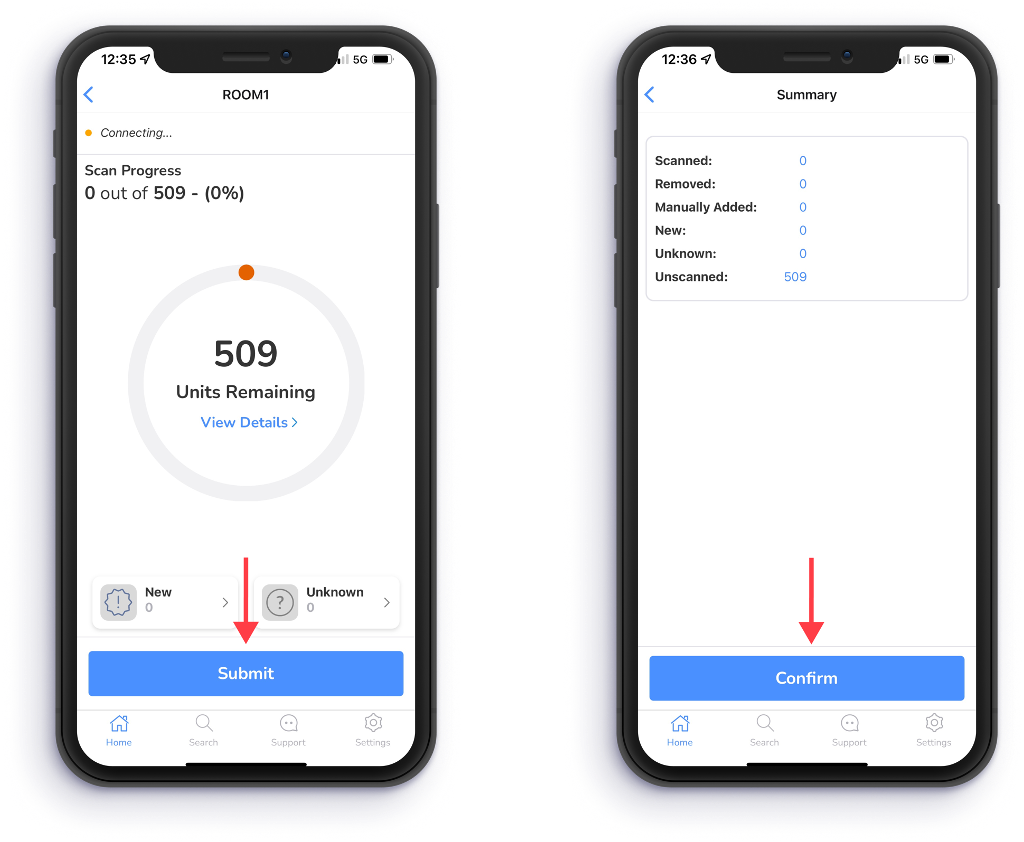
After submitting the audit, an audit report will be generated and stored in the Reports Page of the web application.
Need further assistance?
The article above couldn't resolve your issue? Use the chat button in the bottom-right corner to contact the support team.