Picklist Verification using Kiosk
Picklist Verification using Kiosk
Overview
This article provides step-by-step instructions for completing the picklist verification process.
Instructions
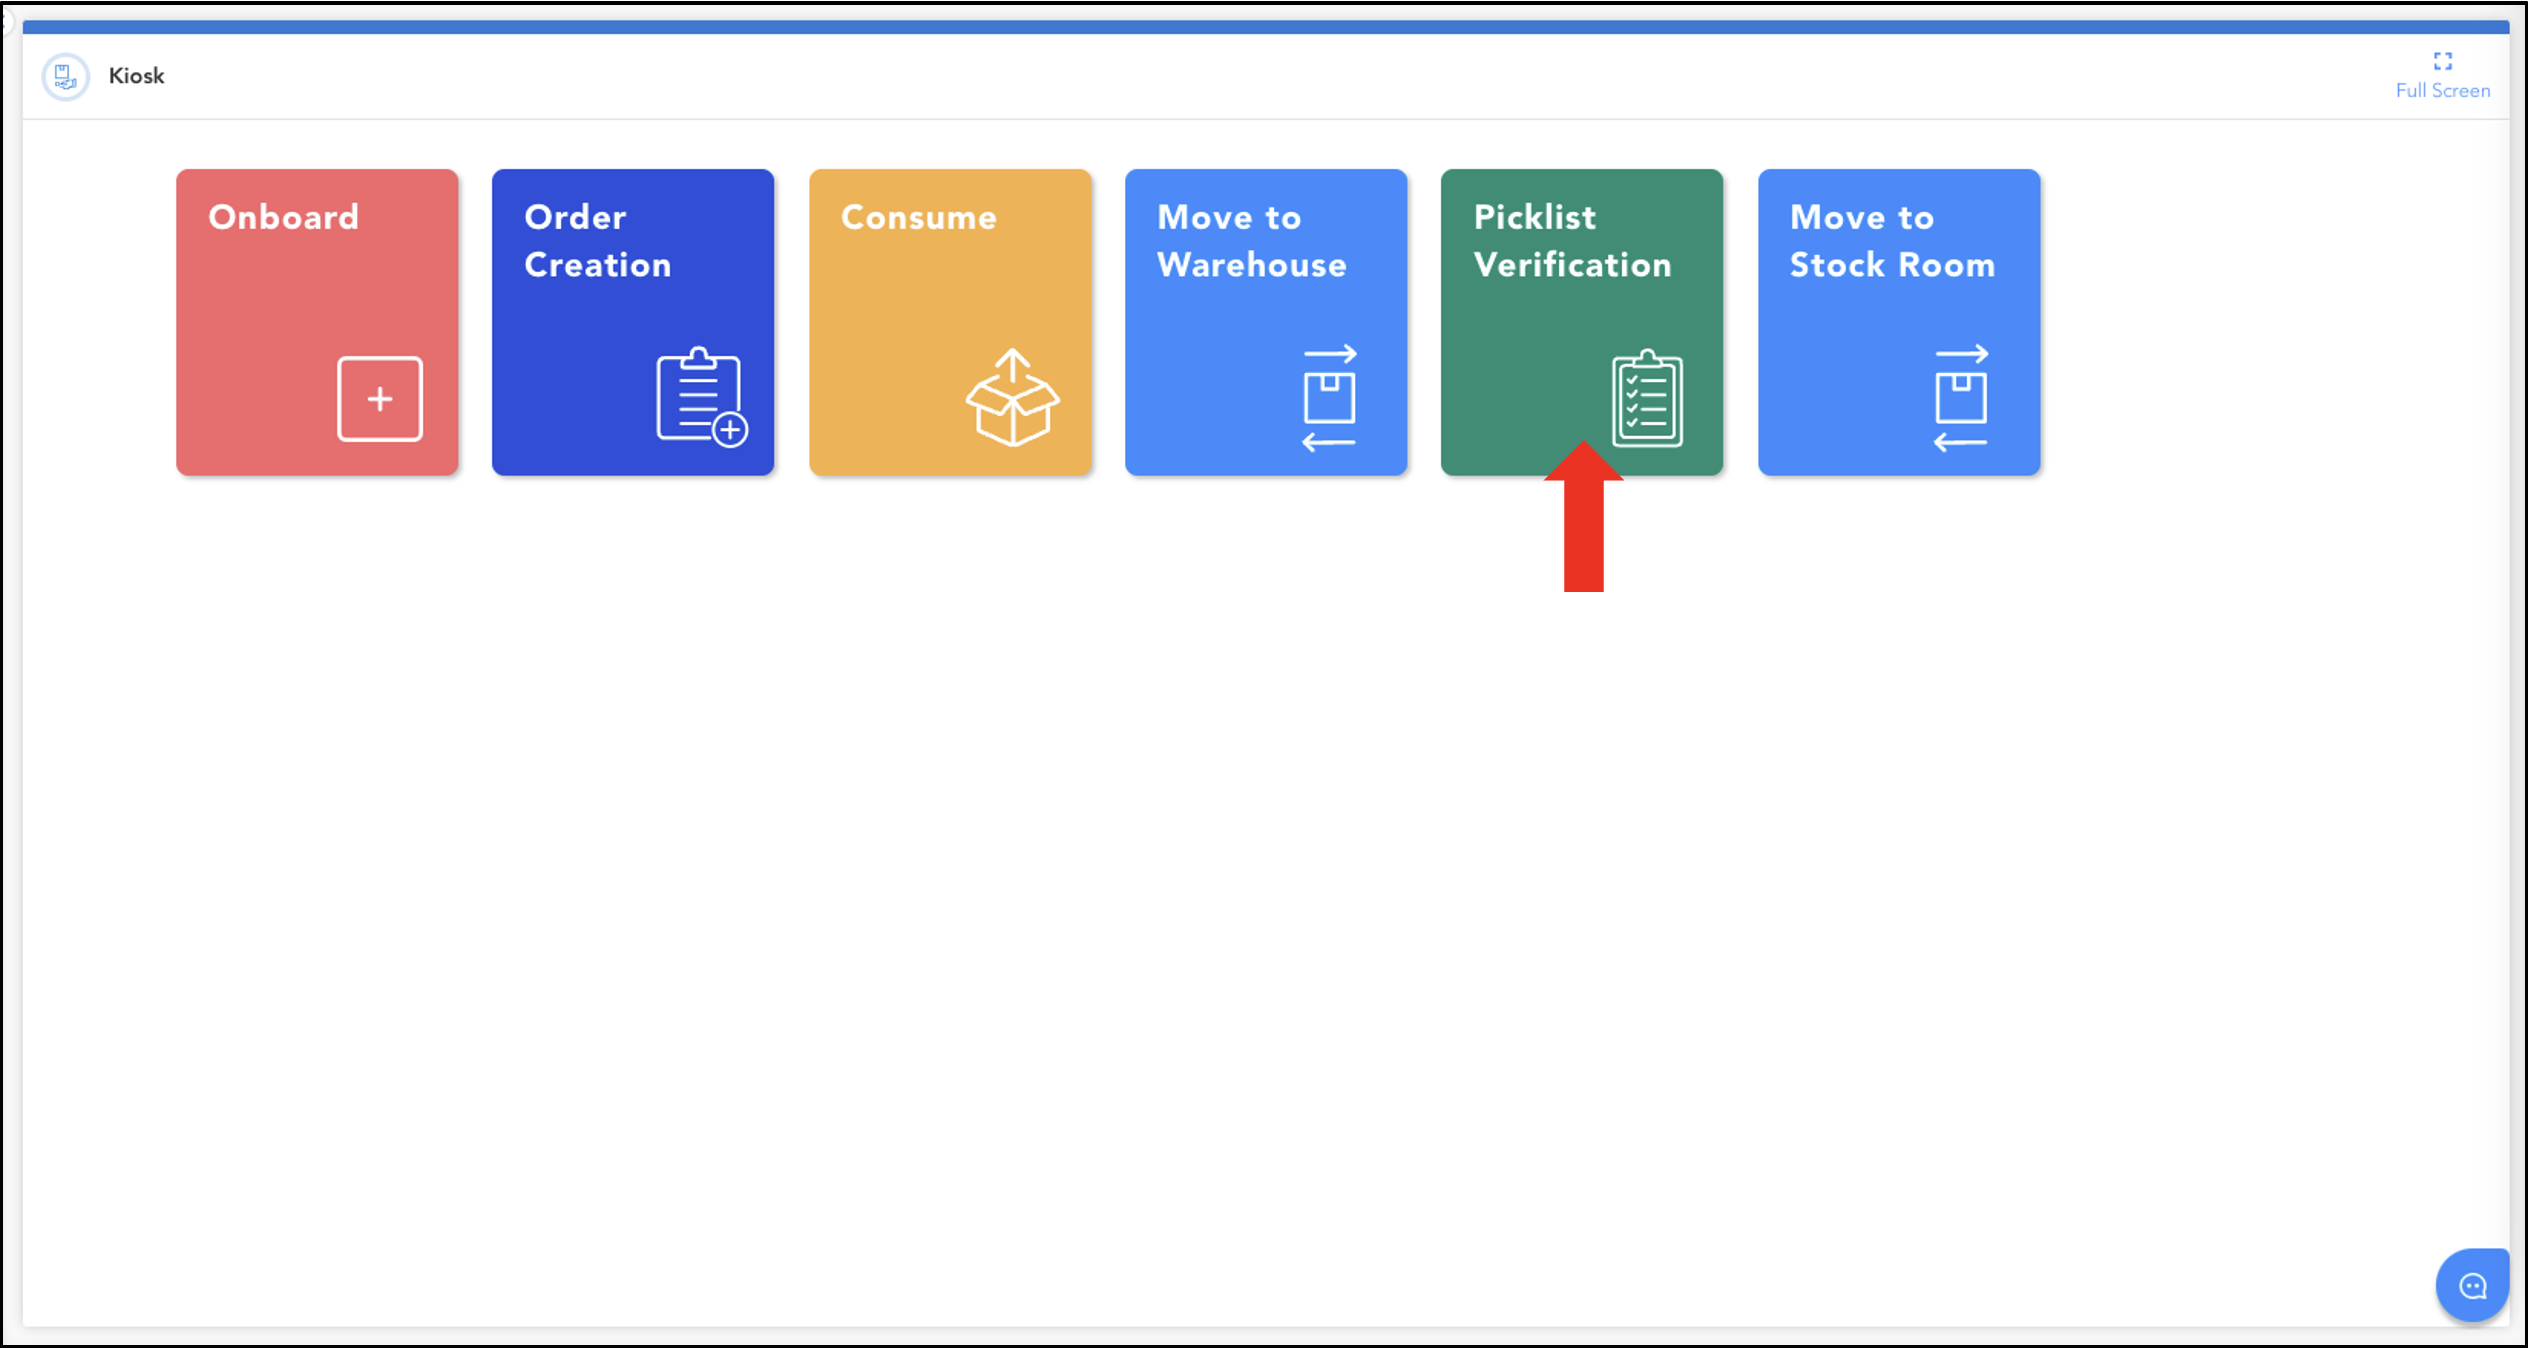
To begin the kiosk validation process, click Picklist Verification.
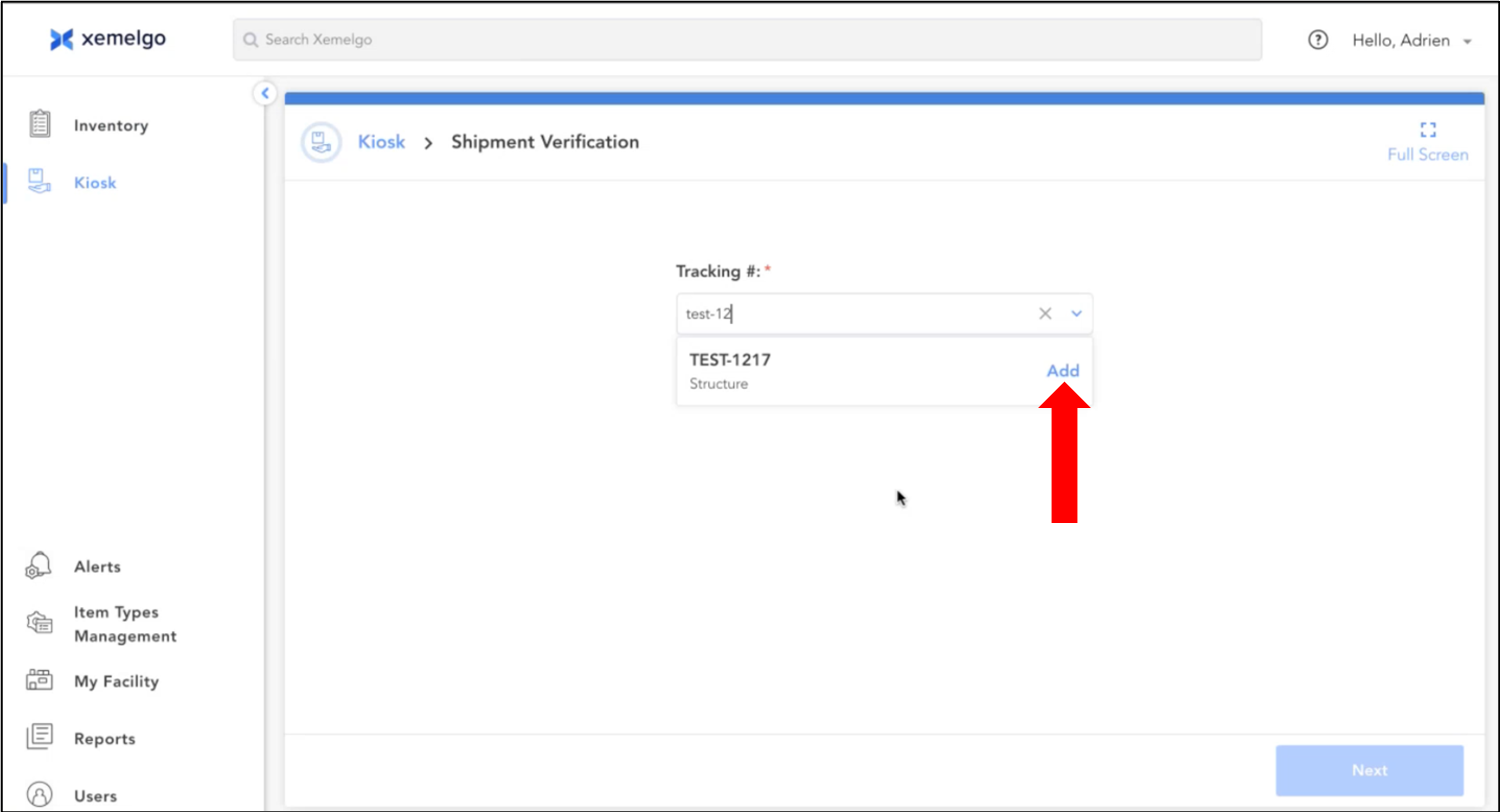
Next, enter the Transfer Order in the text field and click Add.
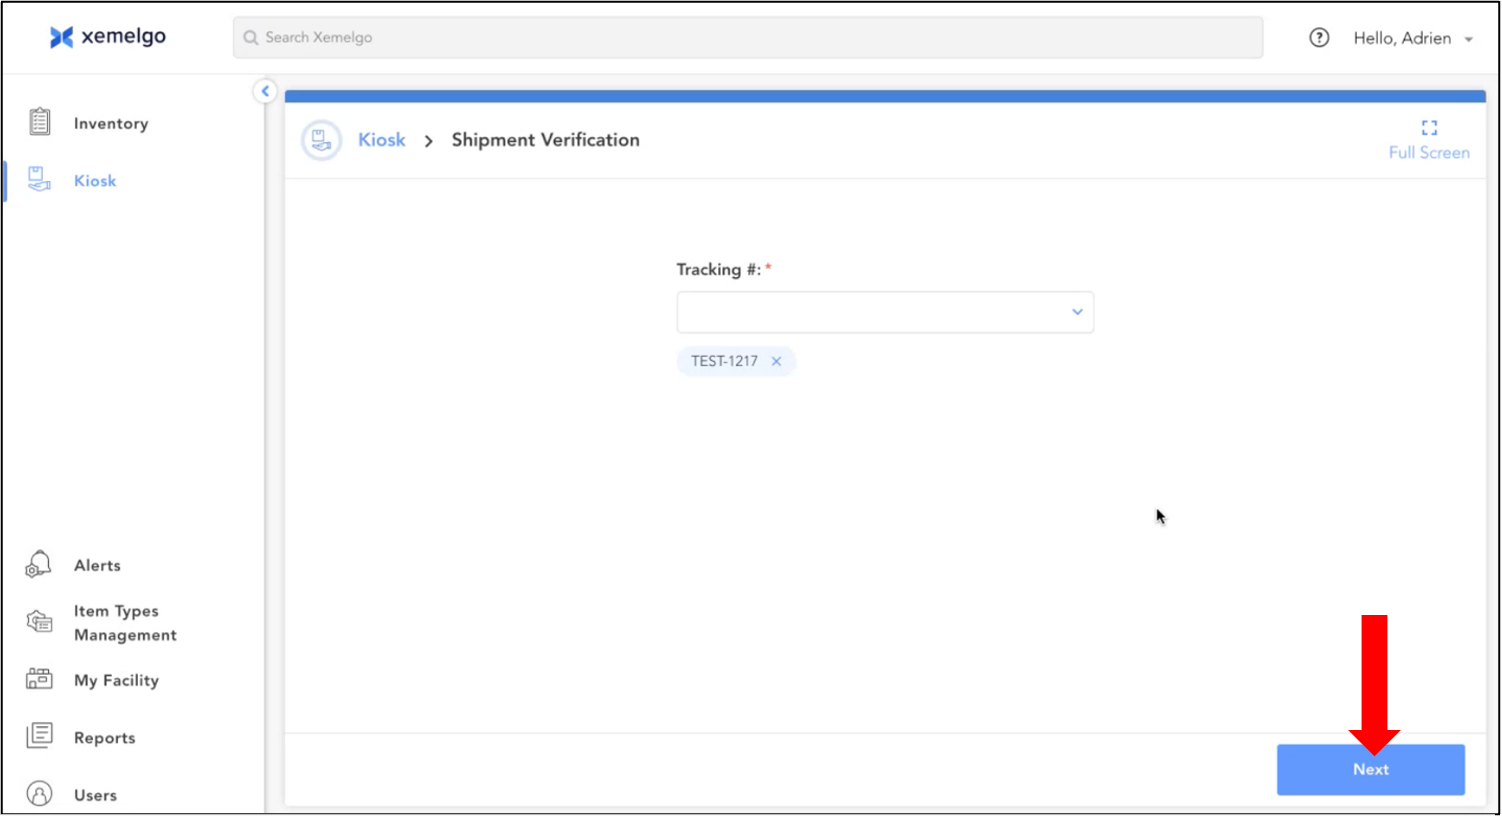
After the transfer order has been entered, click Next.
Next, the items associated with the transfer order will be displayed.
The Expected column shows the number of each item that is part of the order.
The Scanned column will display the number of that item that has been detected when you start scanning for items.
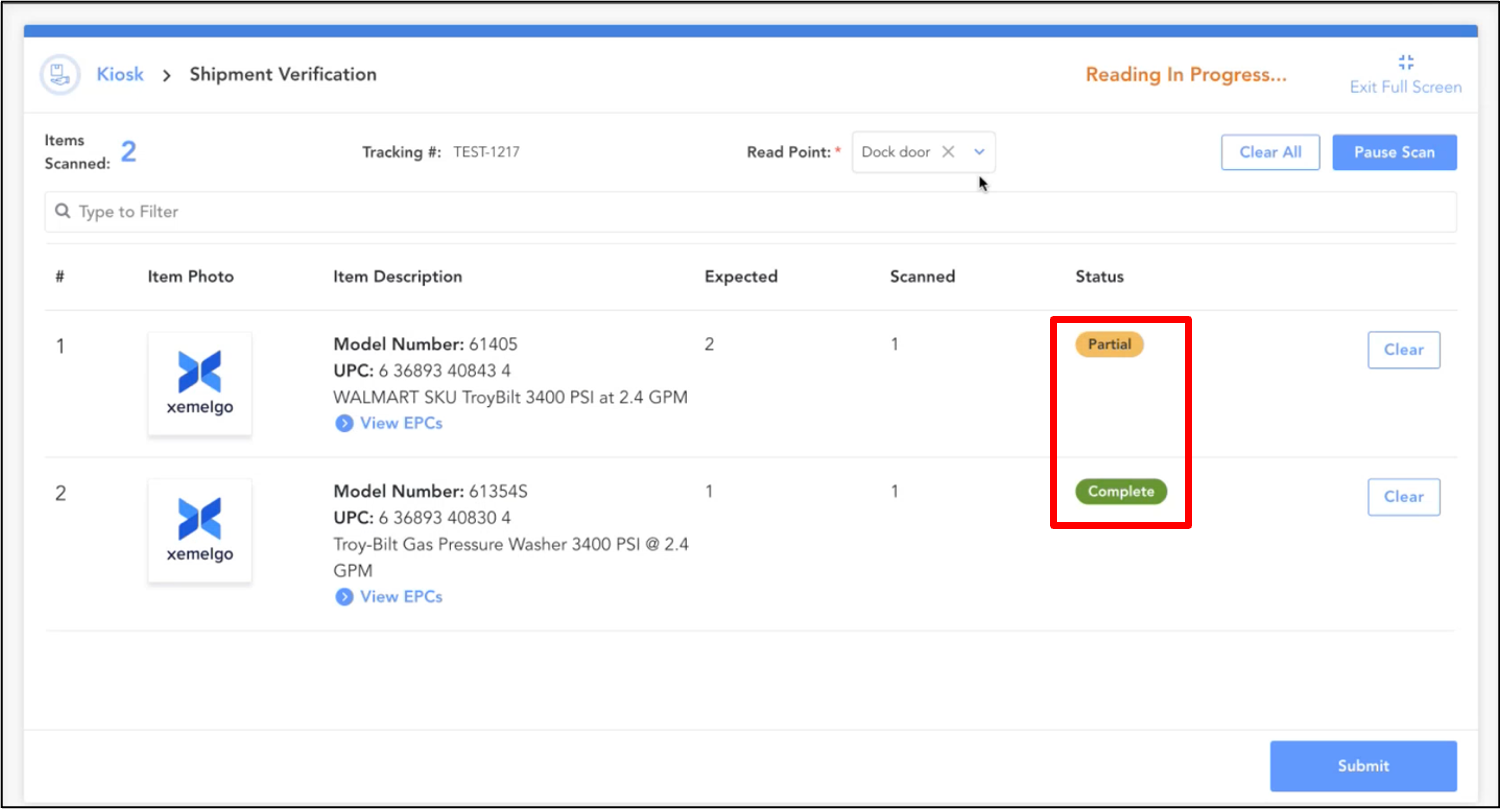
The Status column will display your progress while scanning.
There are 4 possible statuses:
- Not Scanned: Scanned quantity is 0 and less than expected quantity
- Partial: Scanned quantity is greater than 0 but less than expected quantity
- Complete: Scanned quantity matched the expected quantity
- Extra Scanned: Scanned quantity is greater than expected quantity
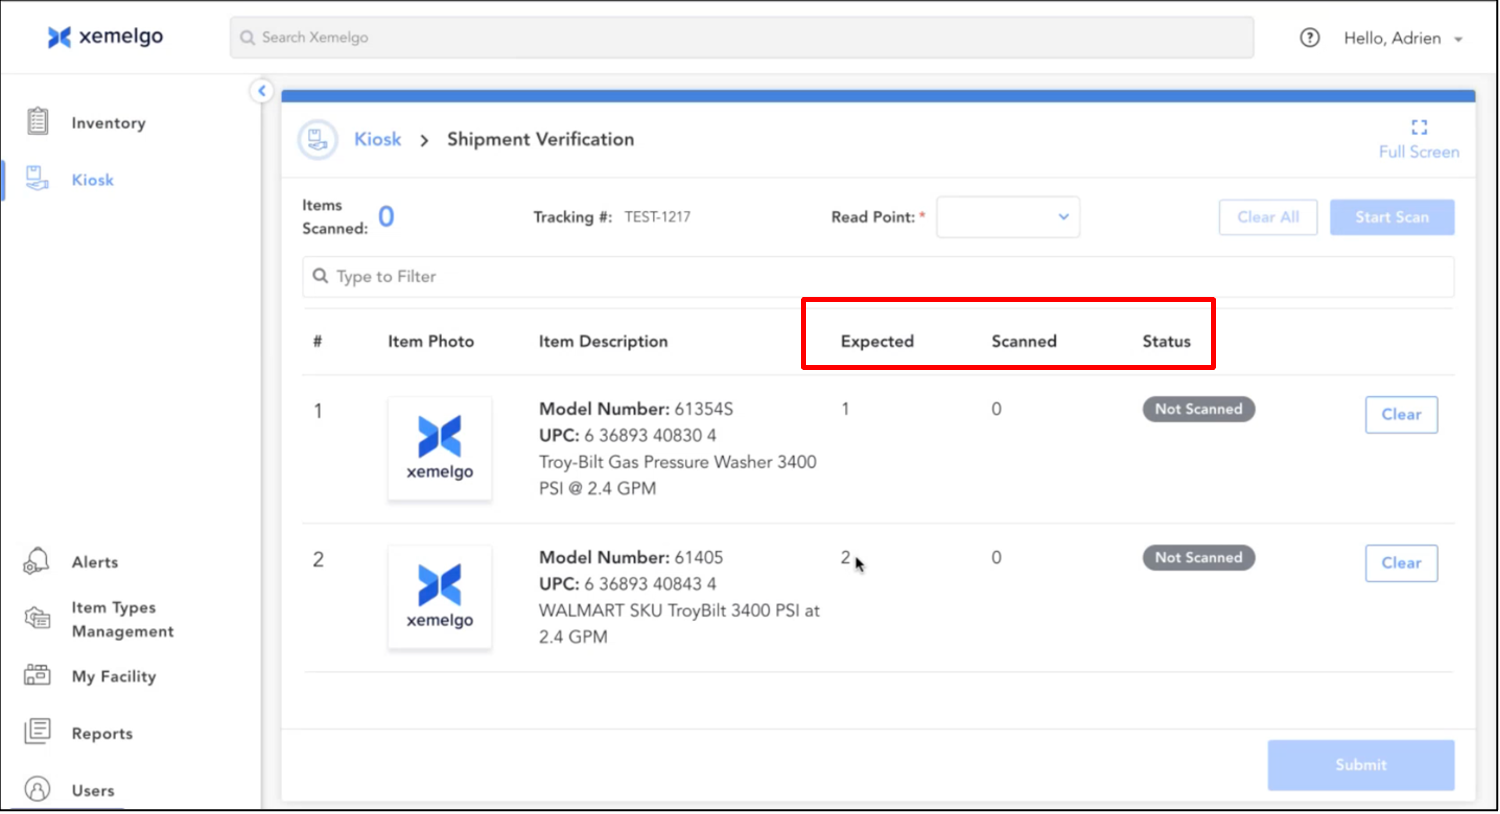
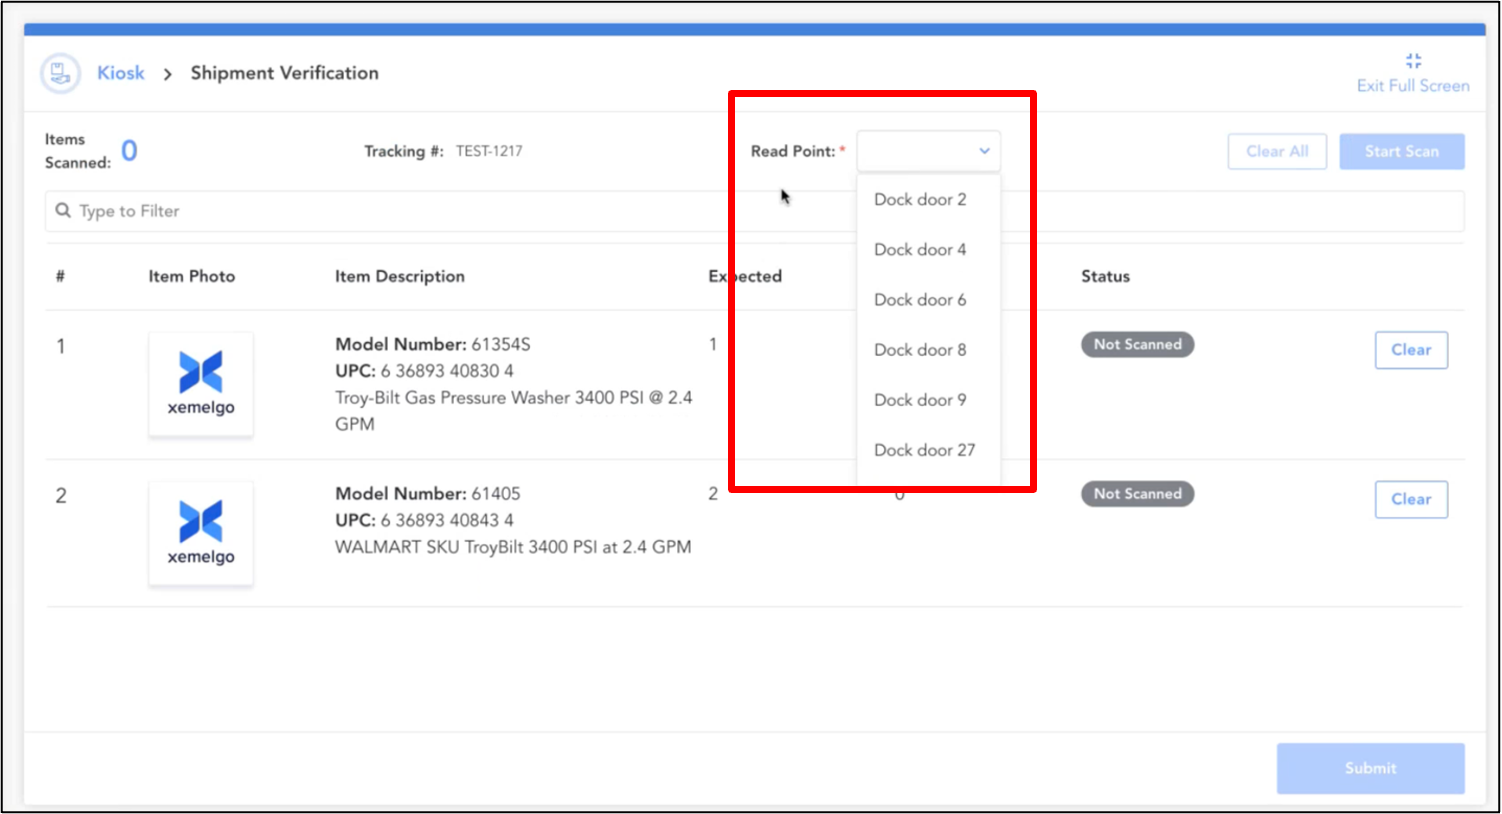
Before you start scanning, you can select the location where you are scanning the items by choosing the correct one from the Read Point dropdown.
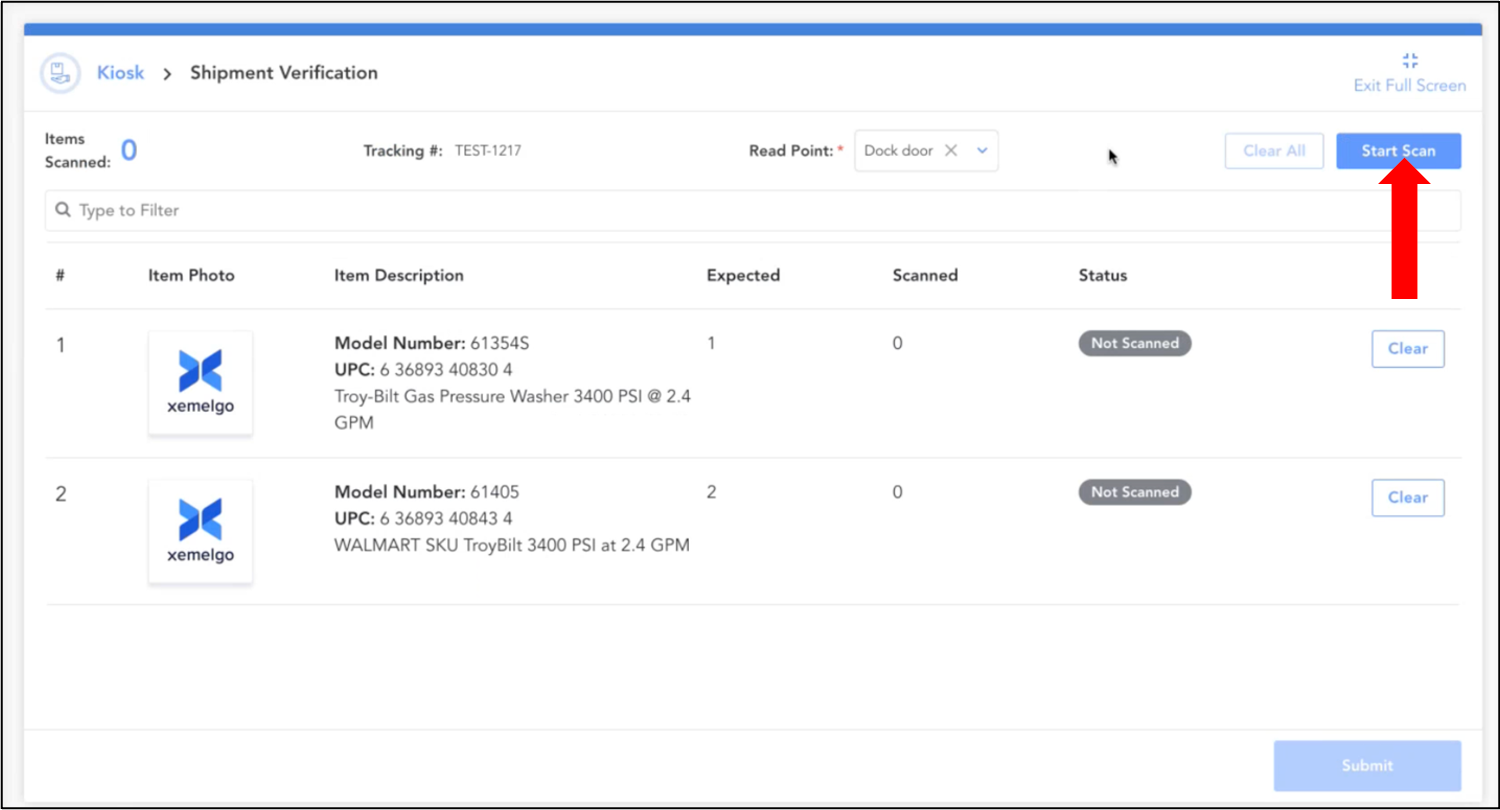
To start scanning the items, click Start Scan.
As you make progress scanning the items, the Status for each item will update automatically.
If you need to remove an individual item that has already been scanned, click Clear.
If you want to remove all items that have already been scanned, instead of starting over, click **Clear All.
If you want to view the details of an item that has been scanned, see our Transfer Order Details documentation.
Once you have completed scanning the order, click Submit.
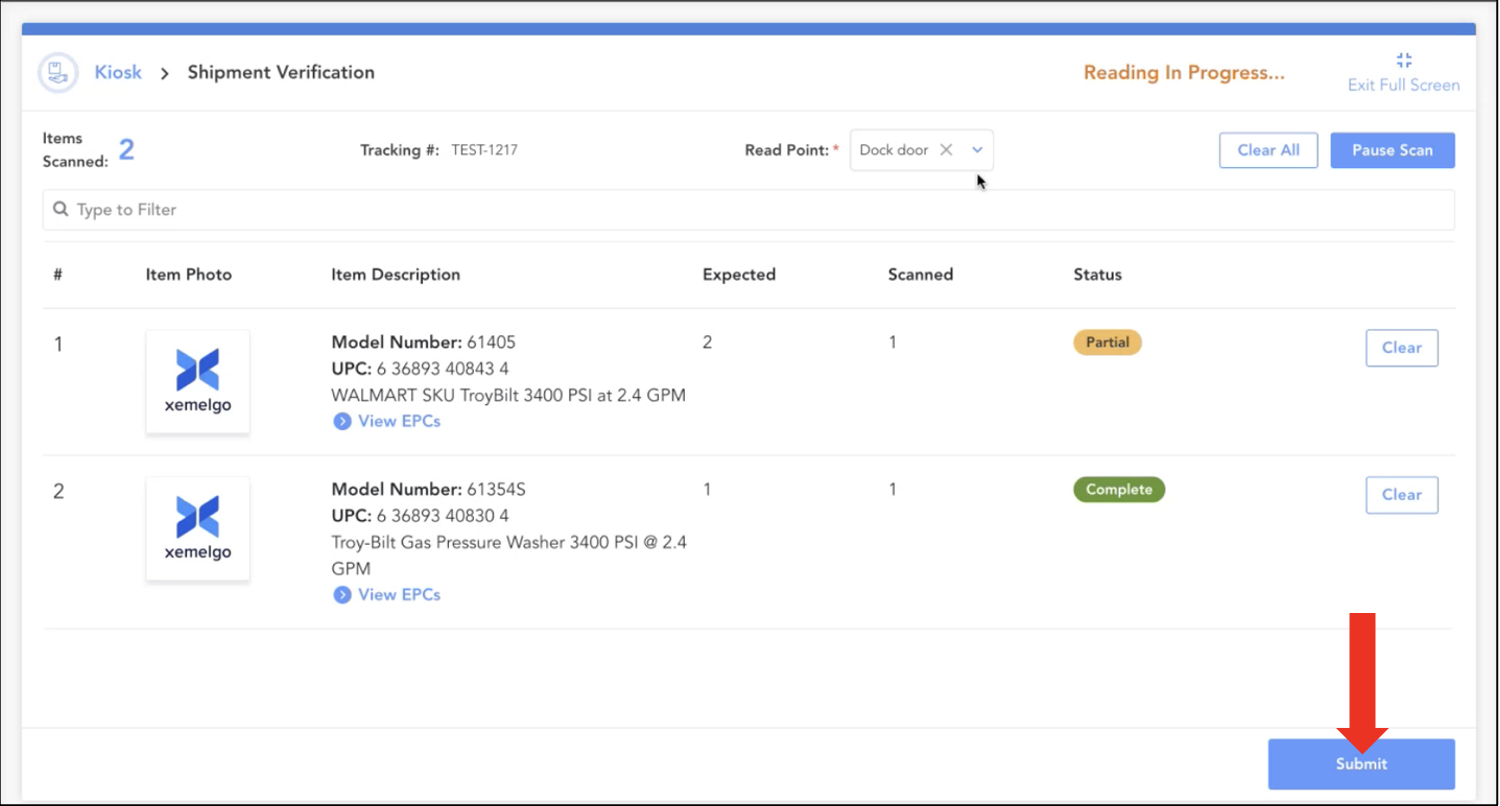
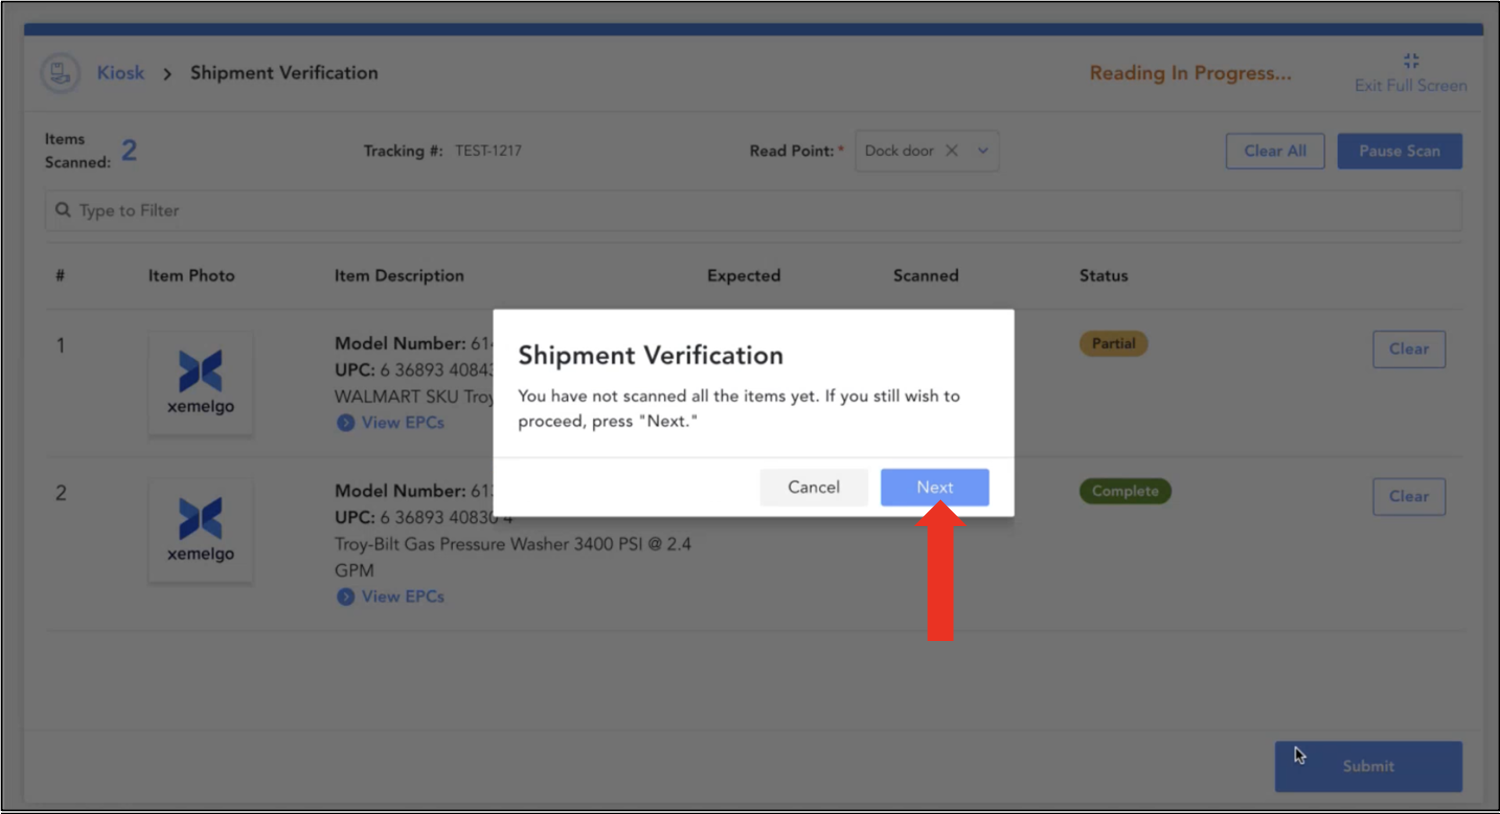
If all items associated with the transfer order have not been scanned, a message will prompt you to verify whether you still want to submit without completing the scan.
If you want to continue your submission, click Next.
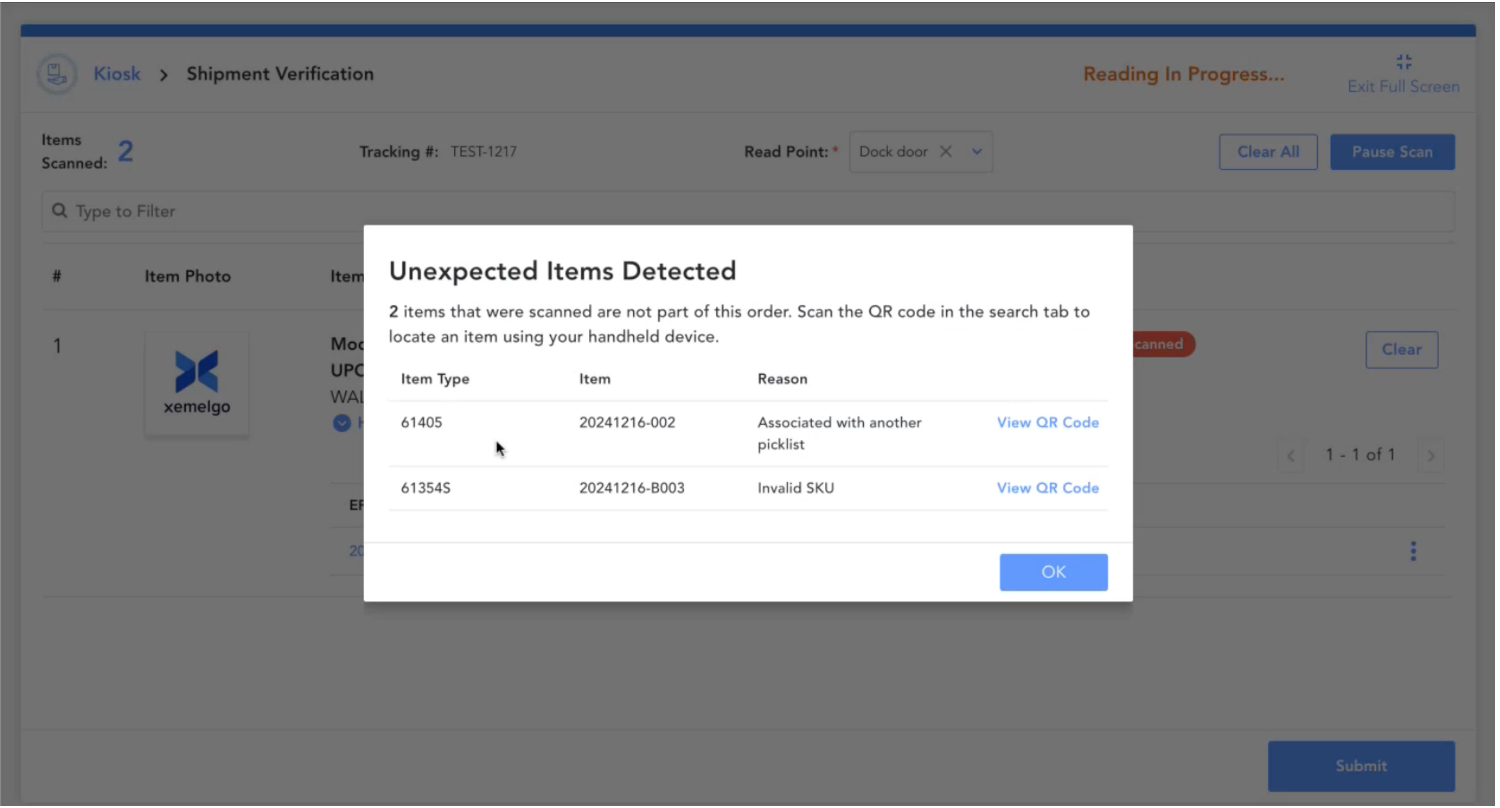
if you have a status of Extra Scanned, you will not be able to continue your submission until the extra scanned item is removed from the order. You can remove the extra item manually by clicking Clear. If you need to find the extra scanned item, click View QR Code to locate the specific item using your handheld device.
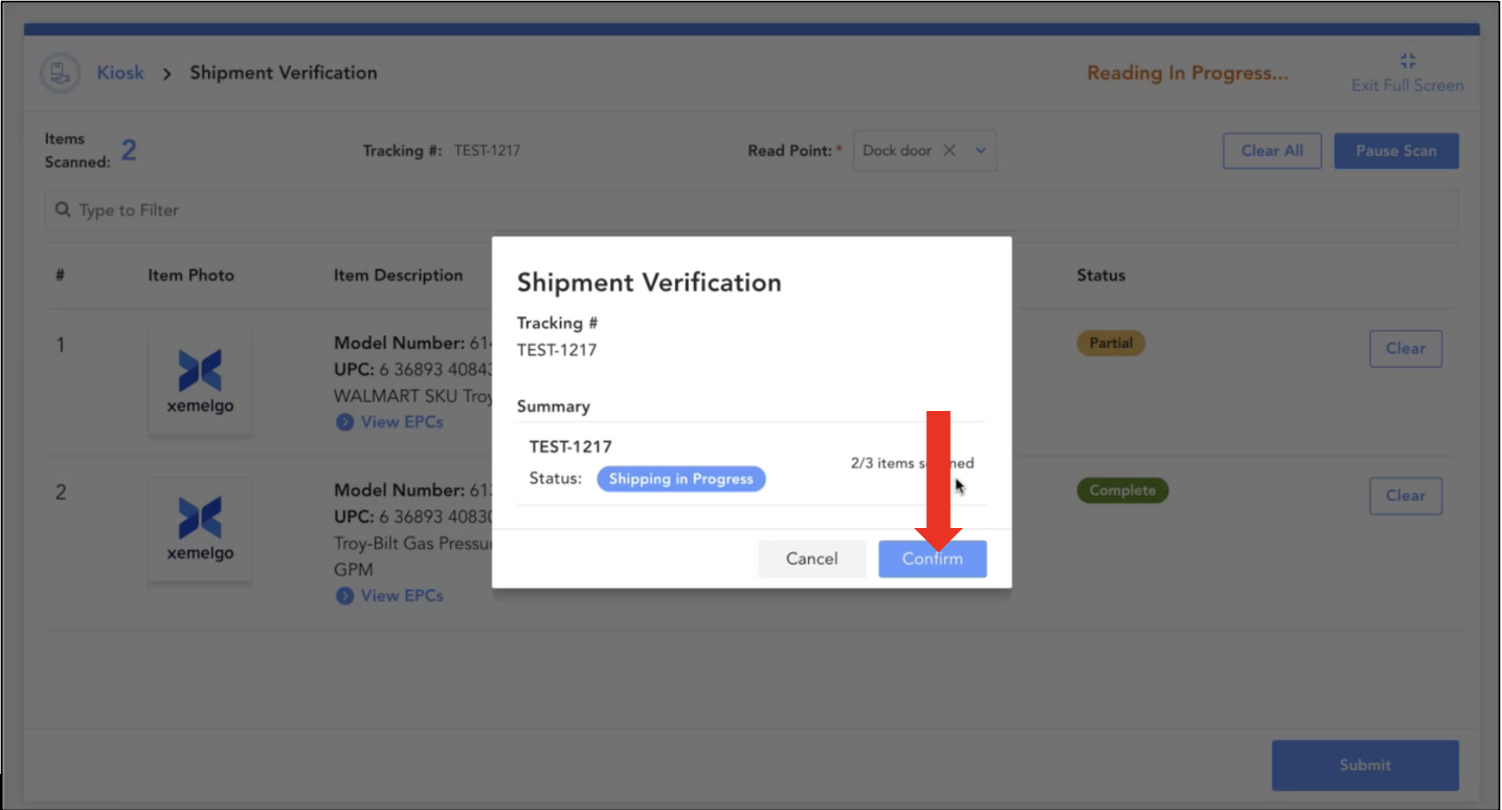
To finish your submission, click Confirm.
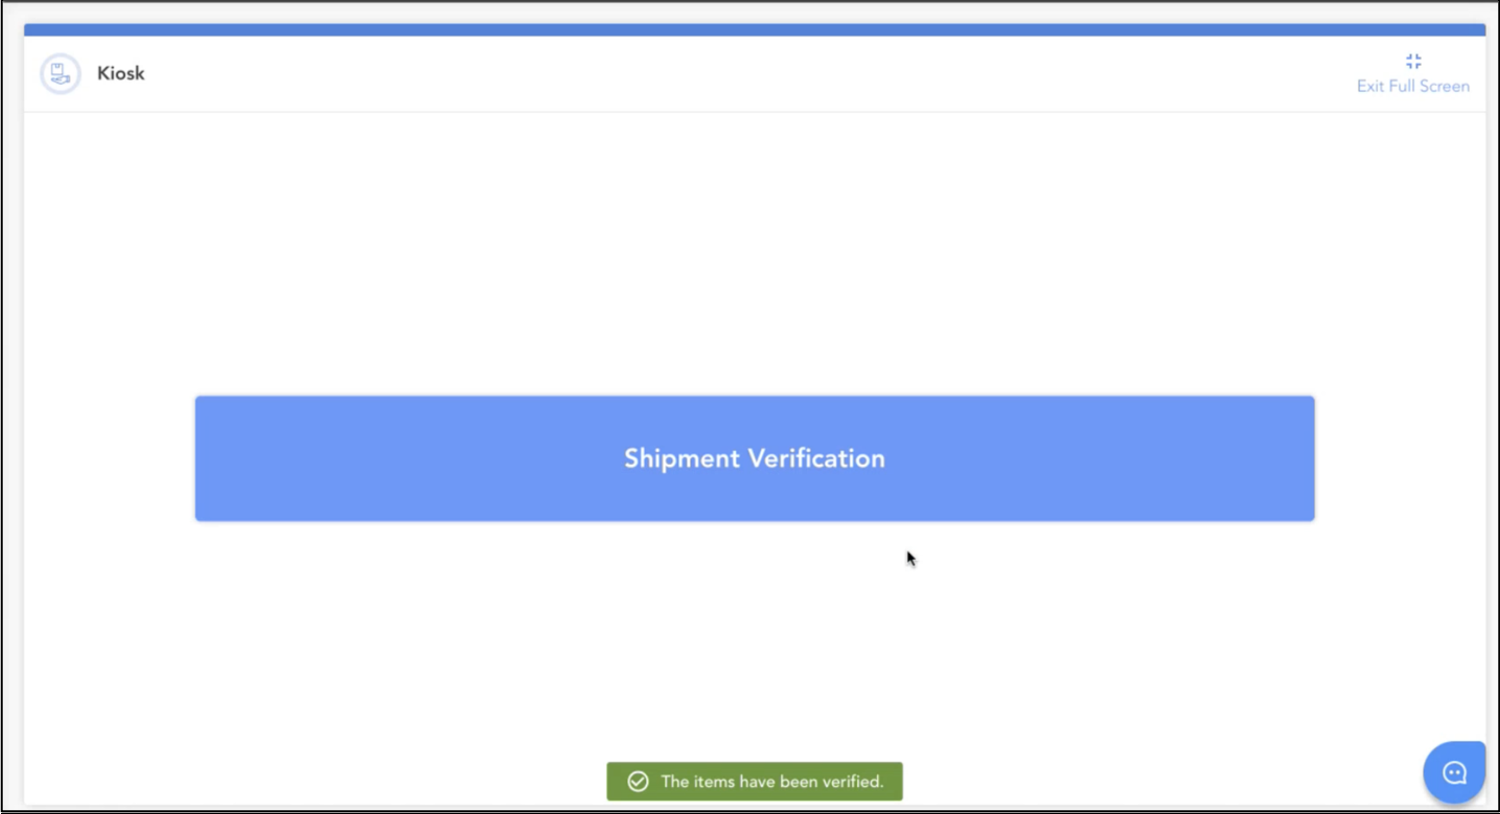
Finally, a verification message will be displayed, indicating you have successfully completed the picklist verification process. If all the items were scanned, the light above the dock door will light up Green. If any items were not scanned, the light above the dock door will light up Red.
Need further assistance?
The article above couldn't resolve your issue? Use the chat button in the bottom-right corner to contact the support team.