Shipment Scanner
Shipment Scanner
Overview:
This article explains how to use the Shipment Scanner feature in the Xemelgo app for both shipping and receiving processes. It covers connecting RFID devices, auto-filling via QR codes, selecting shipping destinations, viewing shipments, and submitting scanned data.
Shipping
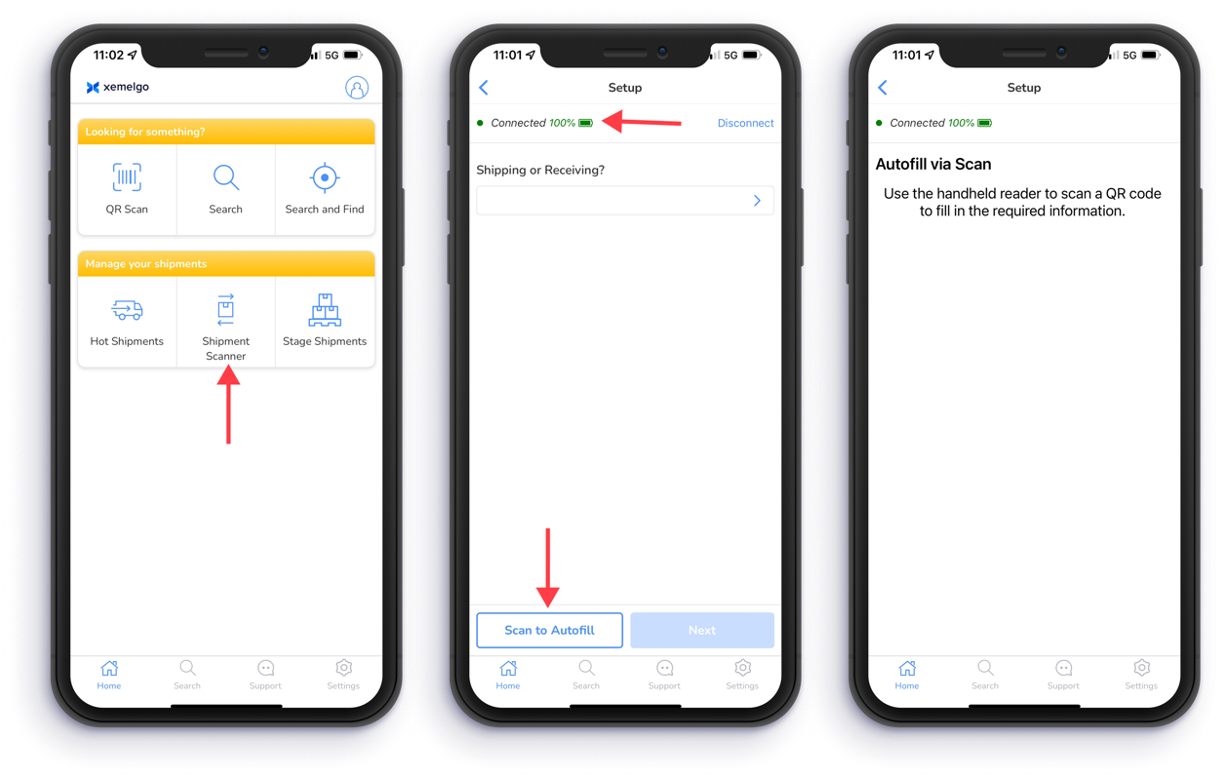
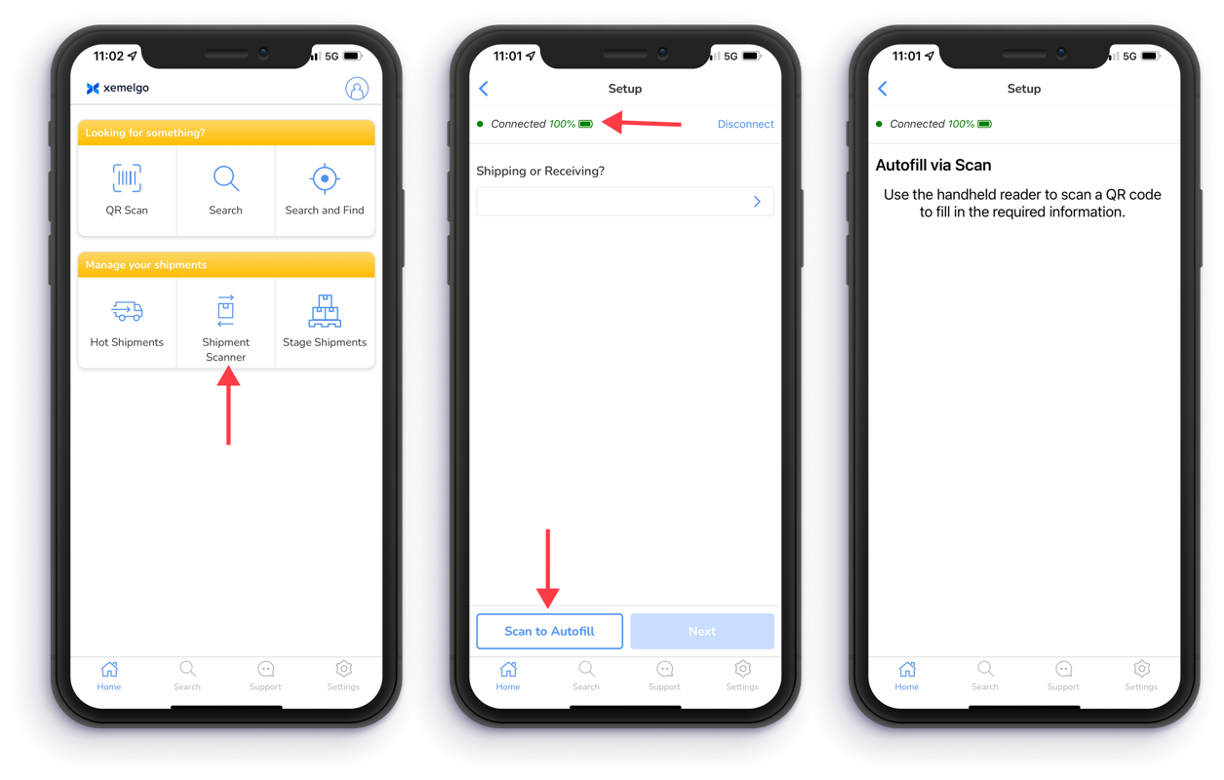
To begin using the shipment scanner feature, tap Shipment Scanner under the Manage your shipments section of the Shipments user interface.
Next, the Xemelgo app will automatically establish a connection to the RFID handheld device you are using.
If the RFID handheld device you are attempting to use has not been onboarded to the Xemelgo app before, please consult the Onboarding an RFID Device section of the Xemelgo Help Center.
If you have a QR Code associated with the shipment, you have the ability to autofill the required information by tapping Scan to Autofill.
Then, use the handheld reader to scan a QR Code to fill in the required information.
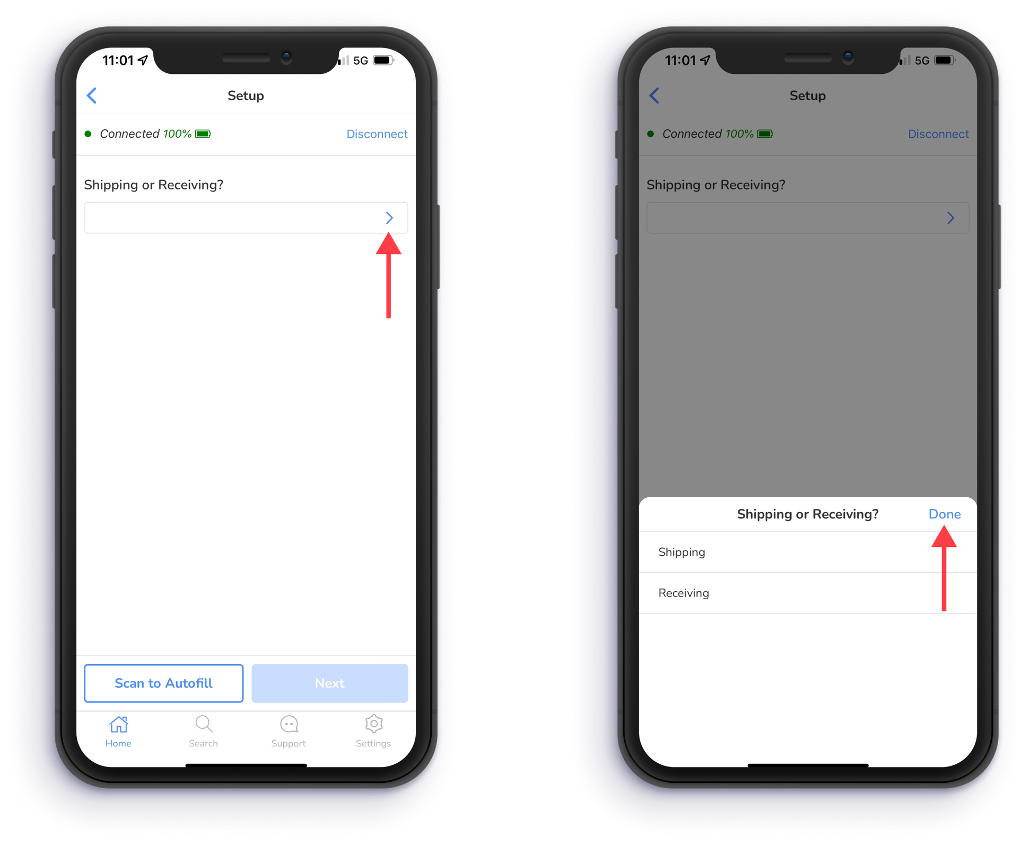
If you do not have a QR code to autofill the requirement information, tap on the Blue arrow.
Then tap Shipping.
Once Shipping has been selected, tap Done.
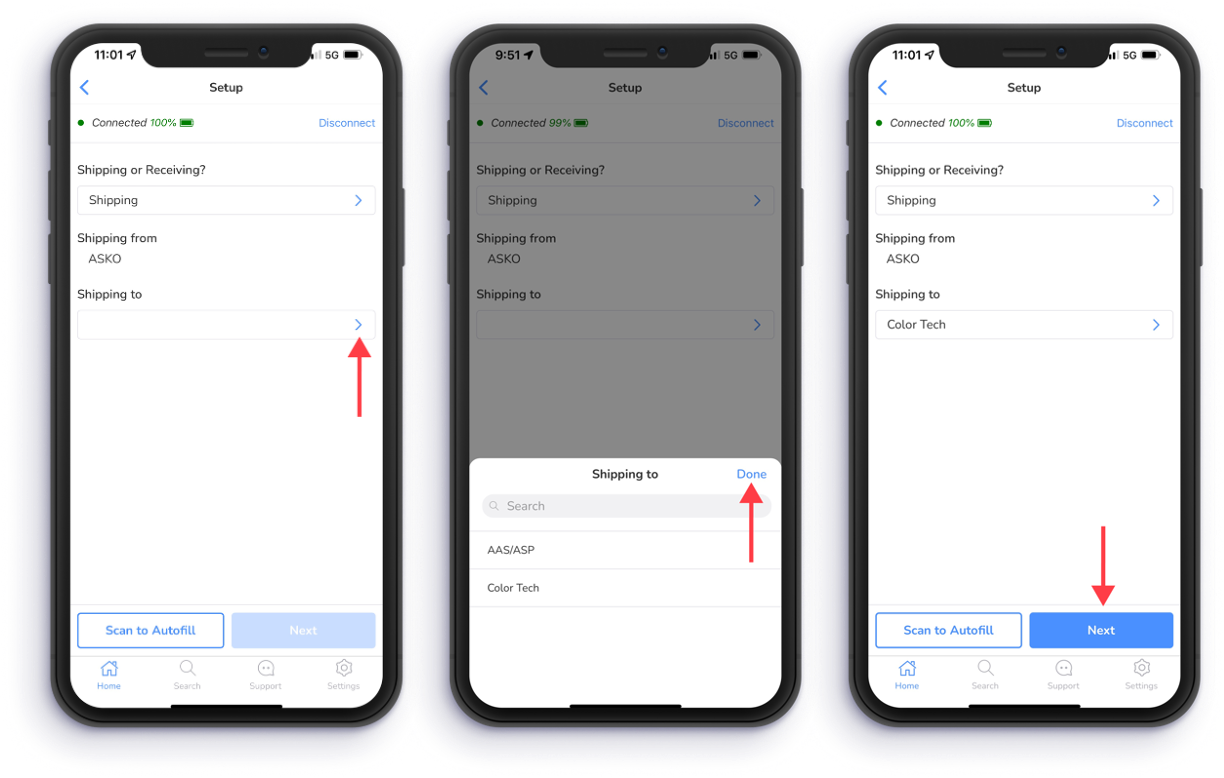
To select a destination to ship to, tap on the Blue arrow.
Then tap on a location.
Once a location has been selected, tap Done.
After all of the required information has been filled out, tap Next.
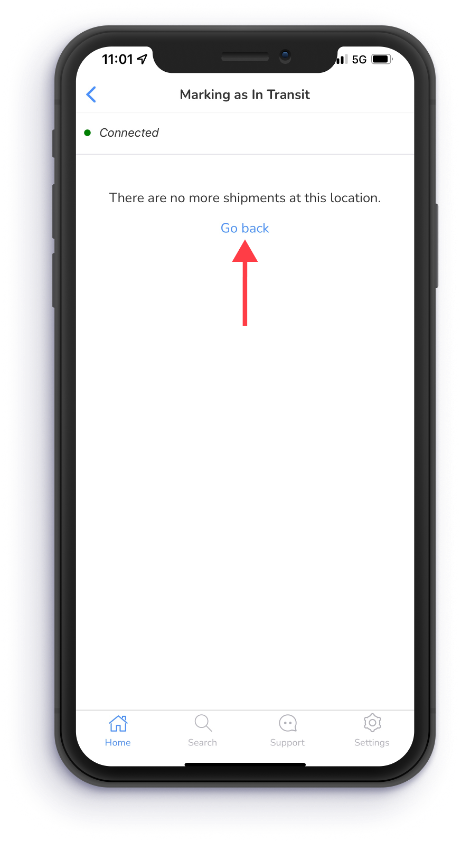
Then the shipments at the location you have selected will be displayed.
If you want to view shipments at a different location, tap Go back.
Receiving
To begin using the shipment scanner feature, tap Shipment Scanner under the Manage your shipments section of the Shipments user interface.
Next, the Xemelgo app will automatically establish a connection to the RFID handheld device you are using.
If the RFID handheld device you are attempting to use has not been onboarded to the Xemelgo app before, please consult the Onboarding an RFID Device section of the Xemelgo Help Center.
If you have a QR Code associated with the shipment, you have the ability to autofill the required information by tapping Scan to Autofill.
Then, use the handheld reader to scan a QR Code to fill in the required information.
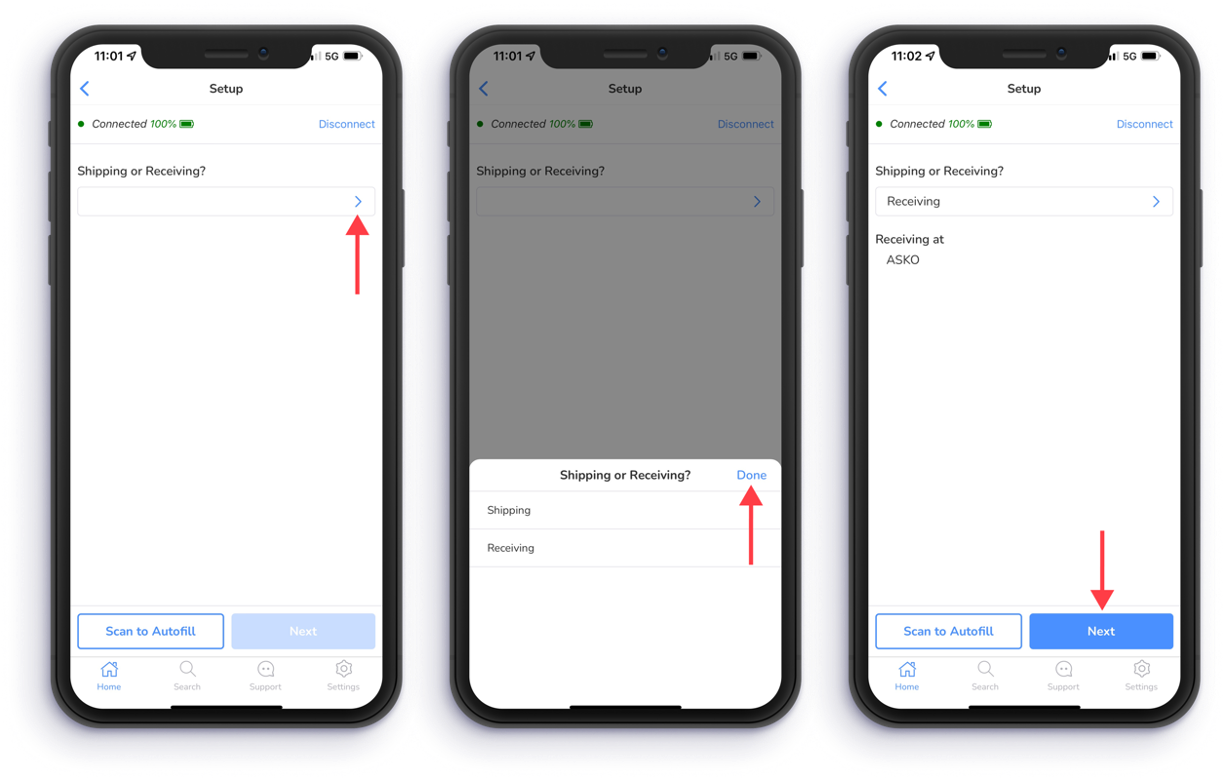
If you do not have a QR code to autofill the requirement information, tap on the Blue arrow.
Then tap Receiving.
Once Receiving has been selected, tap Done.
After all of the required information has been filled out, tap Next.
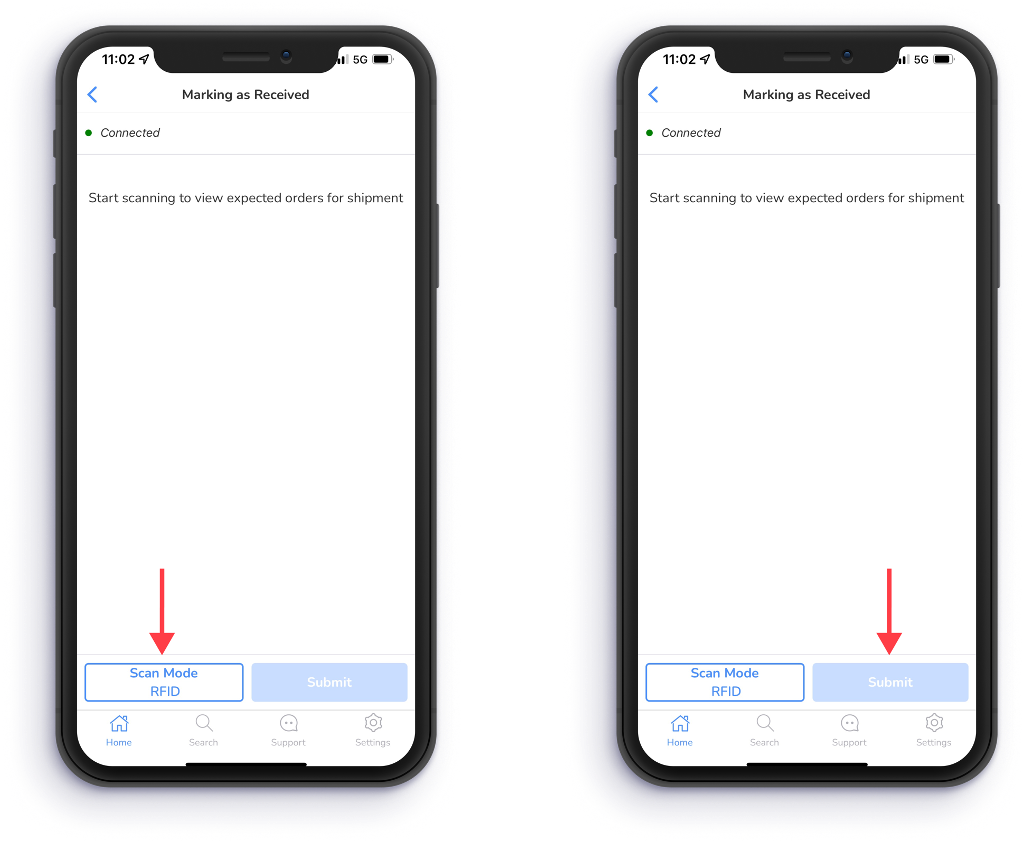
Then users have the ability to start scanning to view expected orders for shipment by scanning either item Barcodes or RFID Tags.
To switch scan mode from scanning RFID Tags to Barcodes, tap on Scan Mode RFID.
After you have completed scanning, tap Submit.
Need further assistance?
The article above couldn't resolve your issue? Use the chat button in the bottom-right corner to contact the support team.