Print New Tag
Print New Tag
Overview
This article explains how to print a new tag for Assets, Inventory, and Work Orders.
Print New Tags for Assets
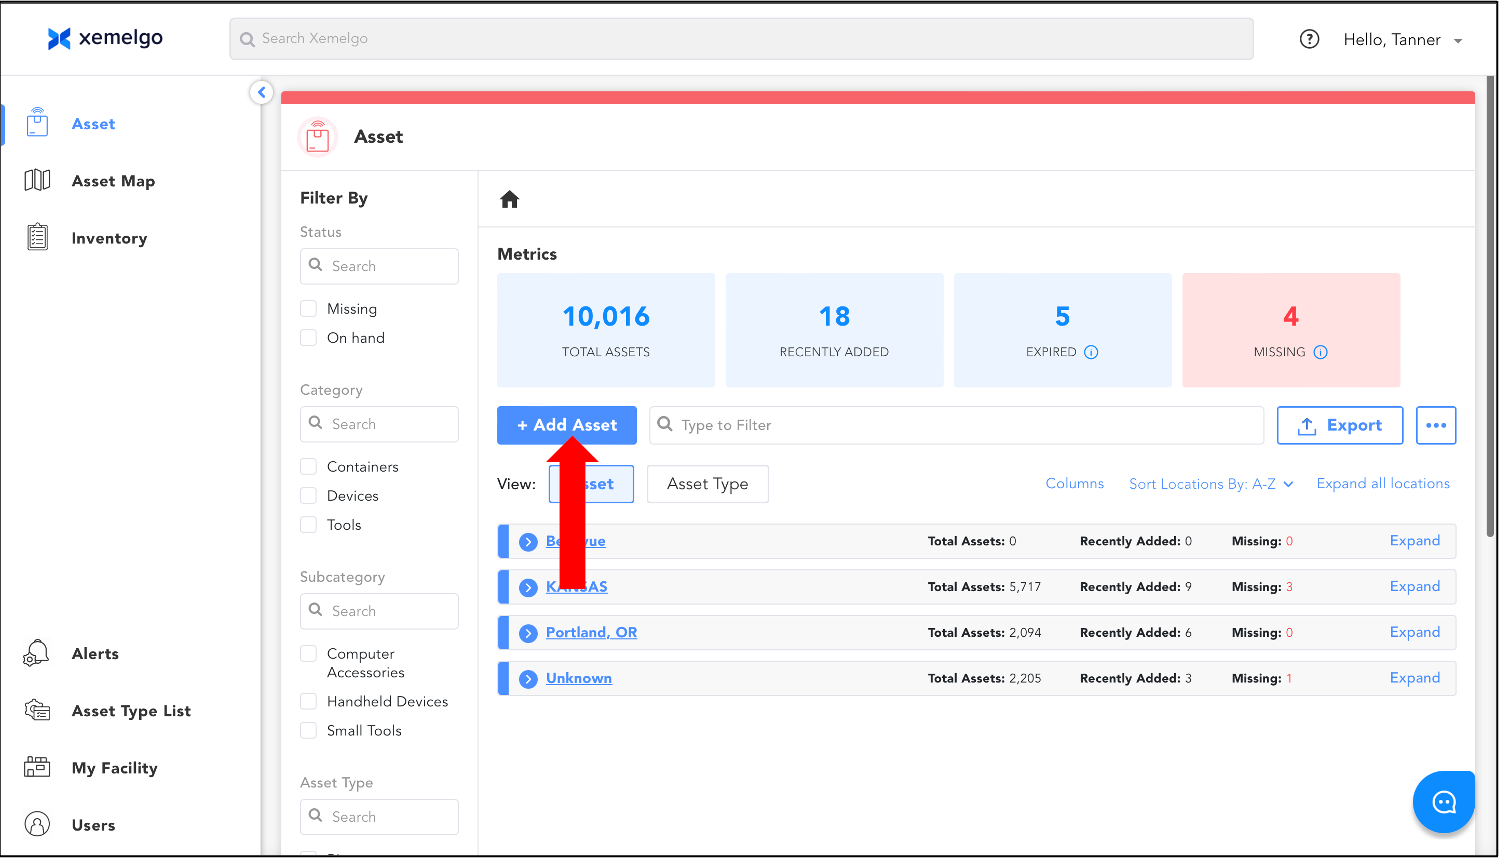
To begin printing a new tag for an asset ensure that you are on the Asset Trackpage.
Next, click + Add Asset.
Then, chose whether you want to print a single tag or print tags in bulk.
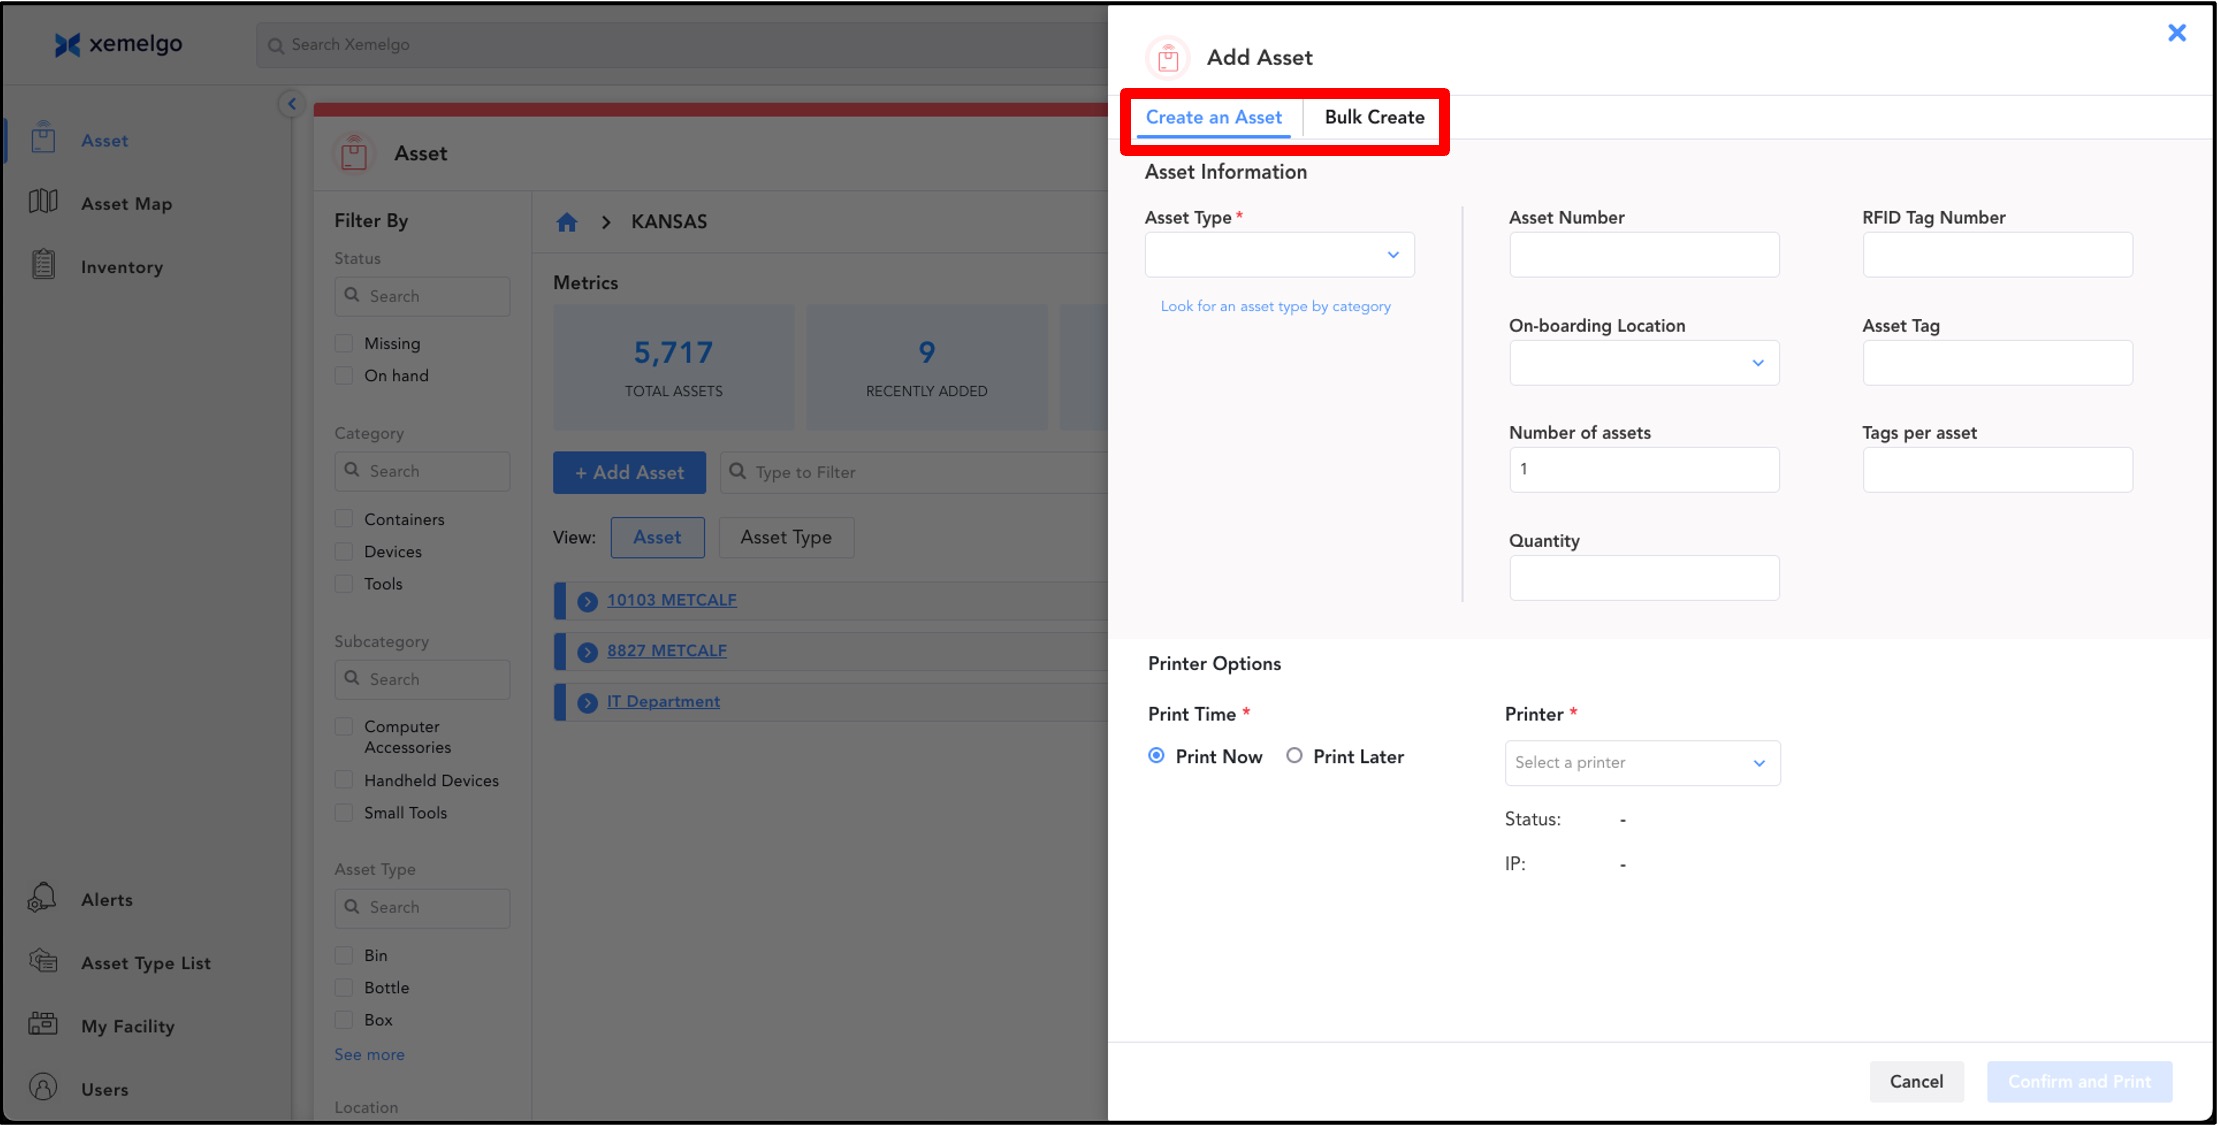
If you have chosen to print a single tag, continue under the Create an Asset section.
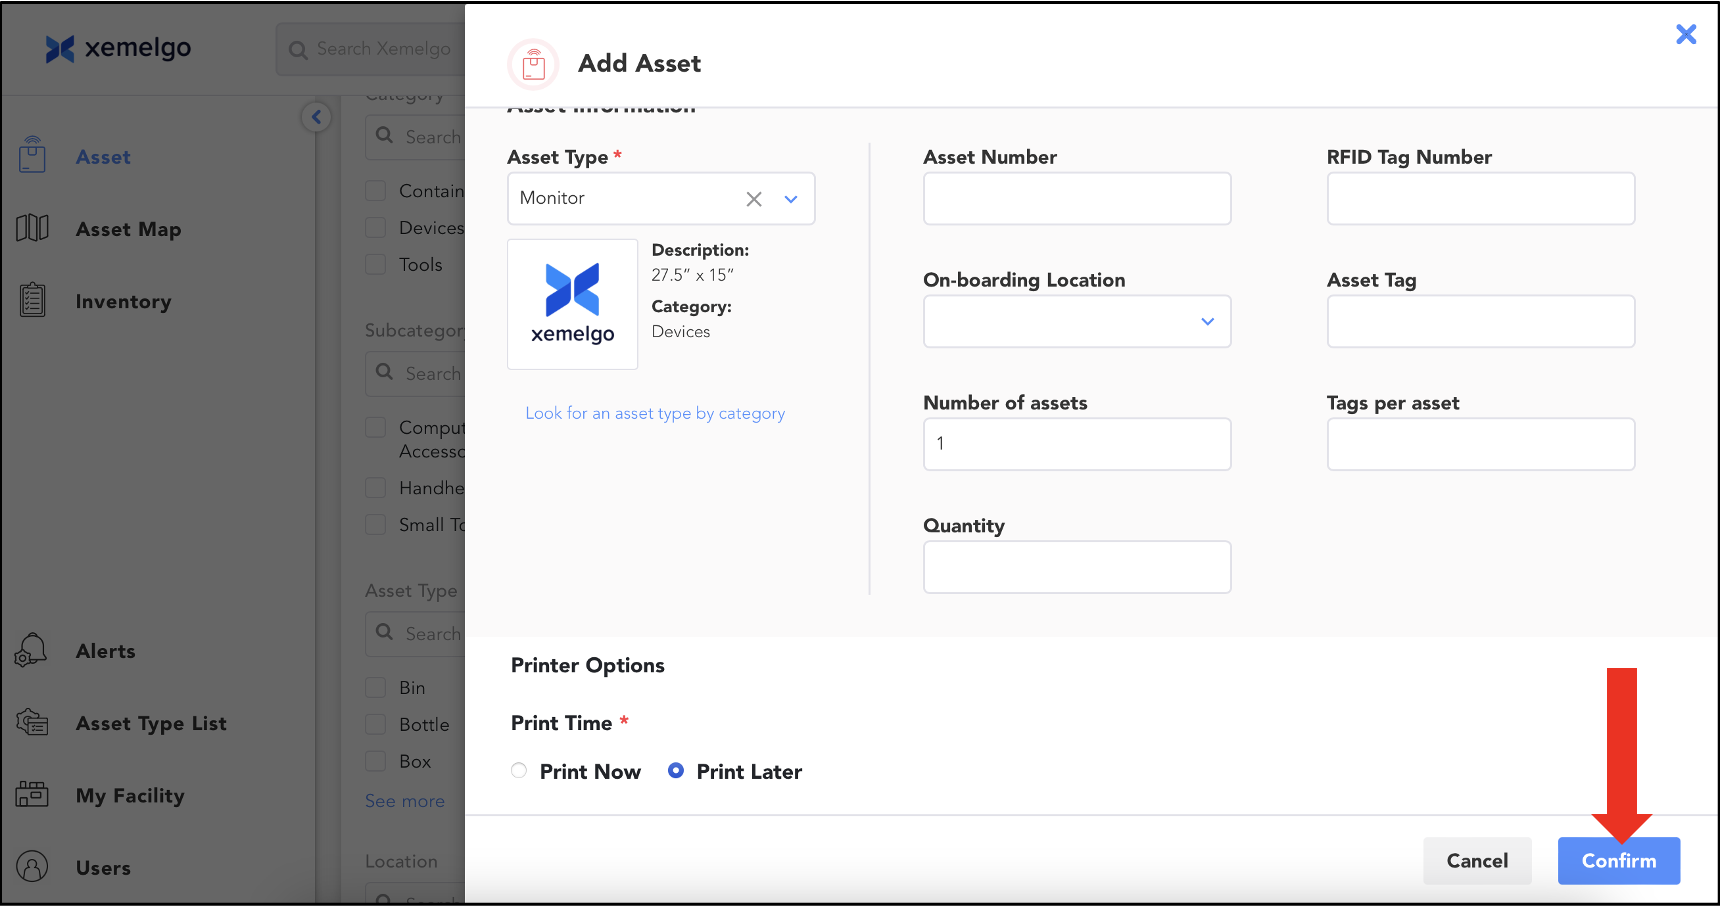
First, enter the required asset information in the appropriate text fields.
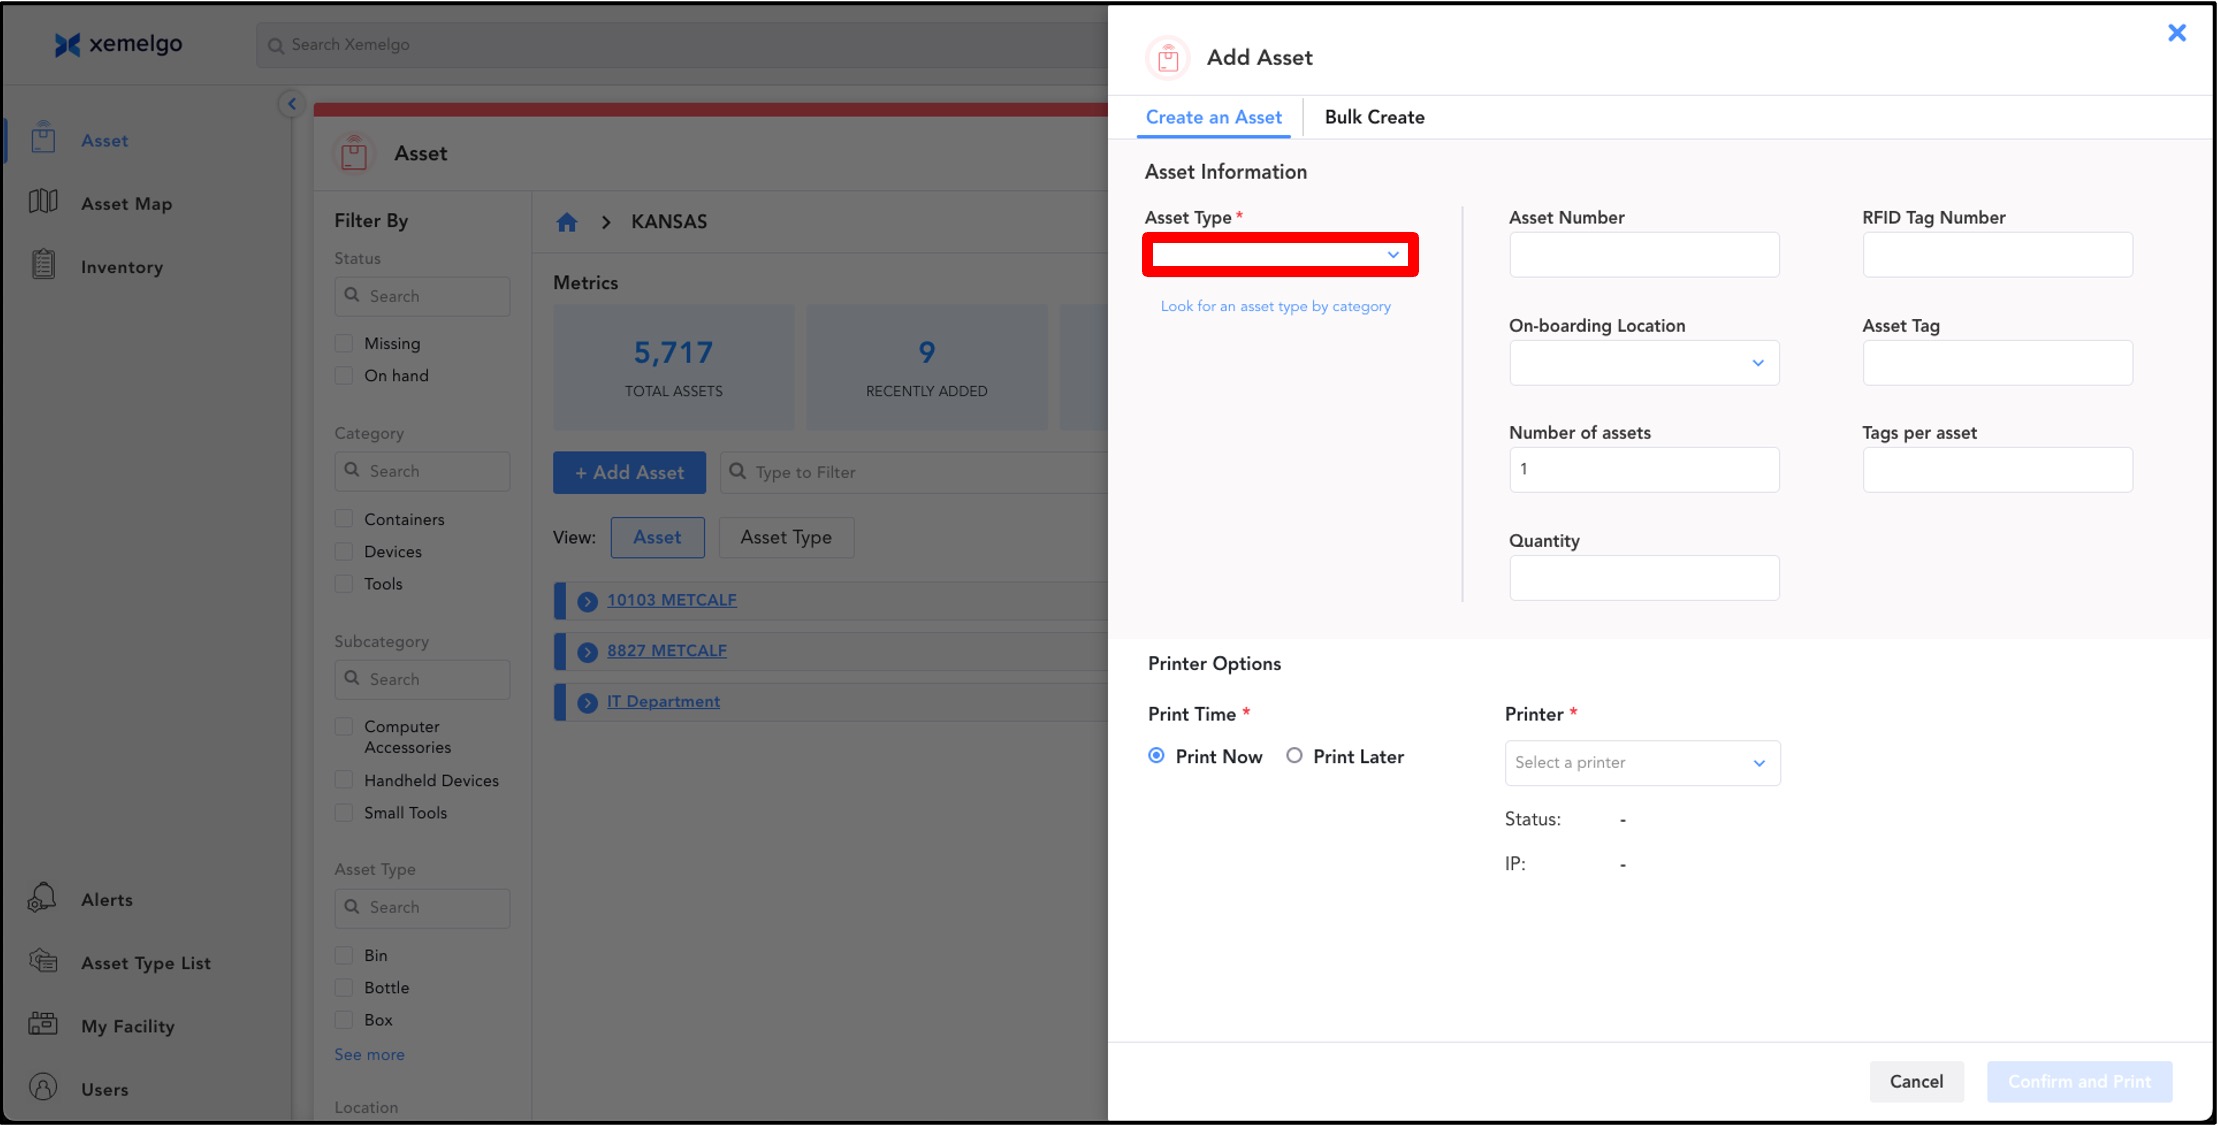
Next, enter any other applicable information (Ex. Asset Number, RFID Tag Number, On-boarding Location, Asset Tag, Number of assets, Tag per asset, Quantity, etc.).
Then, you are given the option to print the tag(s) now or at a later time.
If you choose to print the tag(s) now, select Print Now.
Then, select the Printer from the dropdown and click Confirm and Print.
Ensure Zebra Browser Print is installed and running on your device before printing.
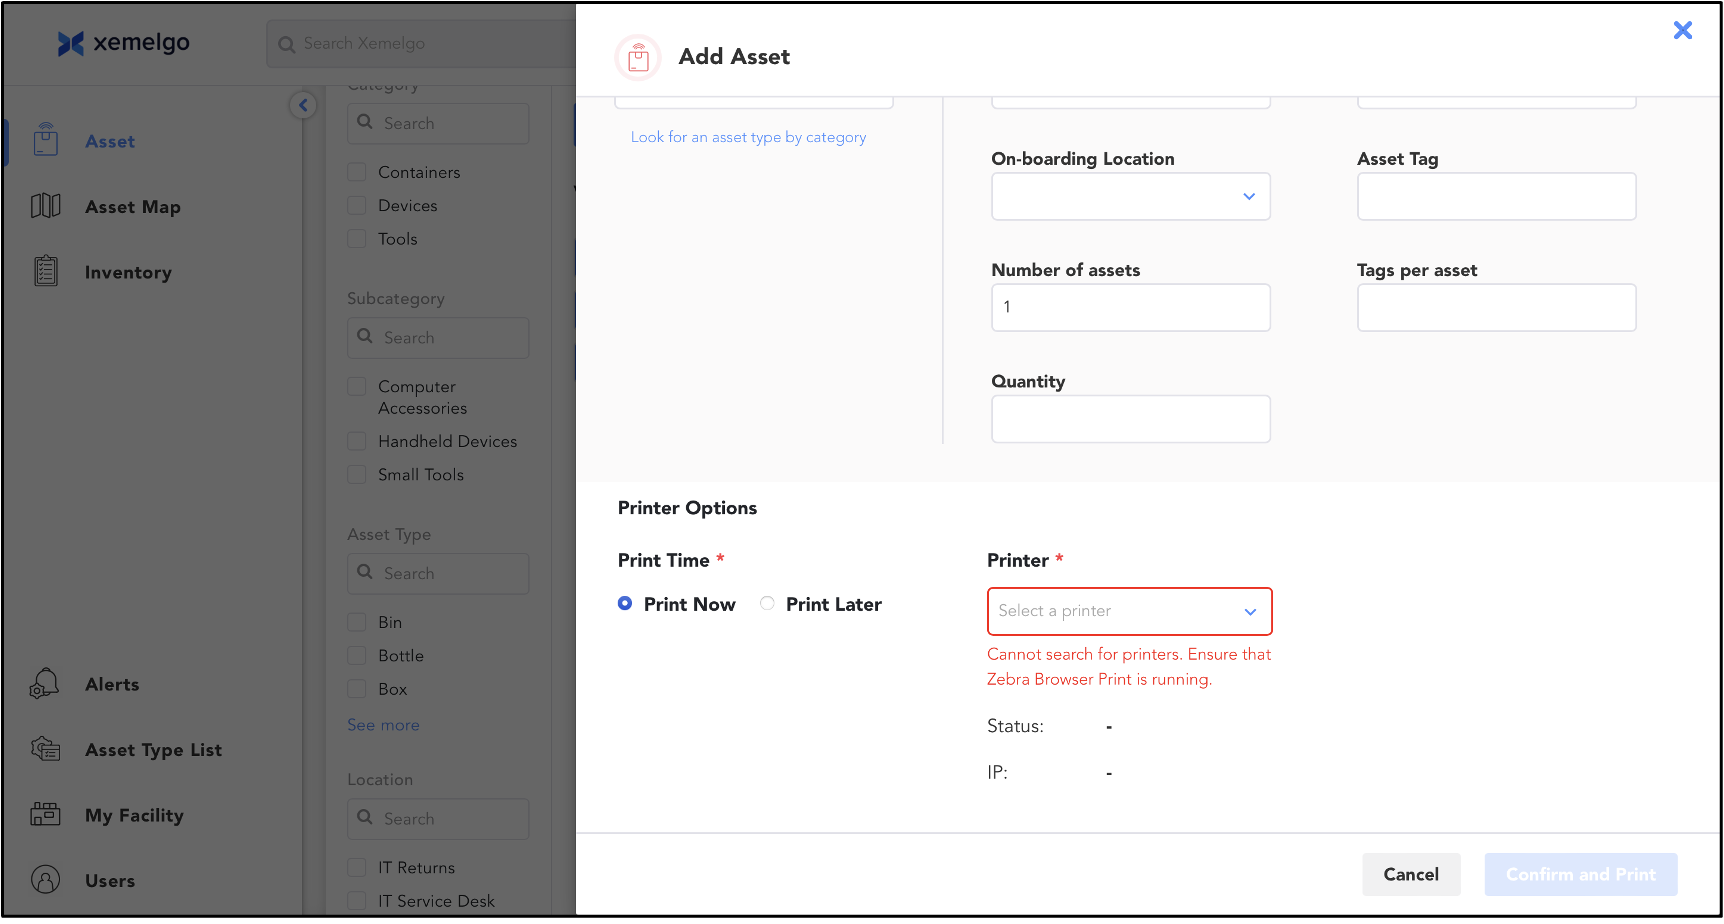
If you choose to print the tag(s) at a later time, select Print Later and click Confirm.
If you choose to print tags in Bulk, ensure the Bulk Create tab is selected.
Next, upload a CSV File with the required information.
If you are unsure of the column headers required in the csv file, or the overall format of the csv file, click Download Template and a csv file with the correct column headers and format will be downloaded to your device.
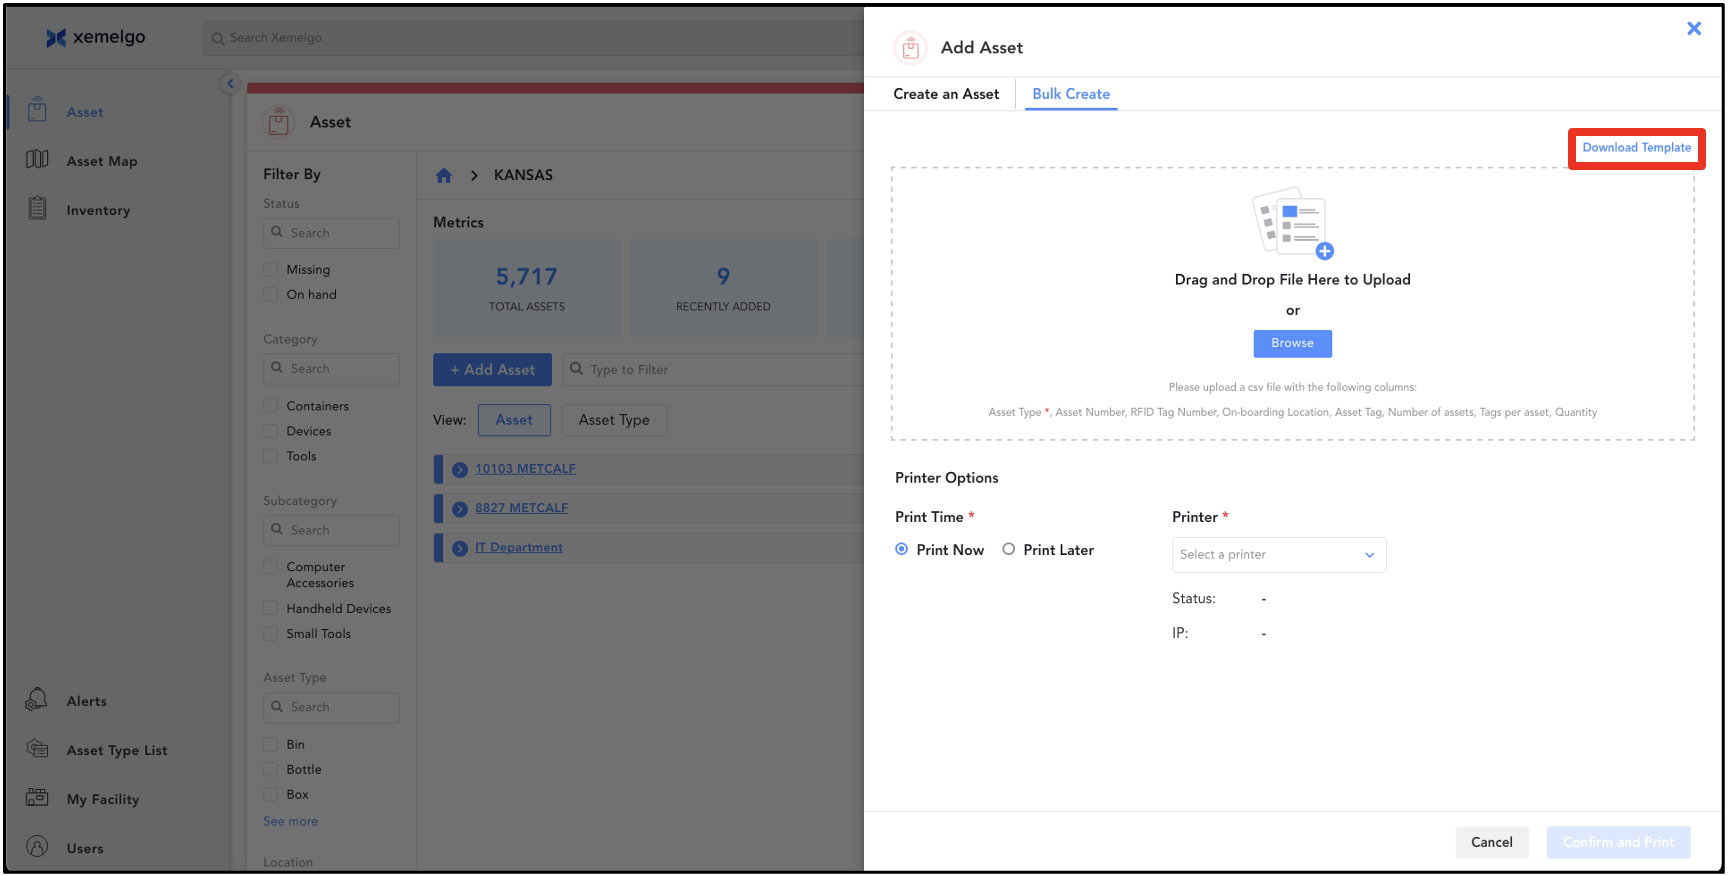
Then, you are given the option to print the tag(s) now or at a later time.
If you choose to print the tag(s) now, select Print Now.
Then, select the Printer from the dropdown and click Confirm and Print.
If you choose to print the tag(s) at a later time, select Print Later and click Confirm.
Print New Tags for Inventory
To begin printing a new tag for an item ensure that you are on the Inventory Trackpage.
Next, click + Add Item.
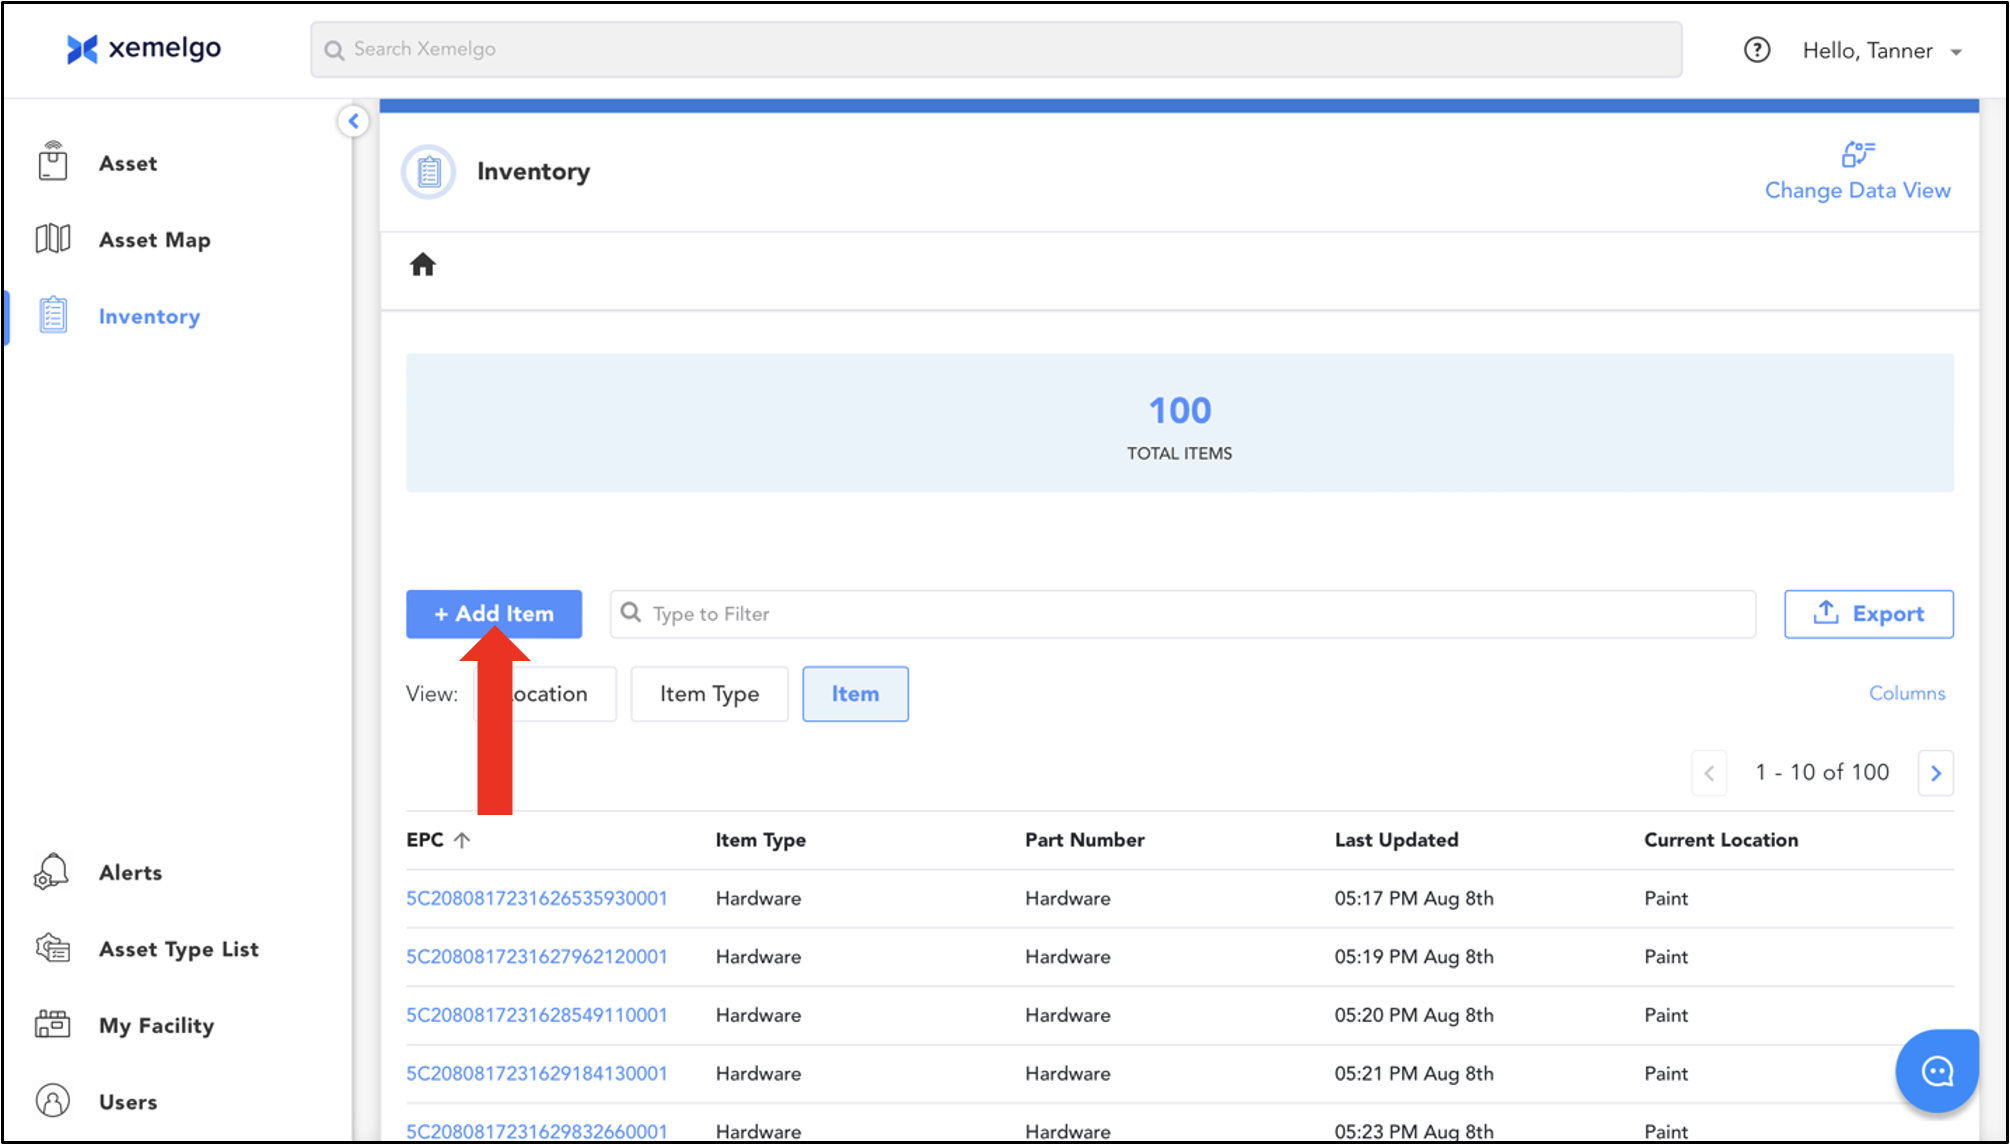
Then, chose whether you want to print a single tag or print tags in bulk.
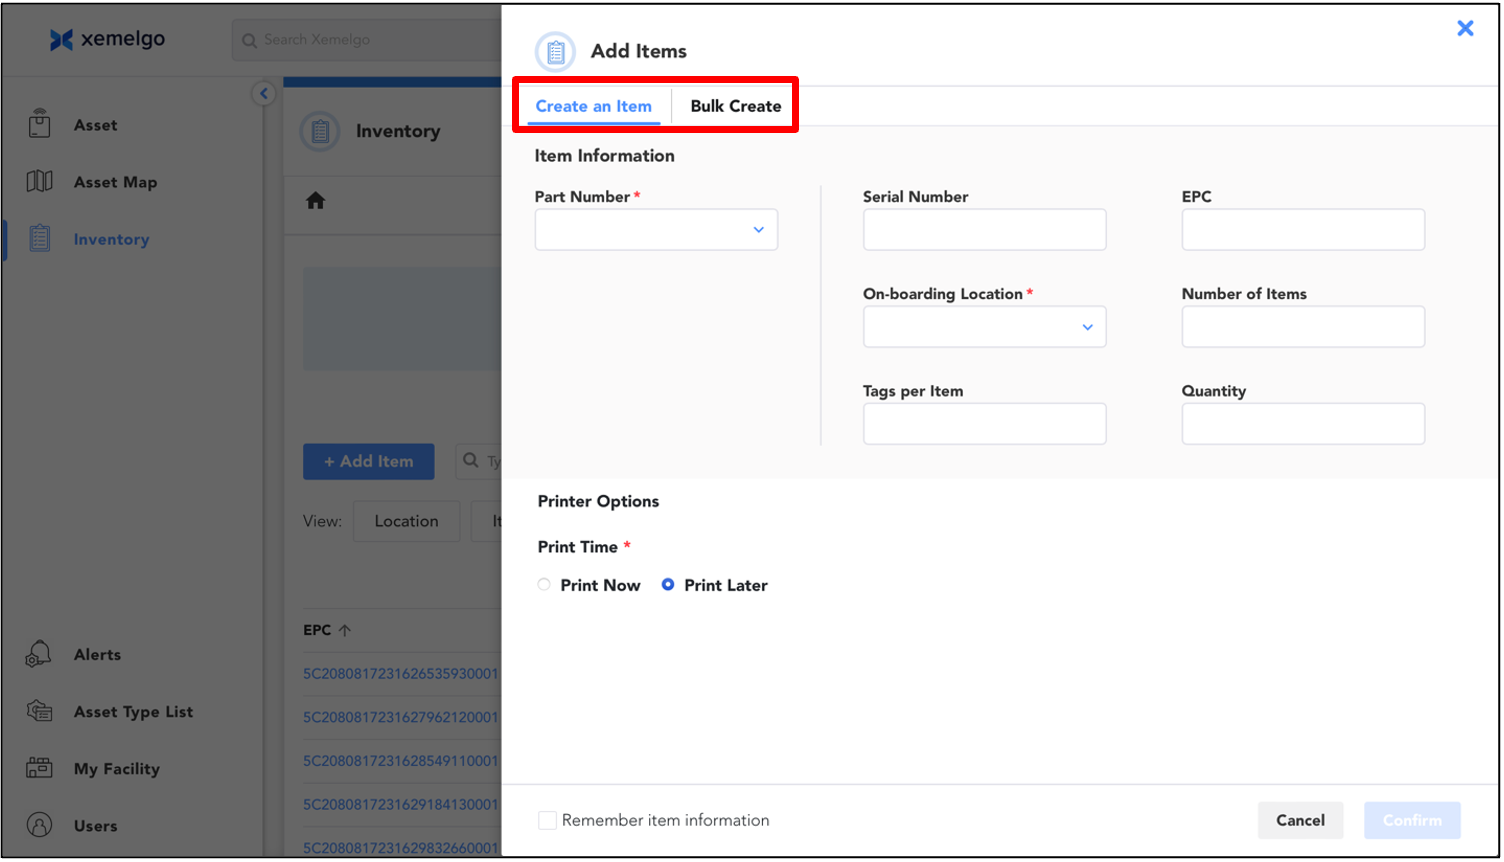
If you have chosen to print a single tag, continue under the Create an Item section.
First, enter the required item information in the appropriate text fields.
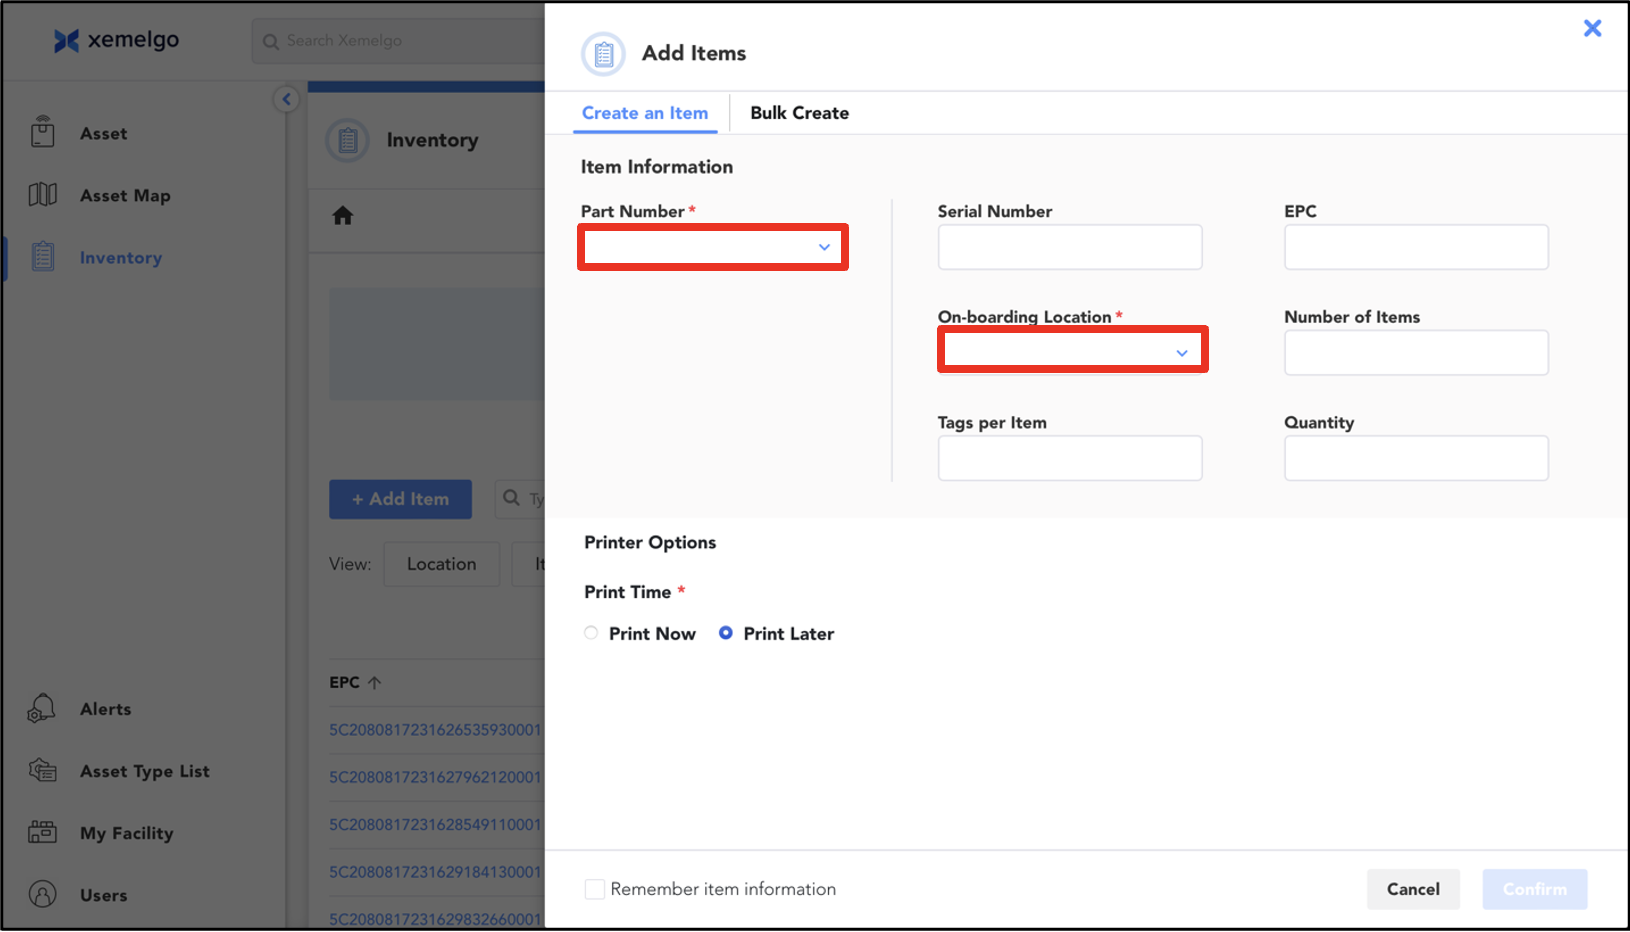
Next, enter any other applicable information (Ex. Serial Number, EPC, Number of Items, Tags per Item, Quantity, etc.).
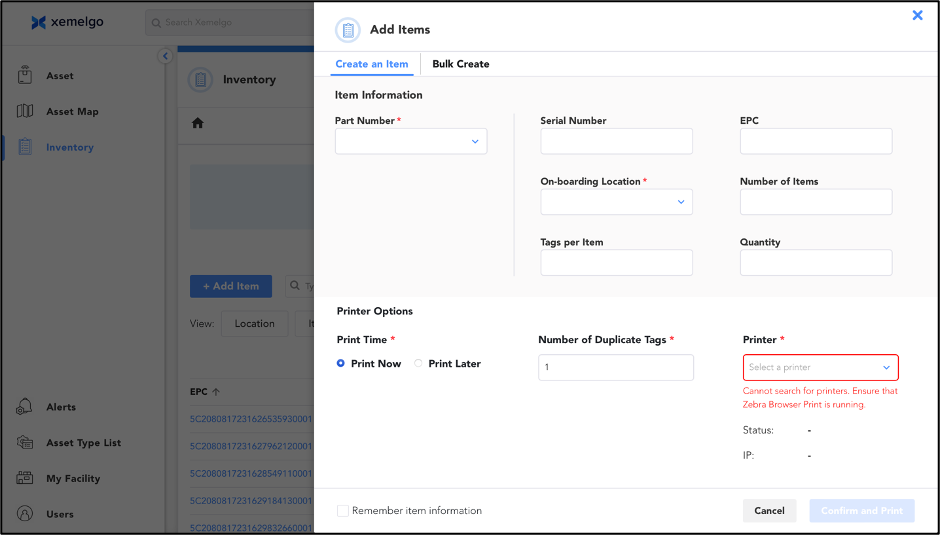
Then, you are given the option to print the tag(s) now or at a later time.
If you choose to print the tag(s) now, select Print Now.
Then, select the Printer from the dropdown and click Confirm and Print.
Ensure Zebra Browser Print is installed and running on your device before printing.
If you choose to print the tag(s) at a later time, select Print Later and click Confirm.
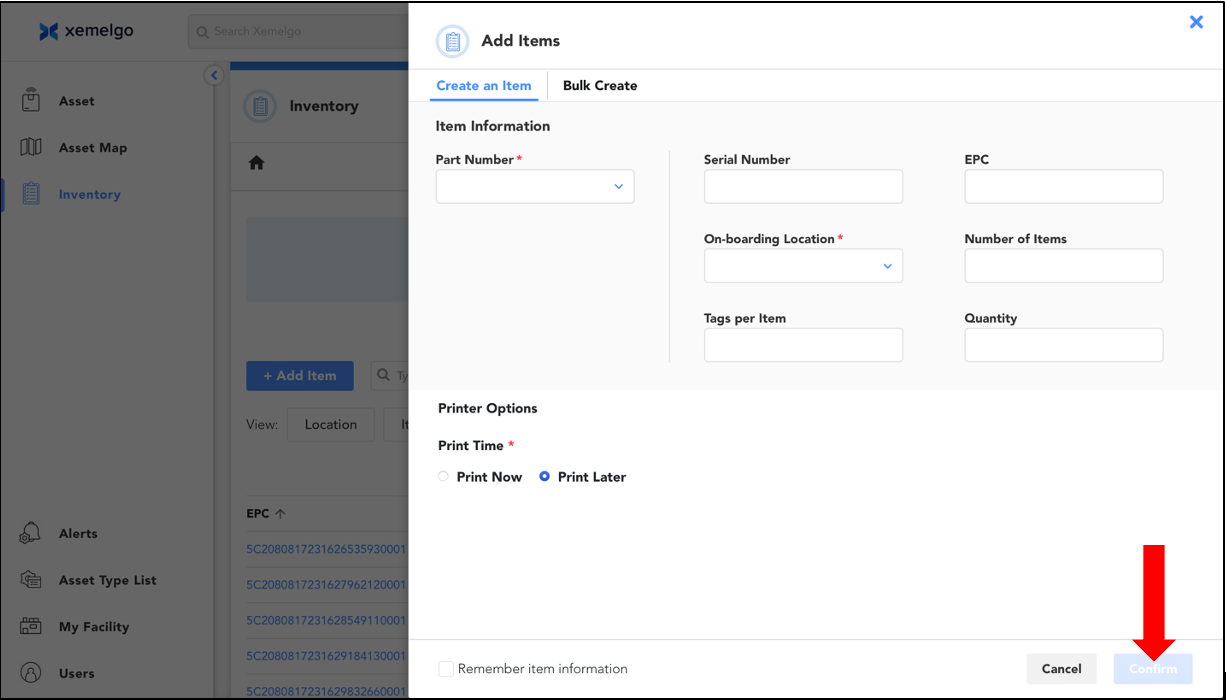
If you choose to print tags in Bulk, ensure the Bulk Create tab is selected.
Next, upload a CSV File with the required information.
If you are unsure of the column headers required in the csv file, or the overall format of the csv file, click Download Template and a csv file with the correct column headers and format will be downloaded to your device.
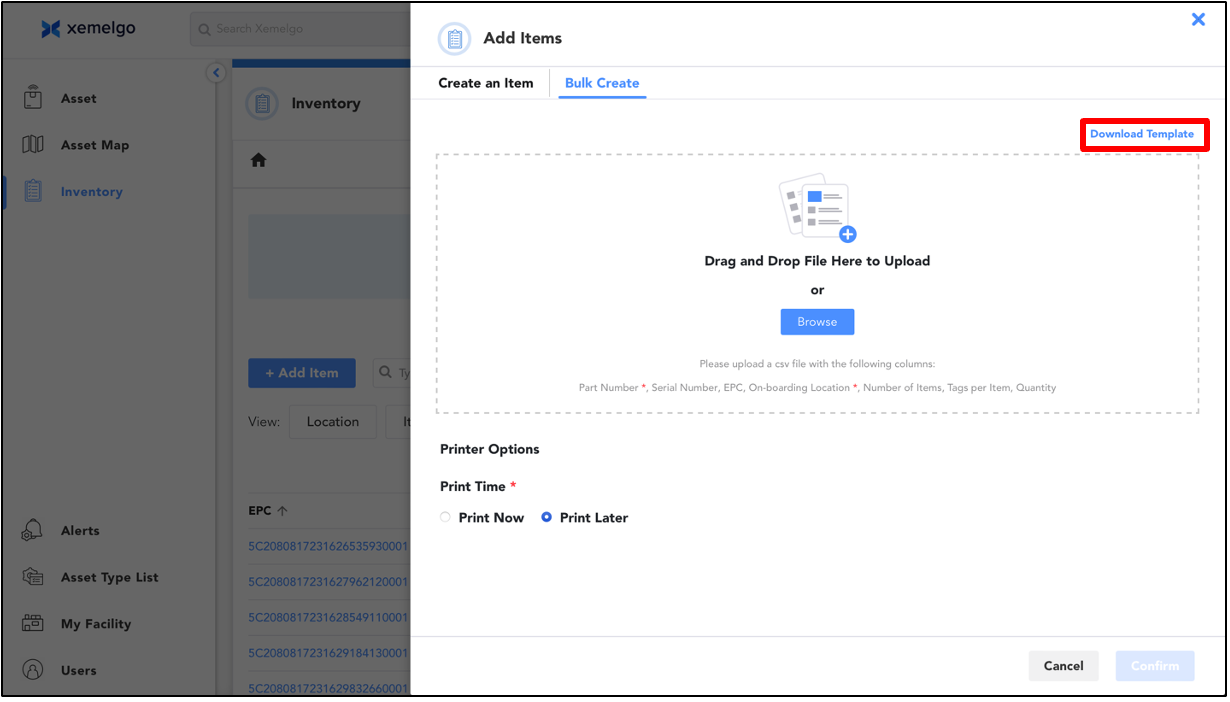
Then, you are given the option to print the tag(s) now or at a later time.
If you choose to print the tag(s) now, select Print Now.
Then, select the Printer from the dropdown and click Confirm and Print.
If you choose to print the tag(s) at a later time, select Print Later and click Confirm.
Print New Tags for Work Orders
To begin printing a new tag for a work order ensure that you are on the Work Orders Trackpage.
Next, click + Add Order.
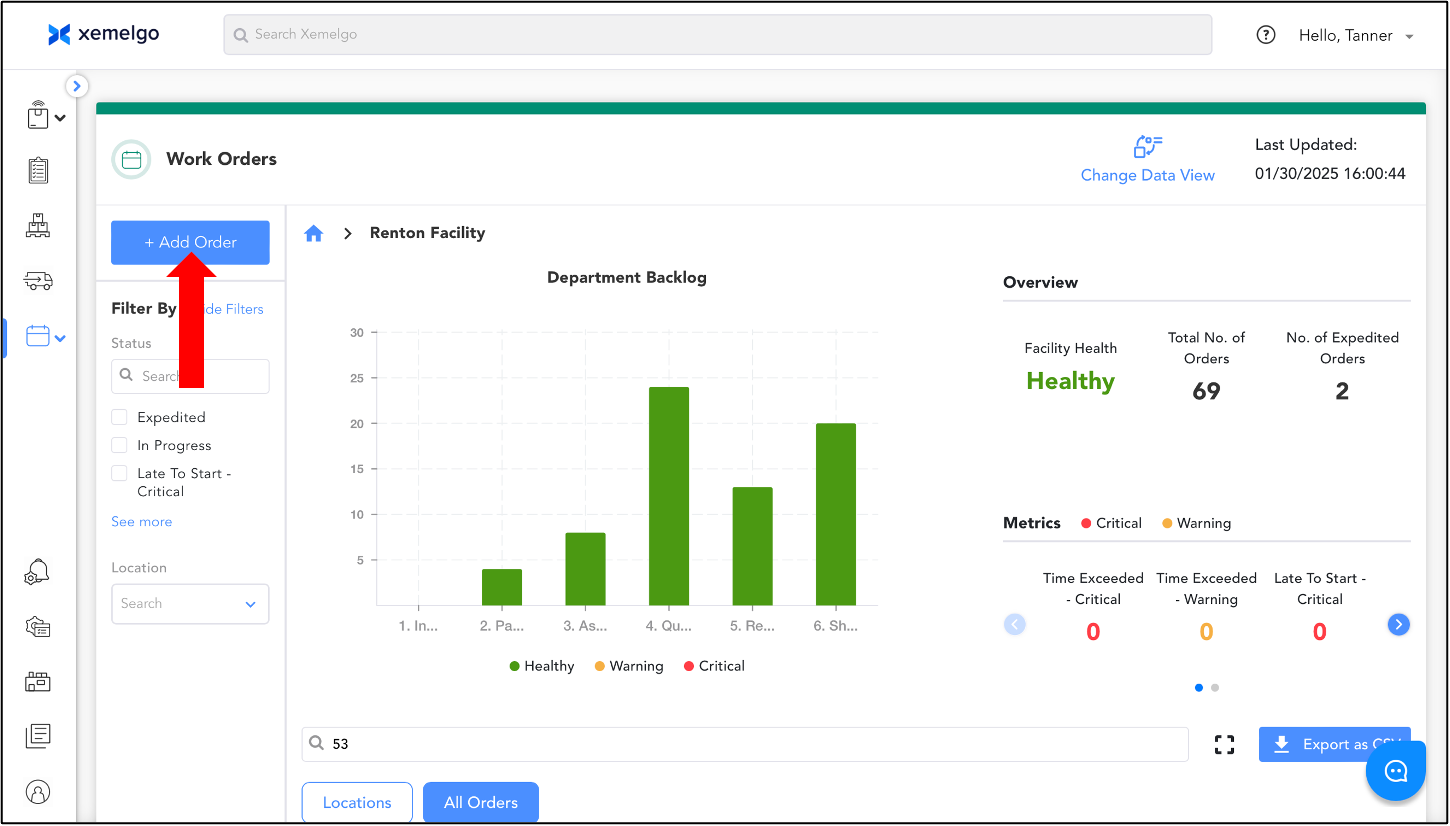
Then, enter the required work order information in the appropriate text fields.
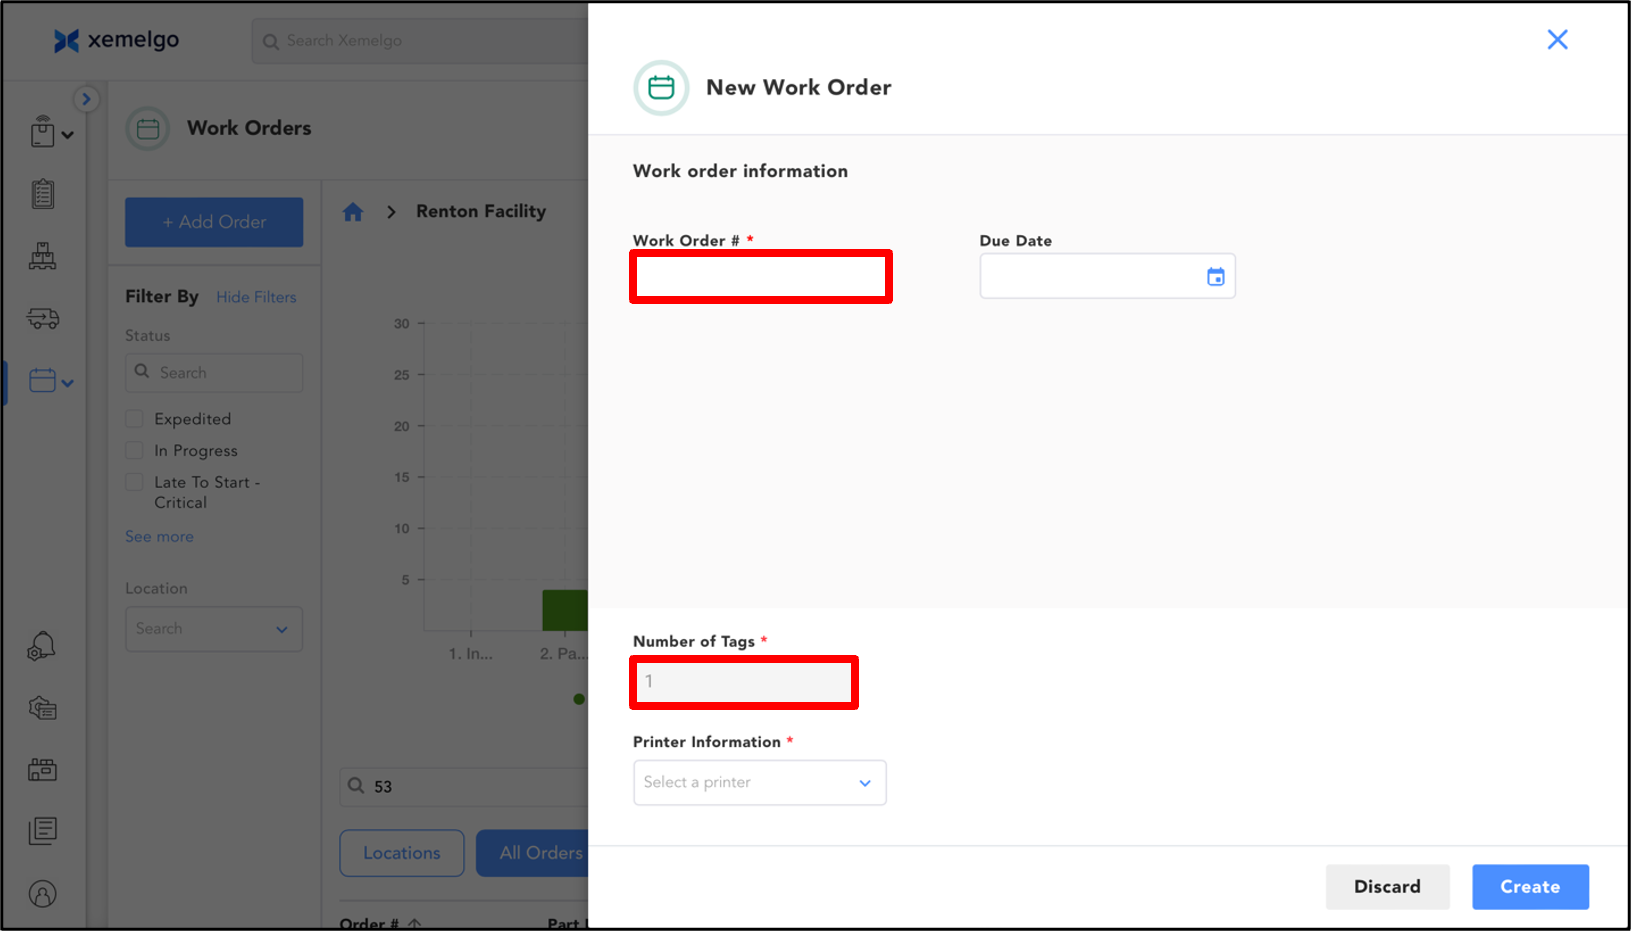
Next, enter any other applicable information (Ex. Due Date).
Finally, select the Printer from the dropdown and click Create.
Ensure Zebra Browser Print is installed and running on your device before printing.
Need further assistance?
The article above couldn't resolve your issue? Use the chat button in the bottom-right corner to contact the support team.