Managing Locations within the Facility
Managing Locations within the Facility
This feature is accessible only to users registered with an Admin role on the Xemelgo app.
Overview
This article explains how Xemelgo app users with Admin roles can add and manage various facility components, including departments, zones, stock areas, and workstations, for inventory and asset tracking. It also covers editing and deleting these locations when needed.
Adding a Facility
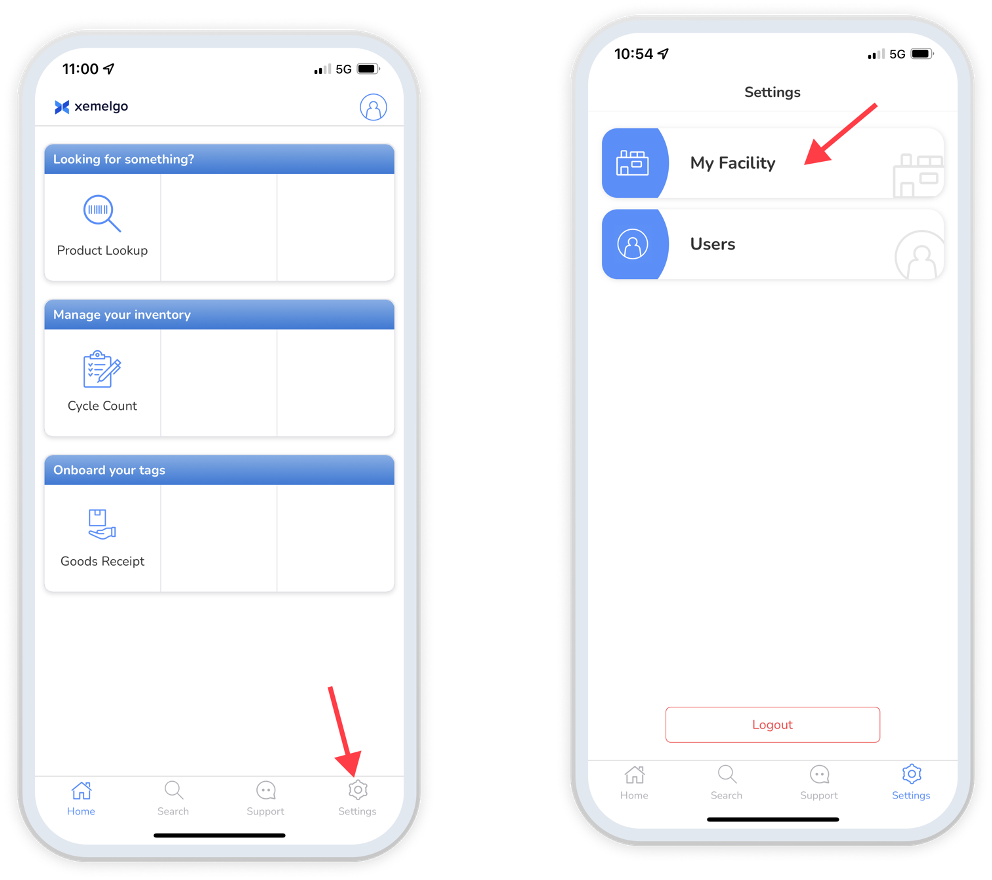
Open the Xemelgo app on the reader interface.
Tap on the Settings icon located in the bottom menu bar.
Tap on My Facility.
Adding a Department for WIP
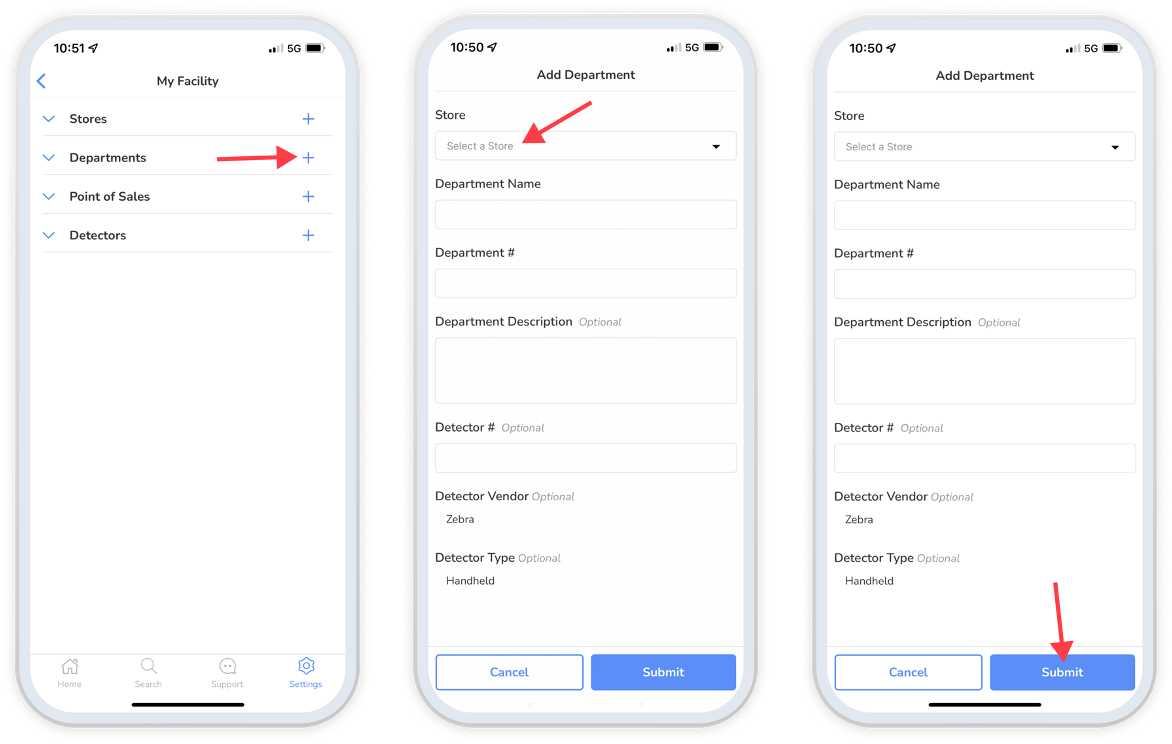
Tap the "+" next to Departments.
Select the Store to which the department belongs from the dropdown.
Enter details such as Department Name, Department #, Department Description, and Detector # for that department.
Tap Submit.
Adding a Zone for Asset Tracking
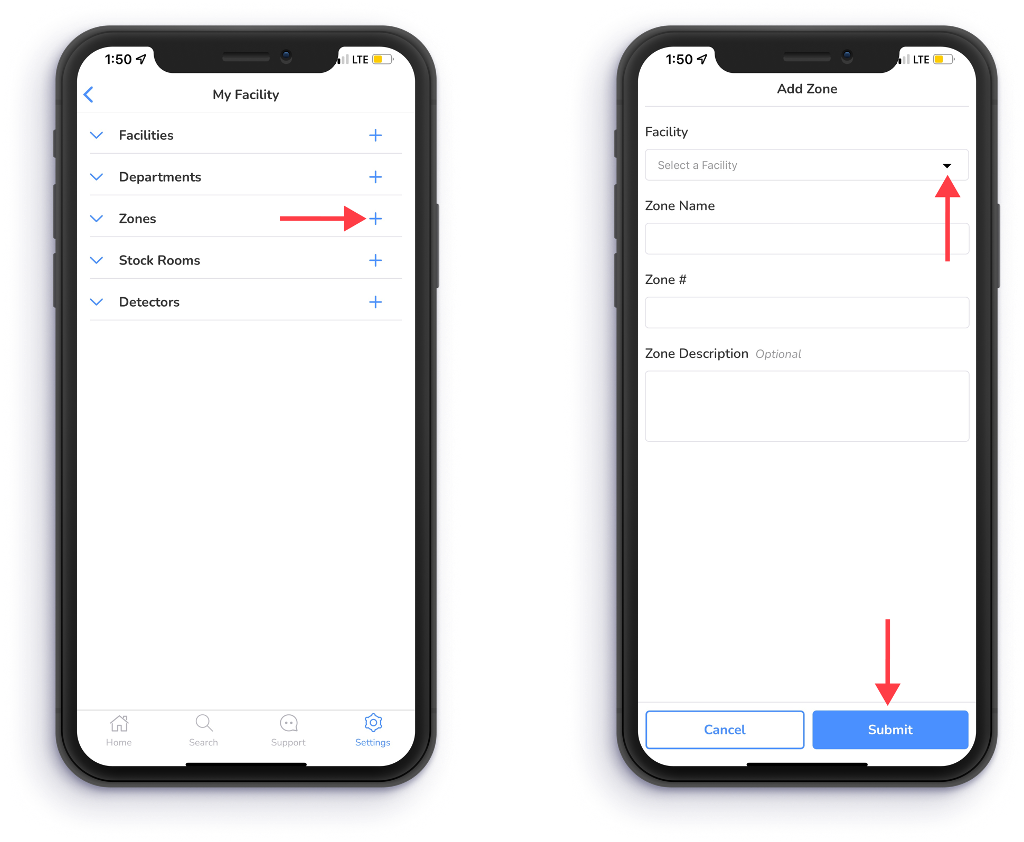
Tap the "+" next to Zones.
Select the Facility to which the zone belongs from the dropdown.
Enter details such as Zone Name, Zone #, and Zone Description for that zone.
Tap Submit.
Adding a Stock Area for Inventory Tracking
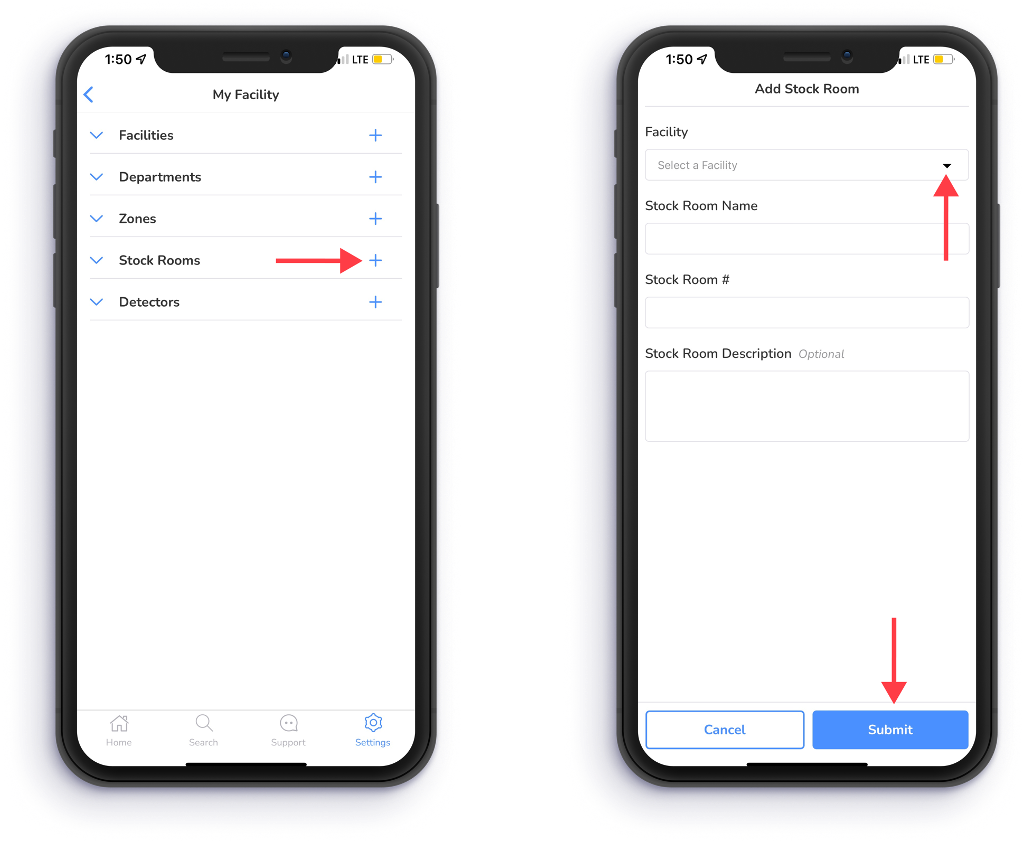
Tap the "+" next to Stock Rooms.
Select the Facility to which the stock room belongs from the dropdown.
Enter details such as Stock Room Name, Stock Room #, and Stock Room Description for that stock room.
Tap Submit.
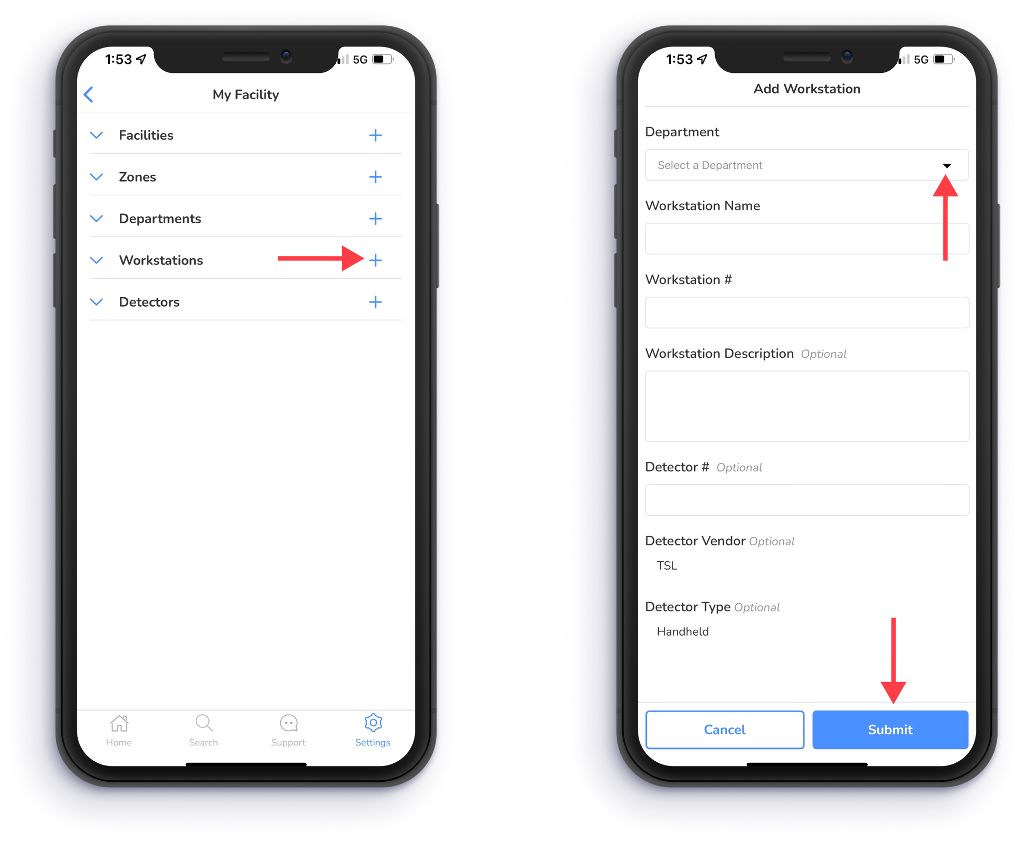
Adding a Workstation for Work-in-Progress
Tap the "+" next to Workstations.
Select the Department to which the workstation belongs from the dropdown.
Enter details such as Workstation Name, Workstation #, Workstation Description, and Detector # for that workstation.
Tap Submit.
Edit/Delete Locations
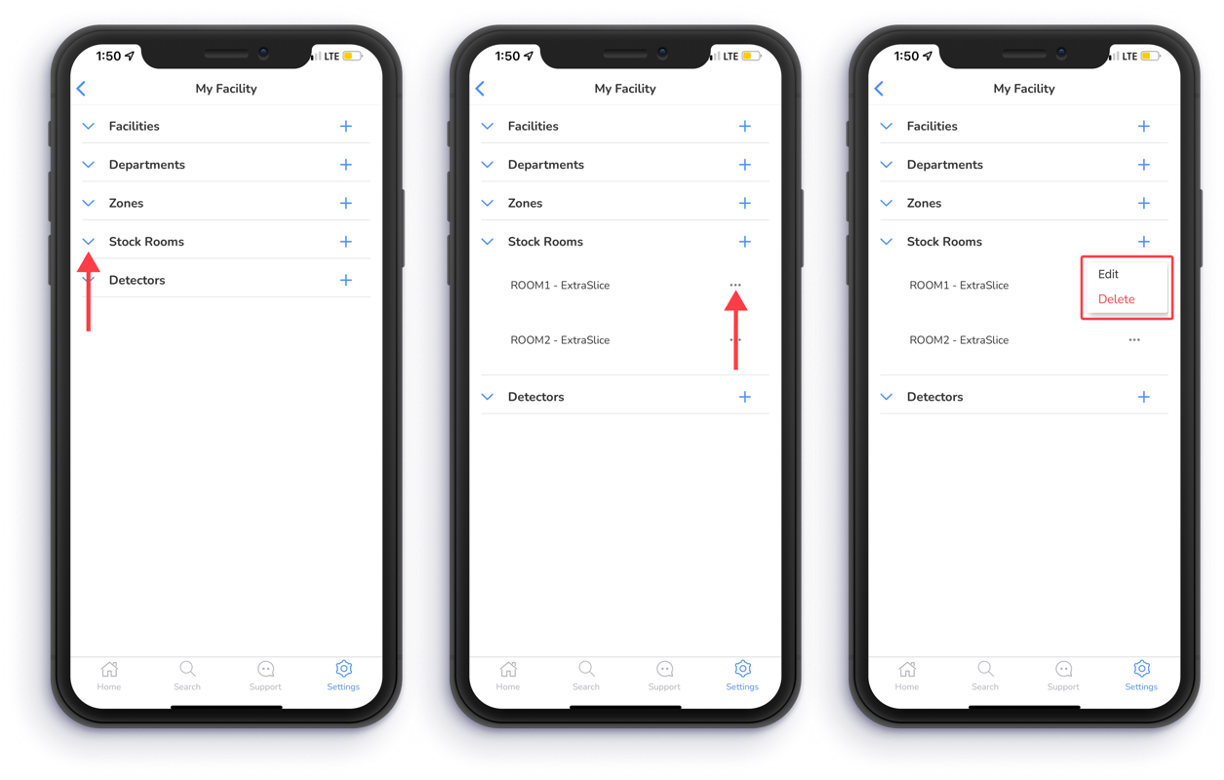
Tap the Blue down arrow to the left of the type of location you want to edit/delete.
Tap "..." to the right of the location you want to edit/delete.
Tap Edit or Delete depending on the action you want to perform.
Need further assistance?
The article above couldn't resolve your issue? Use the chat button in the bottom-right corner to contact the support team.