Bulk Create and Print
Bulk Create and Print
Overview
This article covers the bulk creation of items via CSV, error resolution, printer selection, and printing.
Instructions
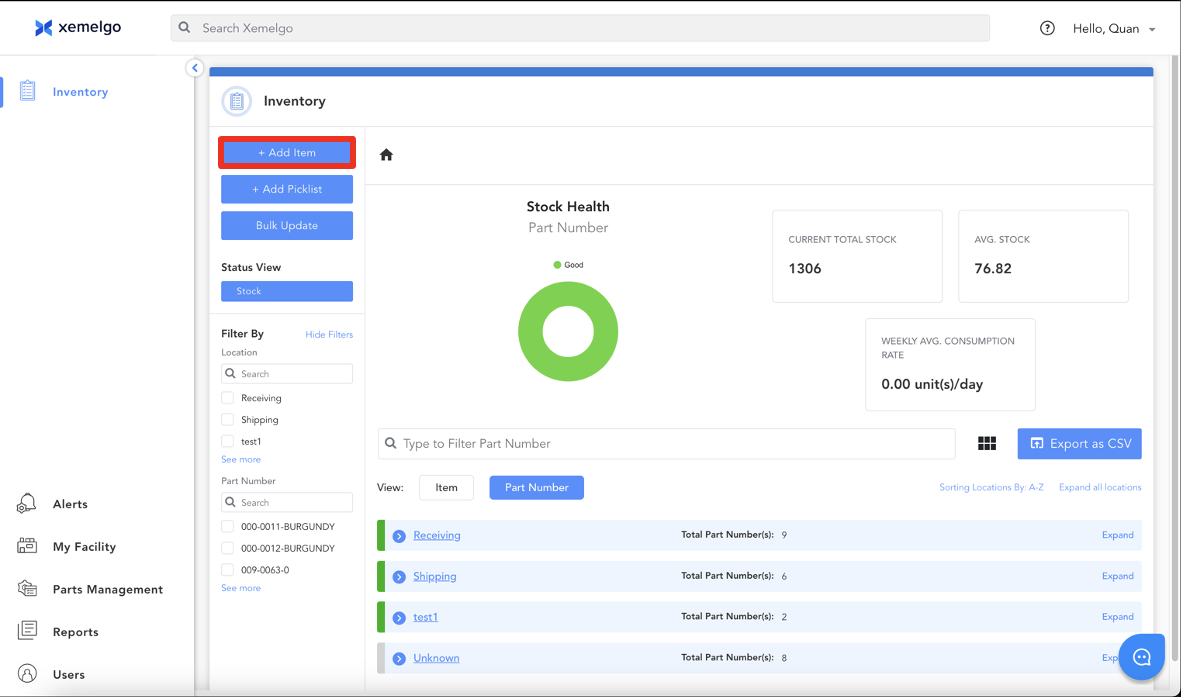
From the Inventory track page, click + Add Item to open the onboarding page.
Next, click Bulk Create.
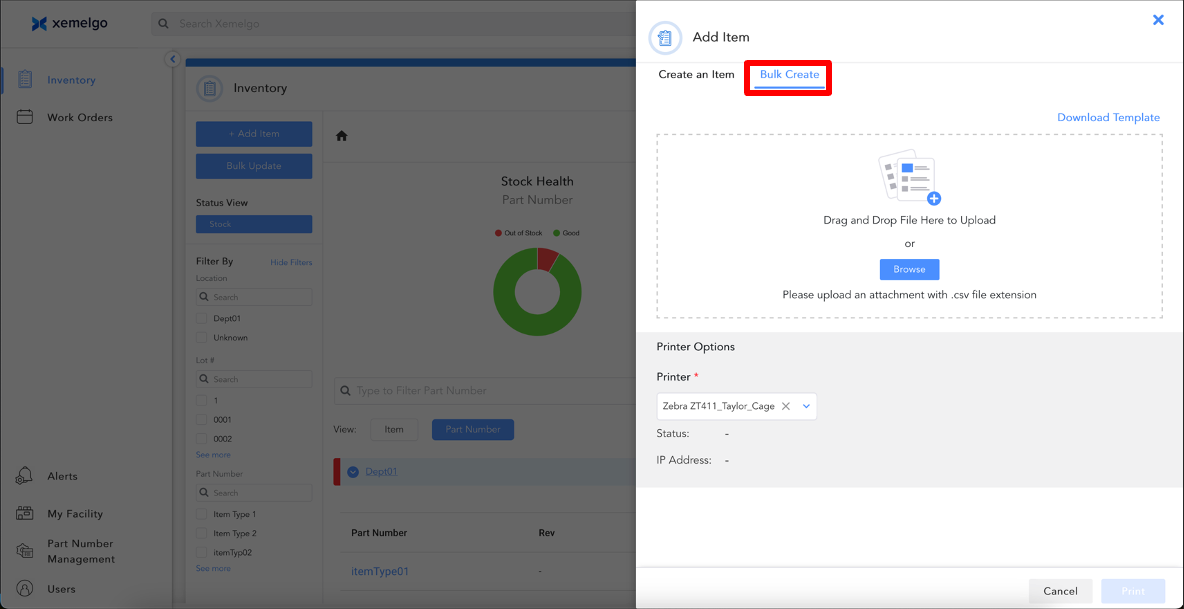
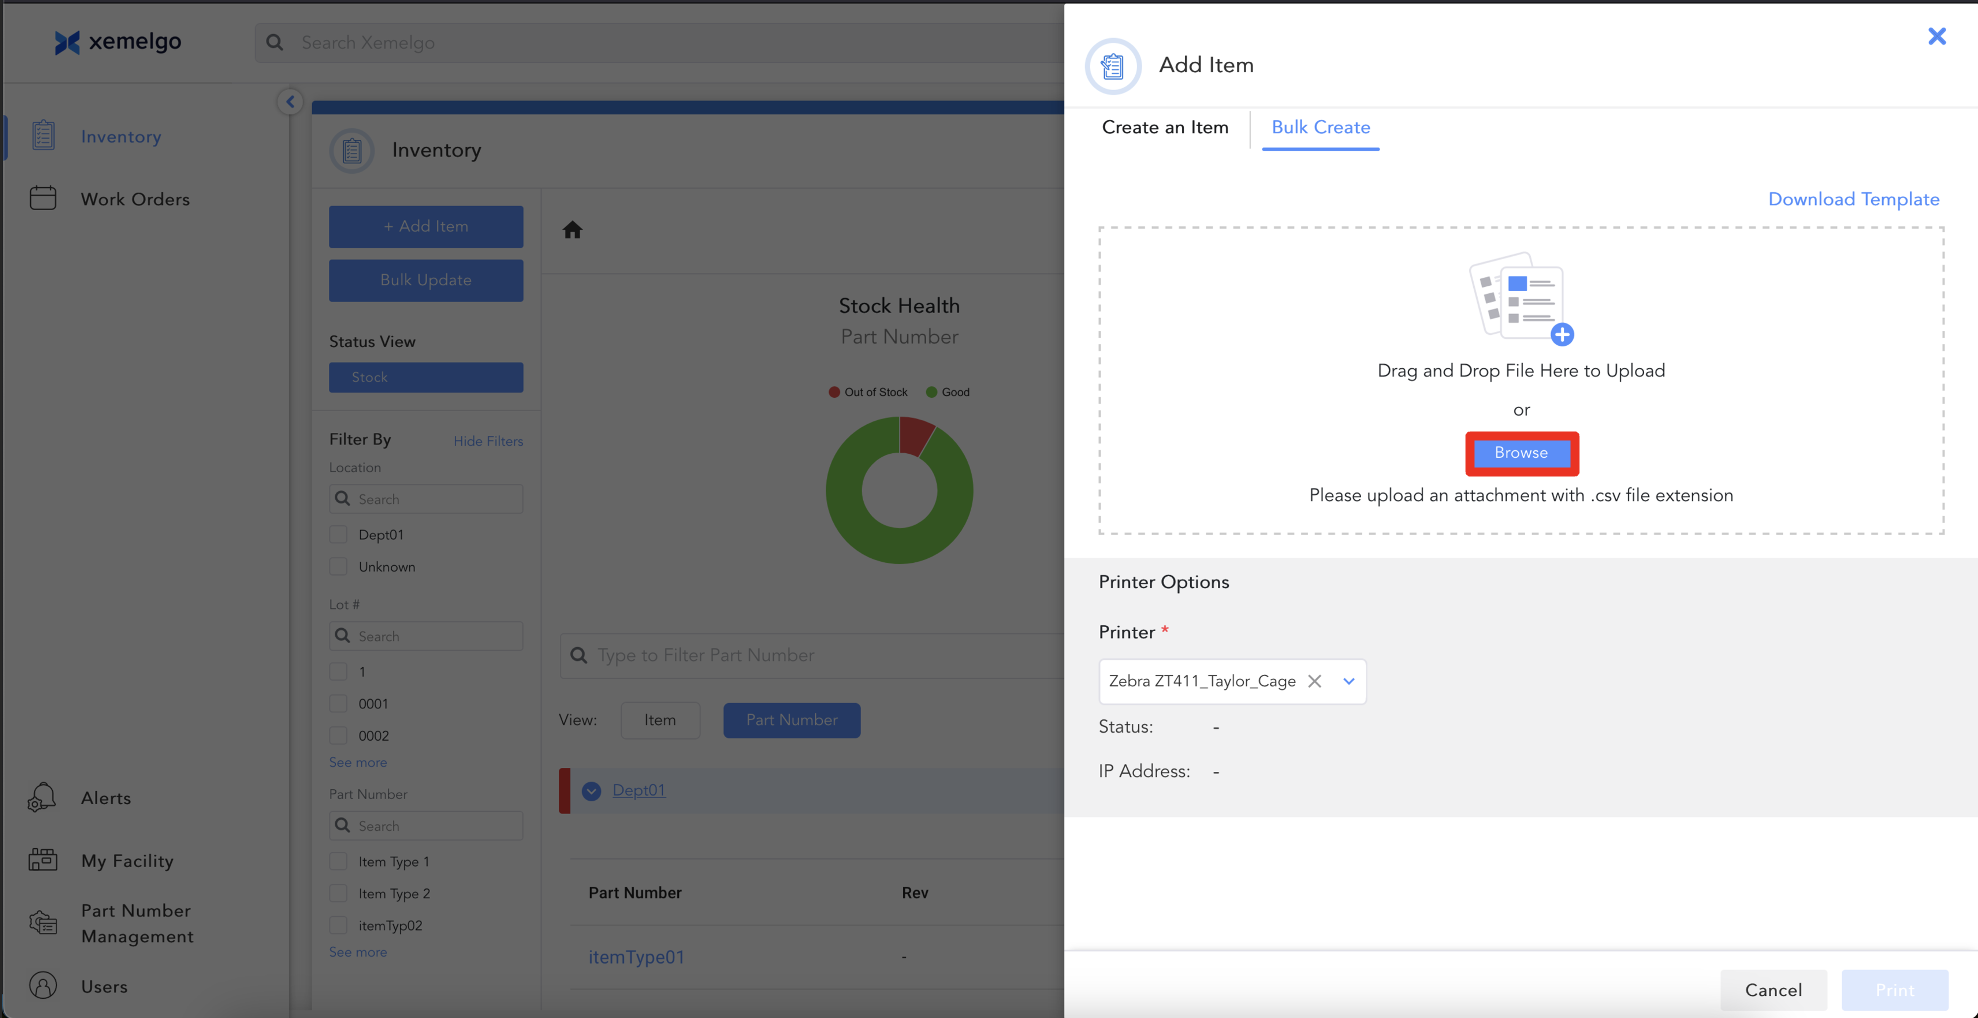
On the Bulk Create tab on the onboarding page, users can upload a CSV by drag and drop or click on Browse button and navigate to the CSV file.
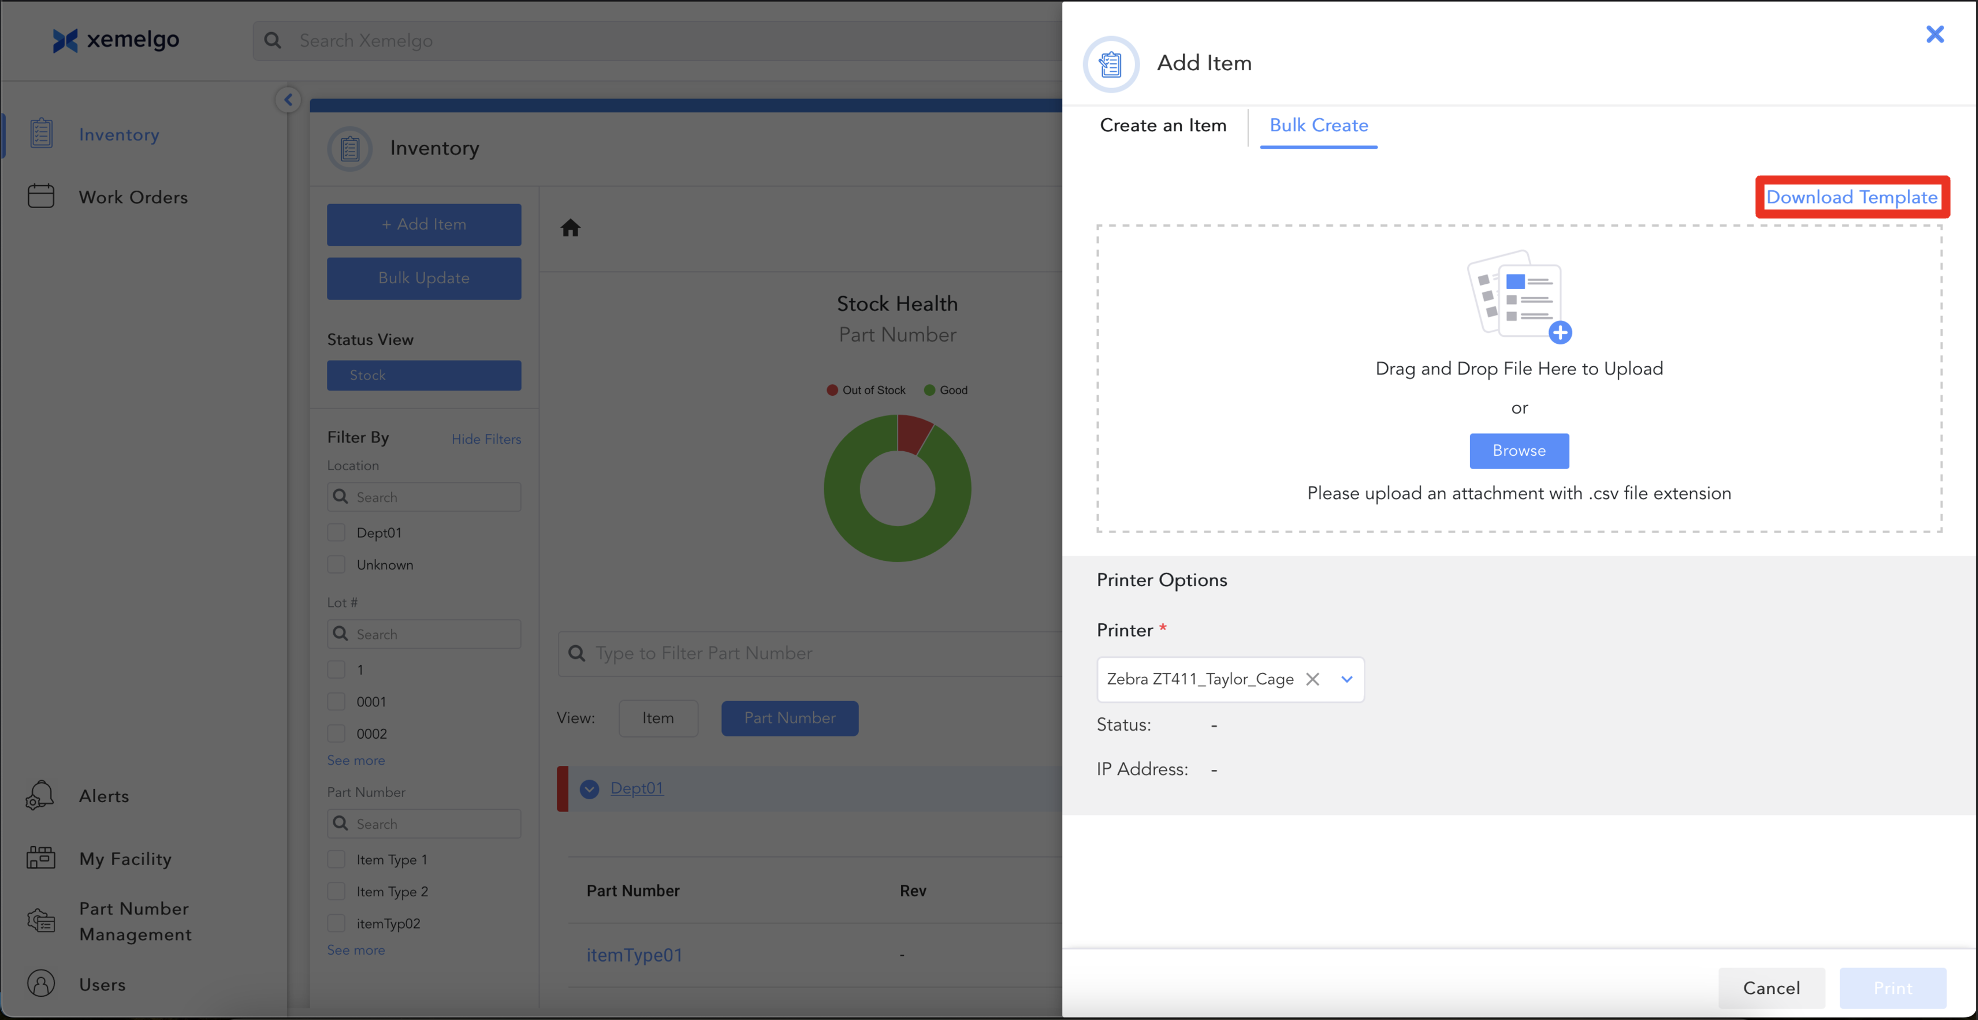
If users don't have a CSV, click Download Template to download a CSV with defined headers.
Next, fill in the CSV.

headers with * are Required and headers without * are optional
Some fields must match with Xemelgo data such as Part Number and **Location
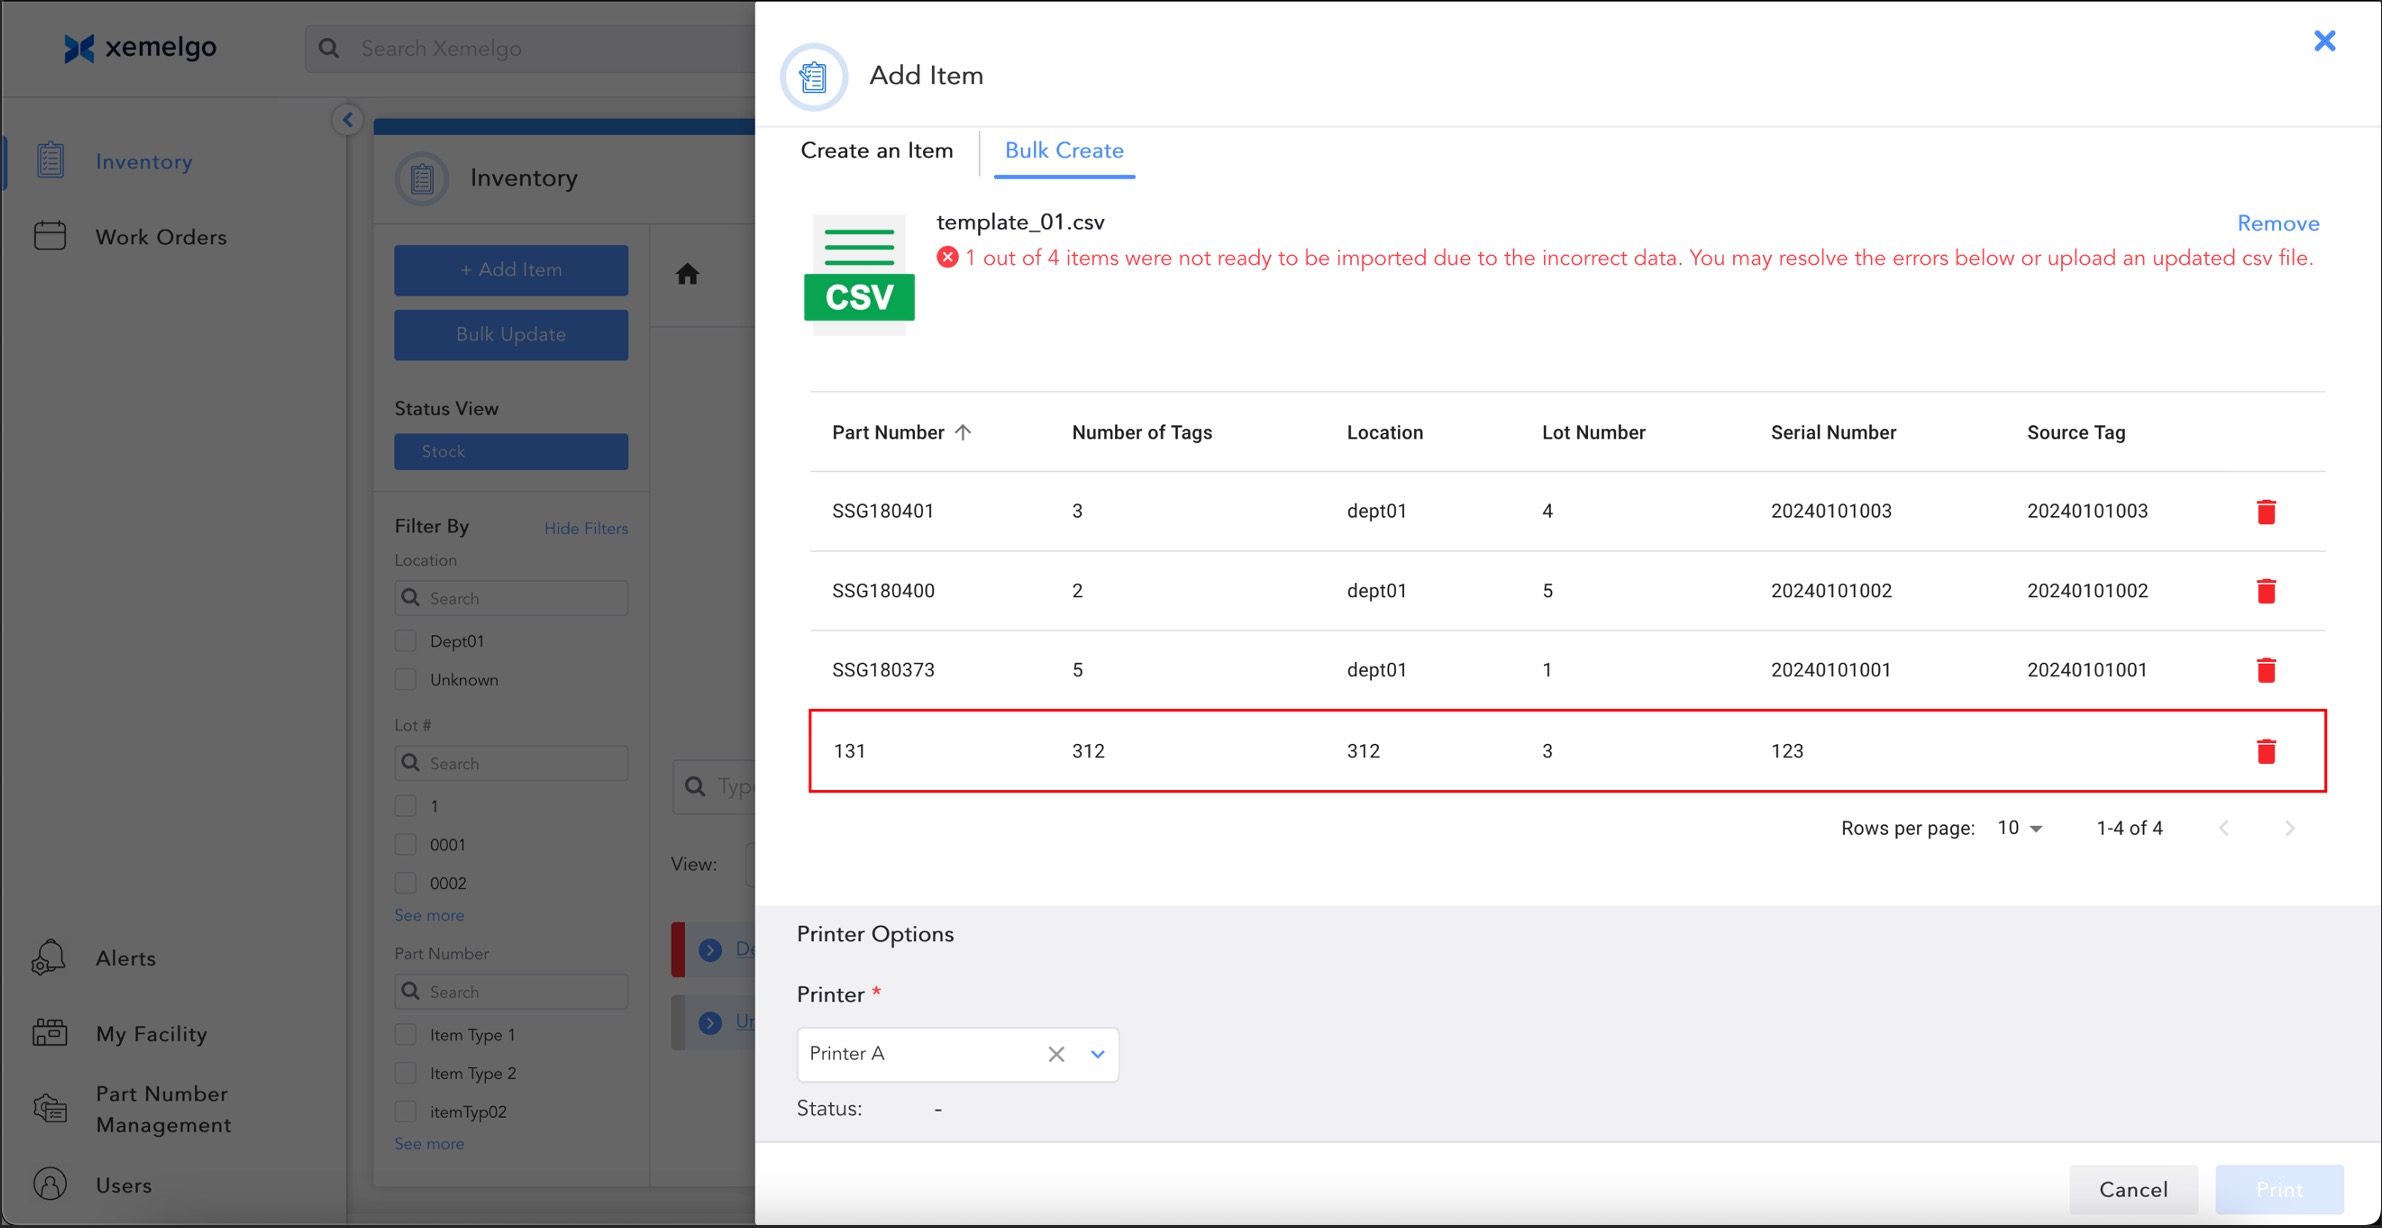
After the CSV file has been uploaded, if there are any Errors in the CSV, it will be pointed out on the table.
Users can resolve the error by clicking on the Delete icon on the right of each row to either delete that row or upload a new CSV.
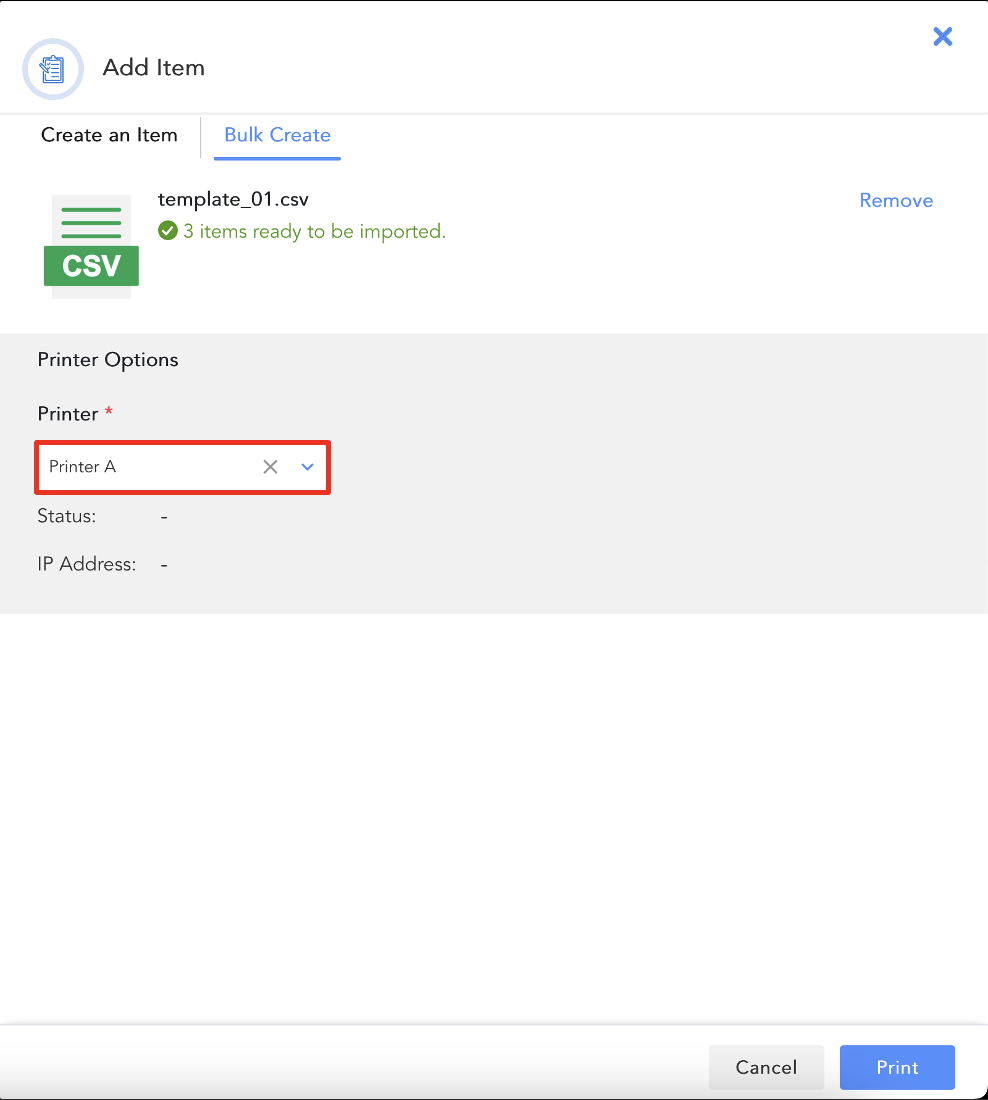
Once the errors have been resolved, select a Printer under Printer Options.
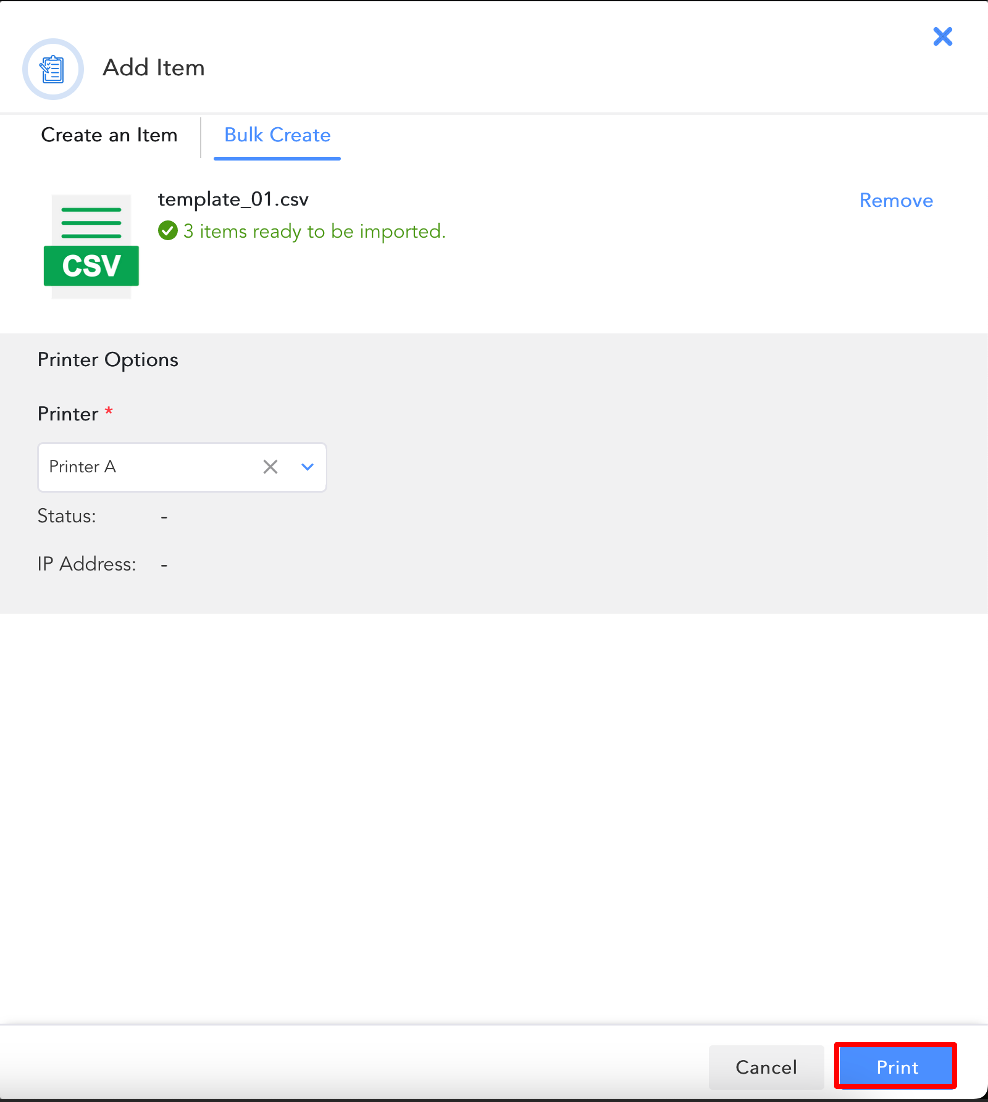
Finally, click Print to start creating items and printing tags.
Need further assistance?
The article above couldn't resolve your issue? Use the chat button in the bottom-right corner to contact the support team.