Resolving "VOID" Prints on Zebra RFID Printers
Resolving "VOID" Prints on Zebra RFID Printers
Overview
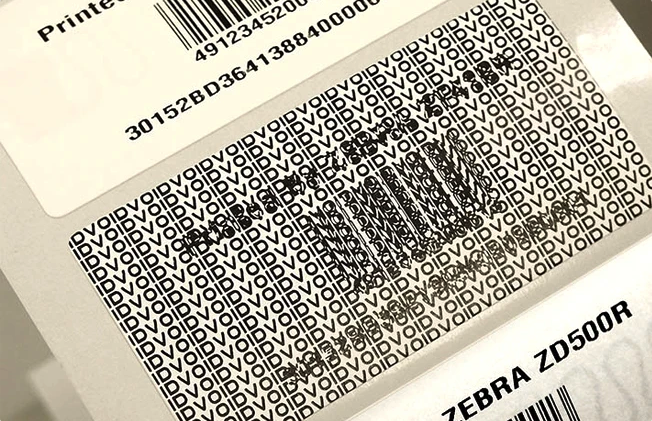
When a Zebra printer outputs a label with "VOID" stamped across it, it means the printer was unable to successfully write data to the RFID chip (inlay) inside the label.
1. Identify the Failure Pattern
Before changing settings, observe the frequency of the "VOID" stamps:
-
Occasional VOID: Usually a single defective tag or minor interference.
-
Three VOIDs in a Row: Standard Zebra logic. The printer retries two additional times before giving up on that specific print job.
-
Every label is VOID: This indicates a fundamental setup issue, such as incorrect calibration or data formatting errors.
2. Immediate Physical Checks
Small changes to the printer's physical state can disrupt the sensitive RFID encoding process.
-
New Media/Ribbon: Even if you replaced a roll with the same type of label, slight manufacturing variations can occur. If the wax ribbon or label roll was changed, perform both a Print / Media calibration, followed by an RFID calibration.
-
Label Alignment: If the last tag was ripped too hard, or the label alignment slider is not set correctly, the label can start getting fed out at a slightly different angle than before, which is enough to cause the printer to not be able to find the RFID chip consistently. Ensure the label is being fed out correctly by pressing the “Feed” button.
3. Step-by-Step Print/Media and RFID Calibration
Step A: Media & Ribbon Calibration
-
Have these details about your printer and labels on hand:
-
Print type: thermal transfer or direct thermal.
-
Label type: continuous, gap/notch, or mark.
-
Label width (dots): the label width multiplied by the printer's DPI. For example, a 4″ label on a 203 DPI printer is 4 × 203 = 812 dots wide.
-
Collection method: tear off, peel off, rewind, cutter, delayed cut, and so on.
-
-
On the printer screen, navigate to Wizards > Print.
-
Follow the prompts to calibrate the media.
-
Make sure the labels feed consistently and stop correctly at the end of each label.
Step B: RFID Calibration
-
Make sure the printer is not paused. It must be in a "Ready" state to calibrate; a paused printer is the usual reason an RFID calibration fails immediately.
-
On the printer screen, navigate to Wizards > RFID.
-
Select Start Calibration.
-
The printer feeds several labels forward and backward to find the best "program position" and power level for your tags. This can take several minutes.
If the RFID calibration fails, check that the labels are loaded correctly under the media guides.
4. Verifying the Data (EPC Formatting)
If calibration is successful but the printer still "VOID"s every label, the issue is likely the data being sent. The EPC (Electronic Product Code) must follow strict rules:
| Requirement | Rule |
|---|---|
| Character Set | Hexadecimal only (Numbers 0–9 and Letters A–F). |
| String Length | Must be an even number of characters (e.g., 24 chars). |
| Invalid Examples | 123G45 (contains 'G')ABC12 (length is 5) |
If you are using the Xemelgo platform, our system automatically generates a valid EPC, making a formatting error unlikely but still worth verifying. Reach out to Xemelgo Support if you want to confirm this, support@xemelgo.com
Still experiencing issues?
If you have performed both Print/Media and RFID calibration successfully but "VOID" labels persist, you may have a defective batch of labels or require a Manual RFID Calibration.
Contact Xemelgo Support
-
Email: support@xemelgo.com
-
Information to include: Printer model (e.g., ZT411R), printer DPI, and the label part number
Need further assistance?
The article above couldn't resolve your issue? Use the chat button in the bottom-right corner to contact the support team.