How to Set Up a Proxy Server on Server Machine for Bartender Print
How to Set Up a Proxy Server on Server Machine for Bartender Print
Route Domain to DNS
Routing your domain name to DNS involves configuring your domain's DNS settings to point to the appropriate server. This can be done when you create the certificate or can be done manually on the server machine. If it cannot be done when you create the certificate, here are the steps to route the domain name to the server IP address on the server.
- Navigate to Hosts file
- Windows: Located at C:\Windows\System32\drivers\etc
- Mac: On Terminal, use the command: sudo nano/private/etc/host
- Add the server IP map to the certificate domain name. For example, 111.111.0.11 localhost
Configure Web Server on IIS
We are going to configure the server on IIS to use the appropriate SSL certificate when the client make request to the corresponding protocol, IP address, hostname and port number.
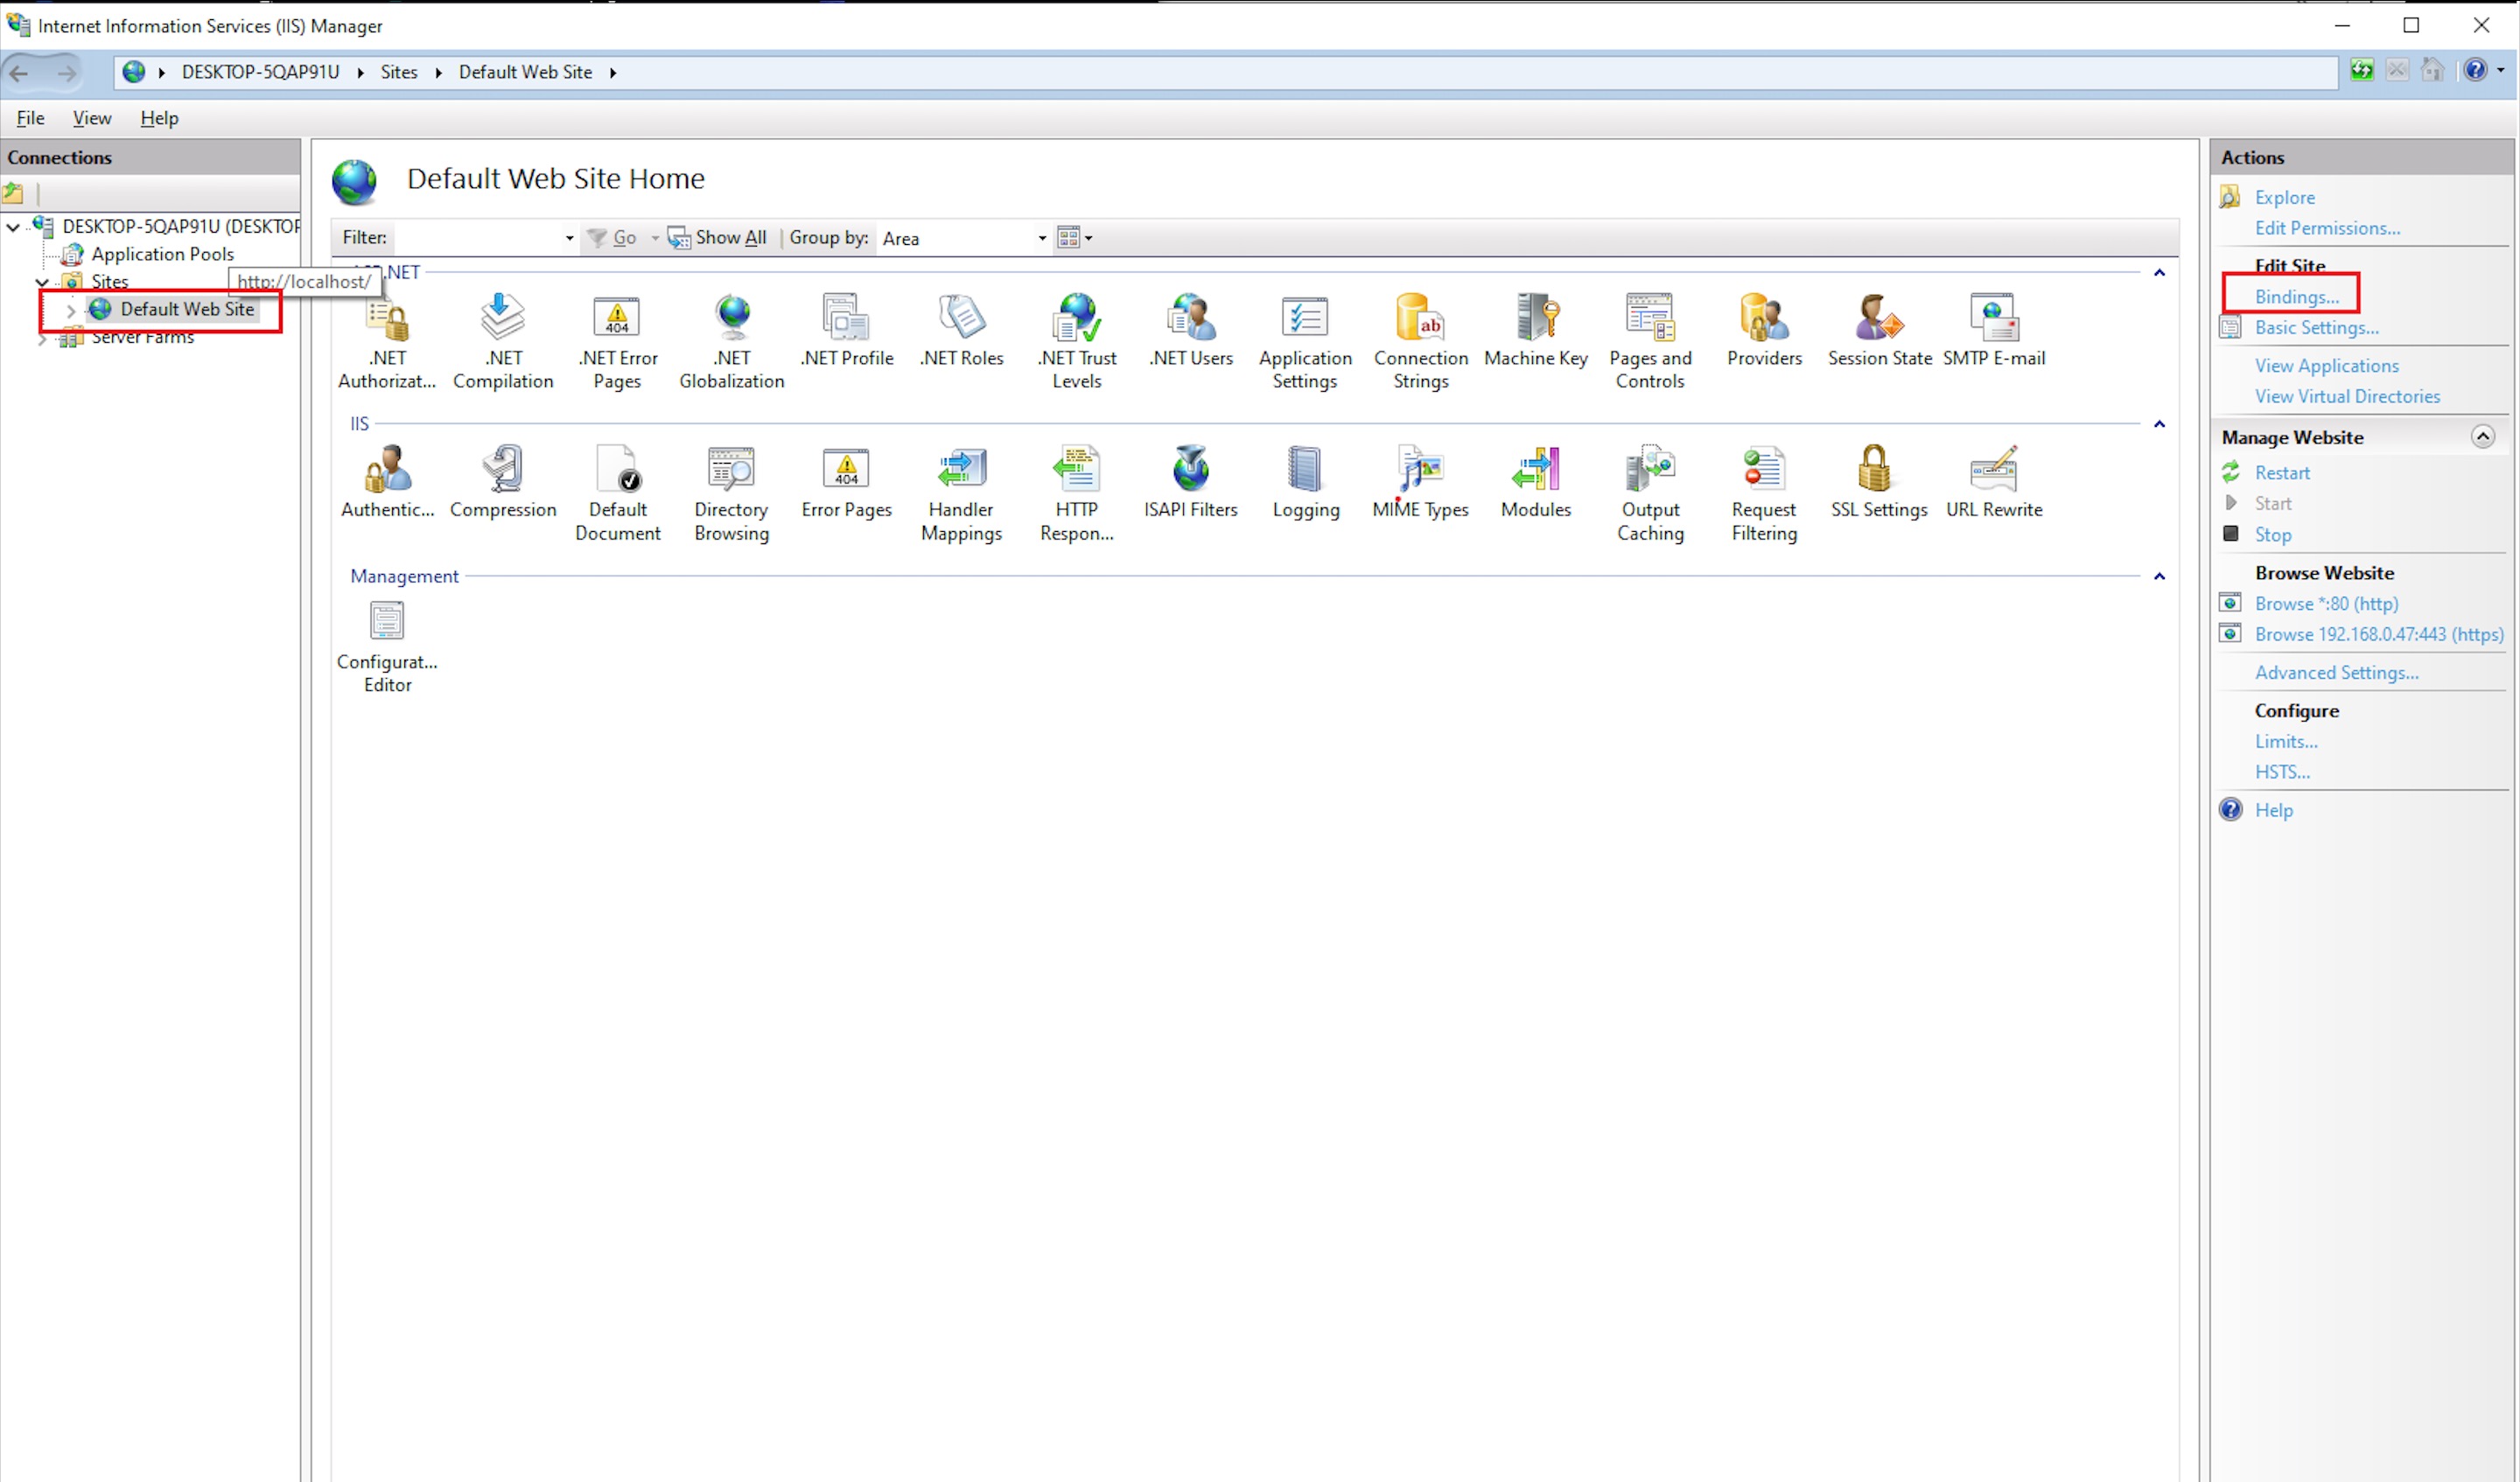
On Internet Information Service (IIS) Manager, select the Default Web Site on Connections pane
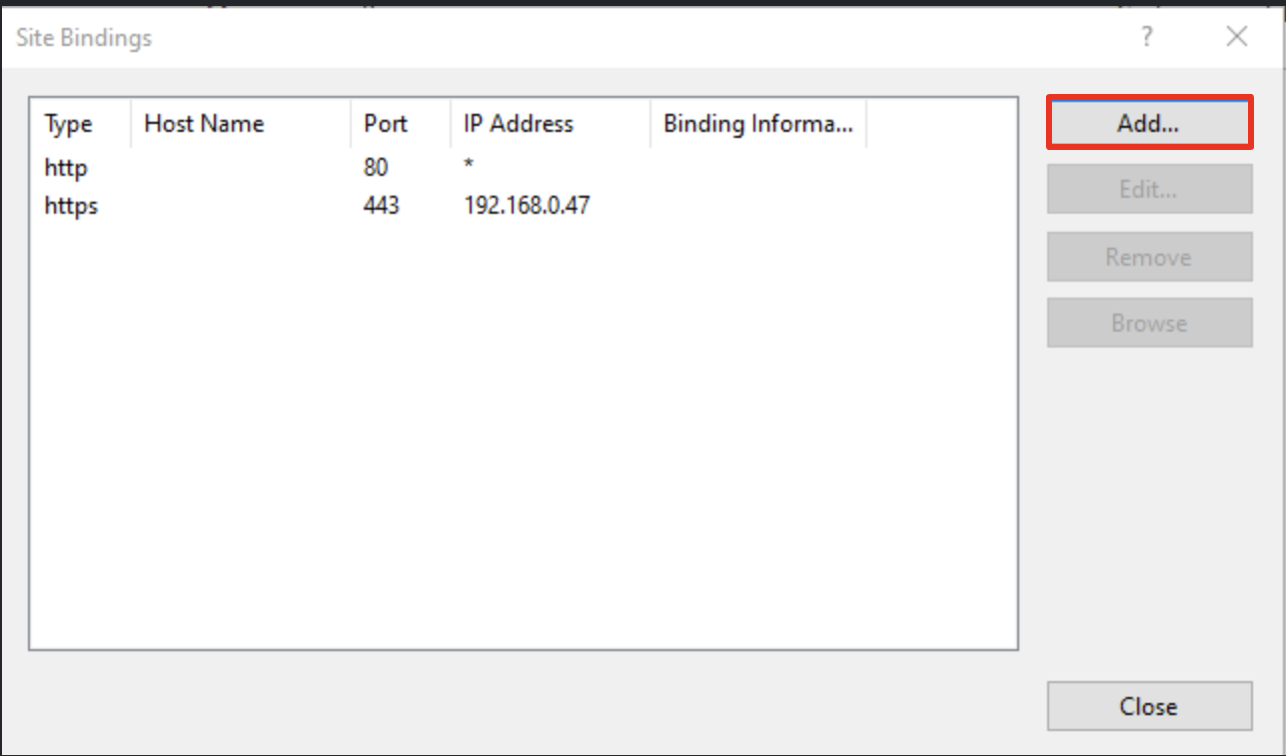
Open the Blinding on the Actions pane
On the Blindings window, click Add
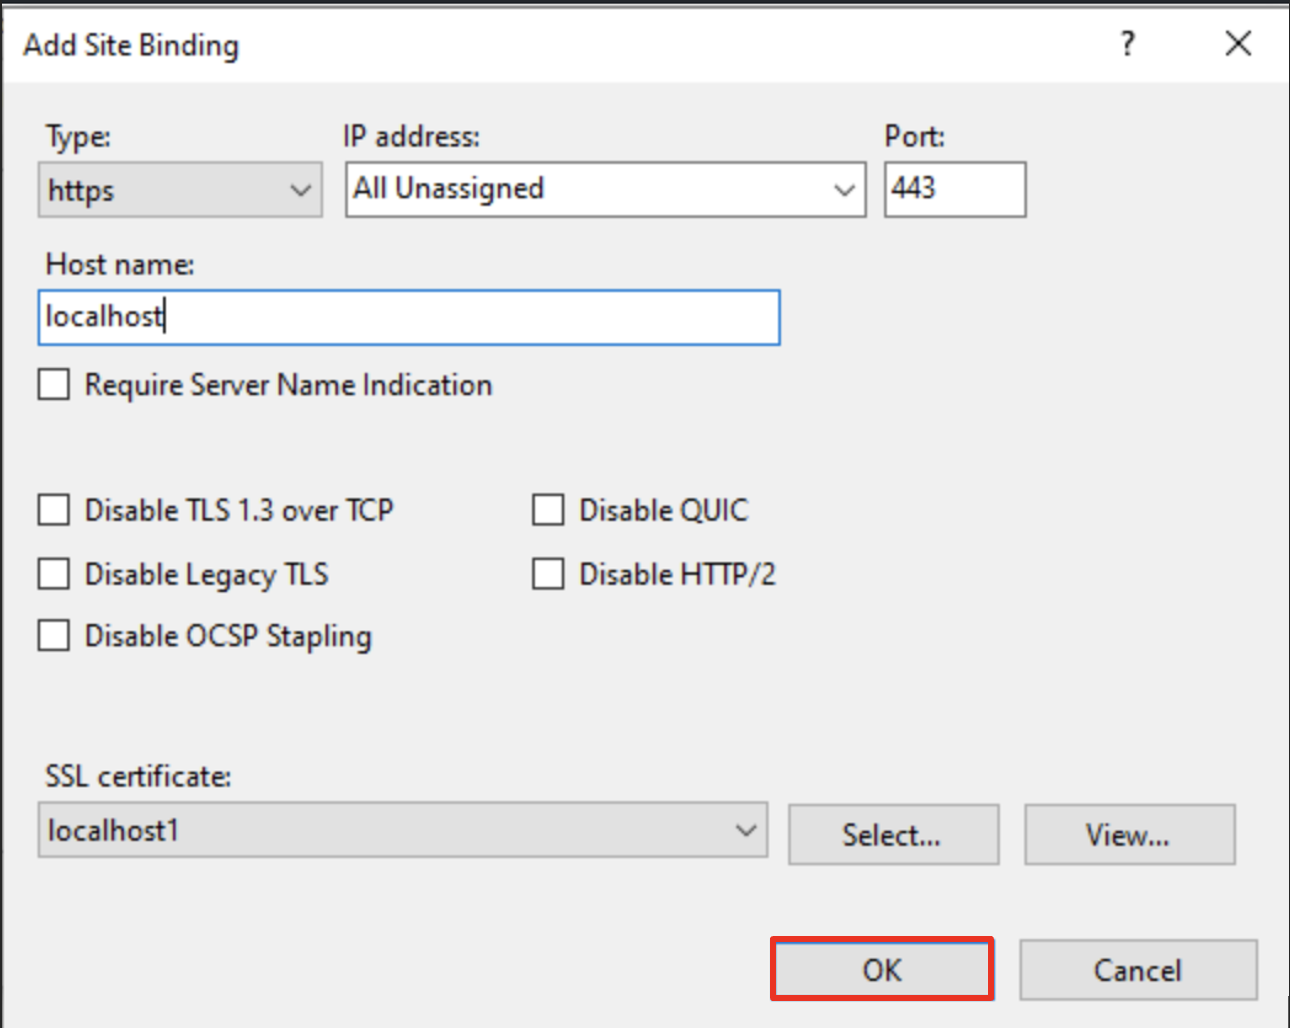
On the Add Site Blinding, enter the following to configure
-
Type: https
-
IP: the IP of the server
-
Port: 443
-
Hostname: domain name of the certificate
-
SSL certificate: select the certificate that you obtained above. The certificate needs to be added to the server machine for it to appear here
Internet Information Service (IIS) Manager Setup
The following setup requires you to enable IIS and download the following feature:
-
Application Request Routing Module
-
URL Rewrite Module
-
CORs Module
Setup Proxy Server
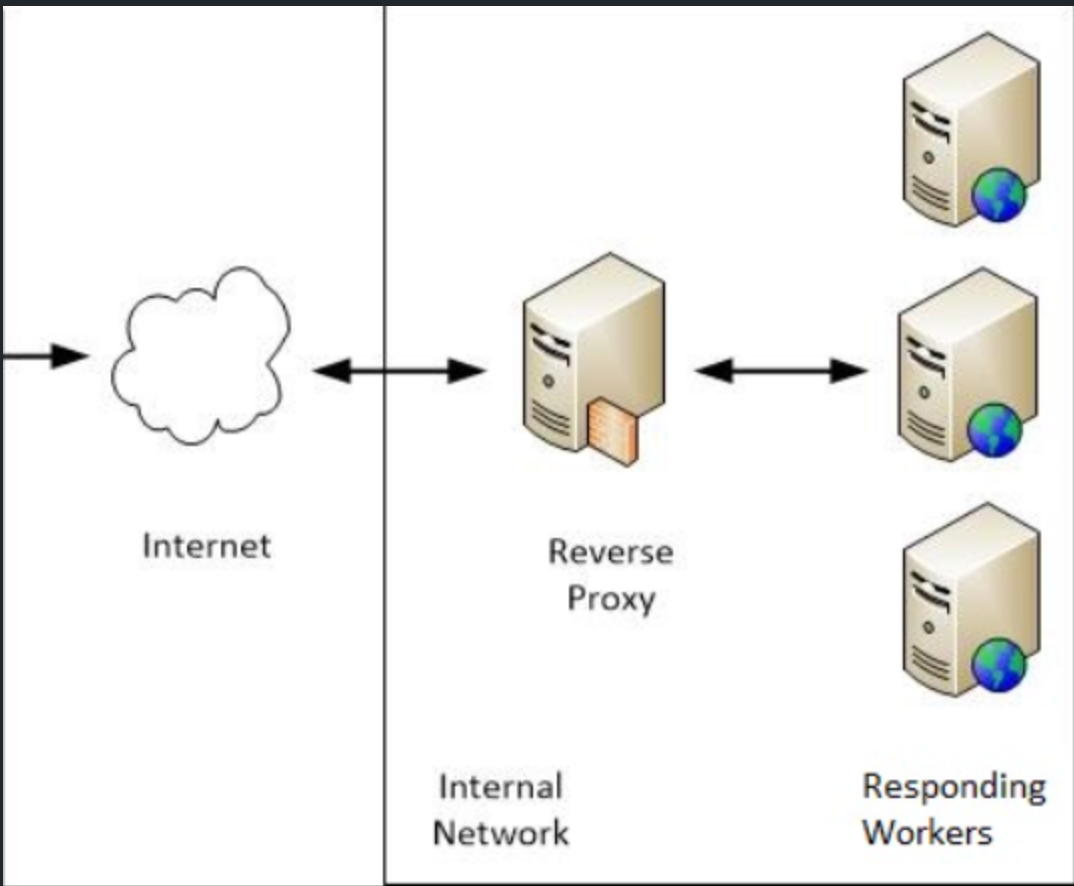
We are going to setup the reverse proxy to handle incoming request from the Internet, forwards it to a backend server, and returns the response to the Internet.
Configure Application Request Routing Cache
On Internet Information Service (IIS) Manager, select the server on the Connections pane.
Click on Application Request Routing Cache.
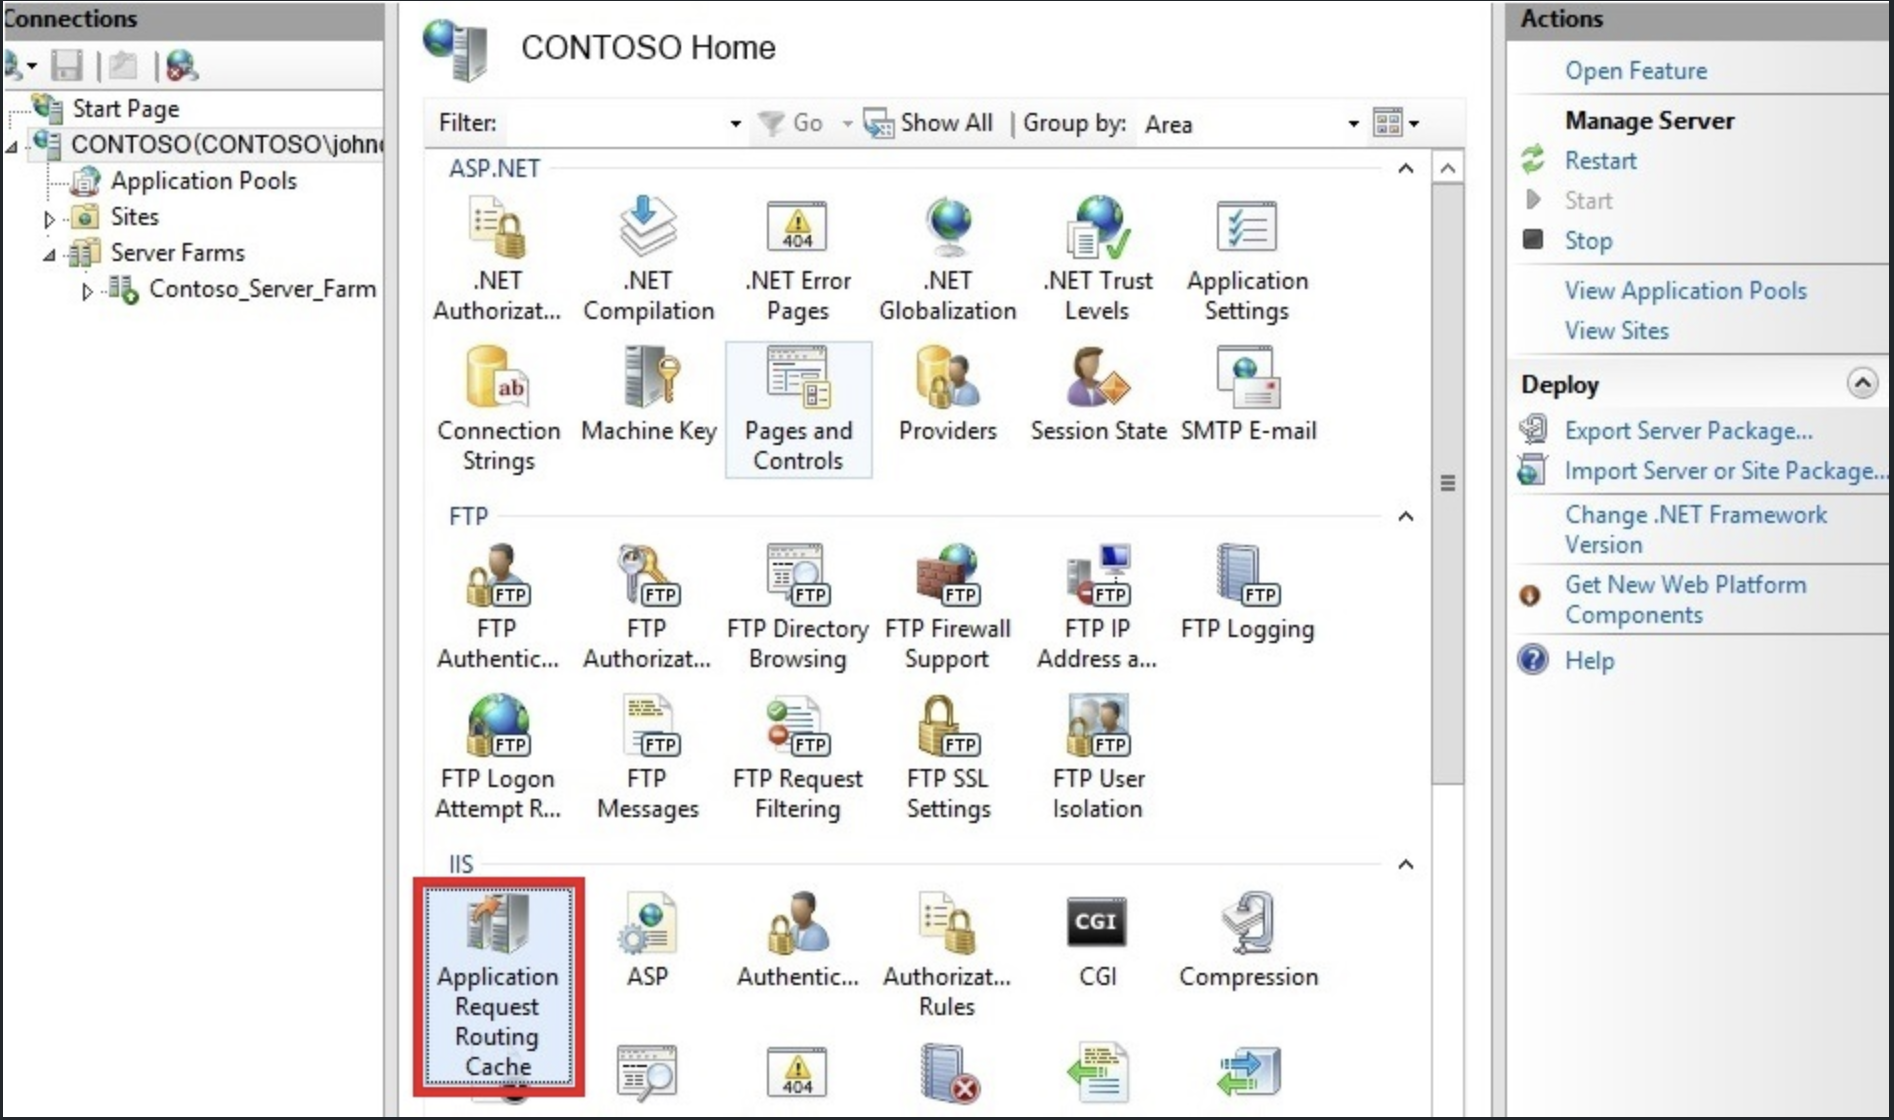
On the Actions pane, click Server Proxy Settings.
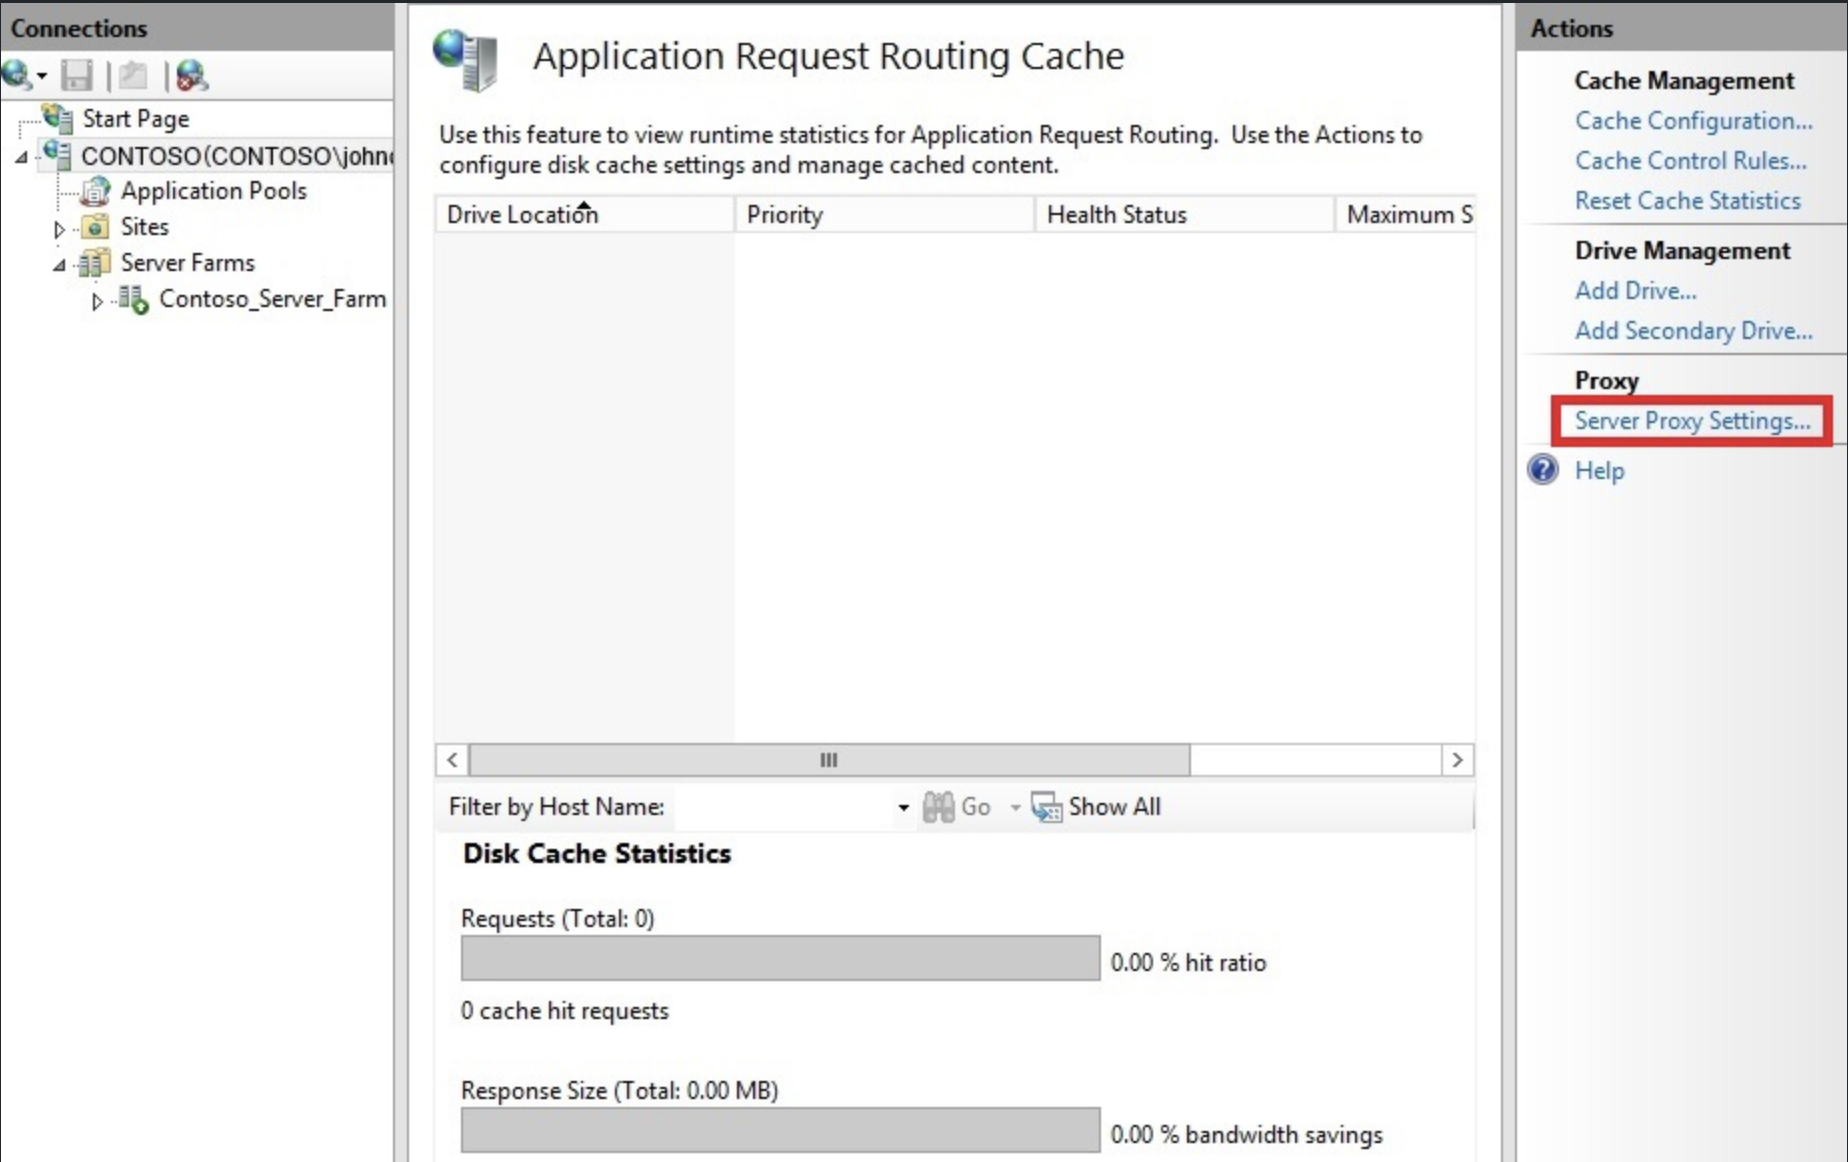
On the Application Request Routing page, select Enable proxy.
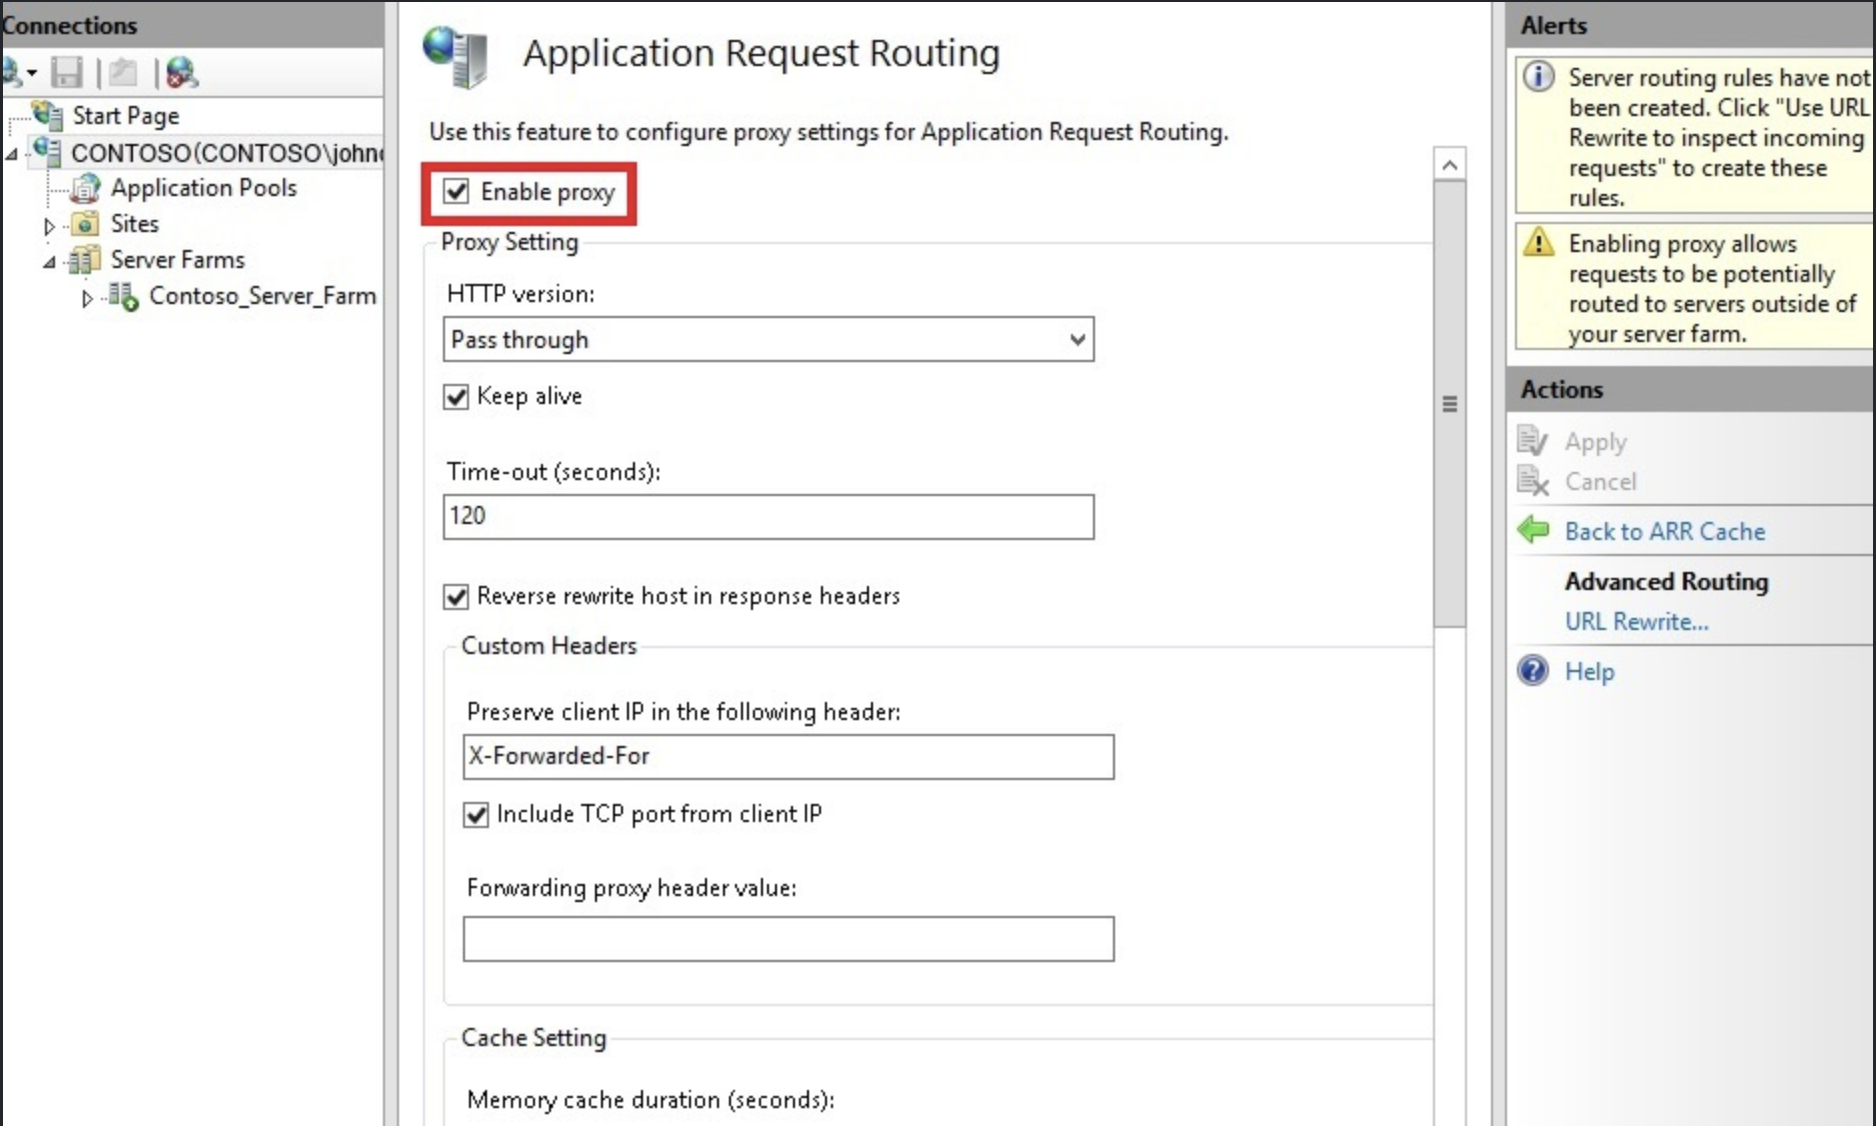
In the Actions pane, click Apply. This enables ARR as a proxy at the server level.
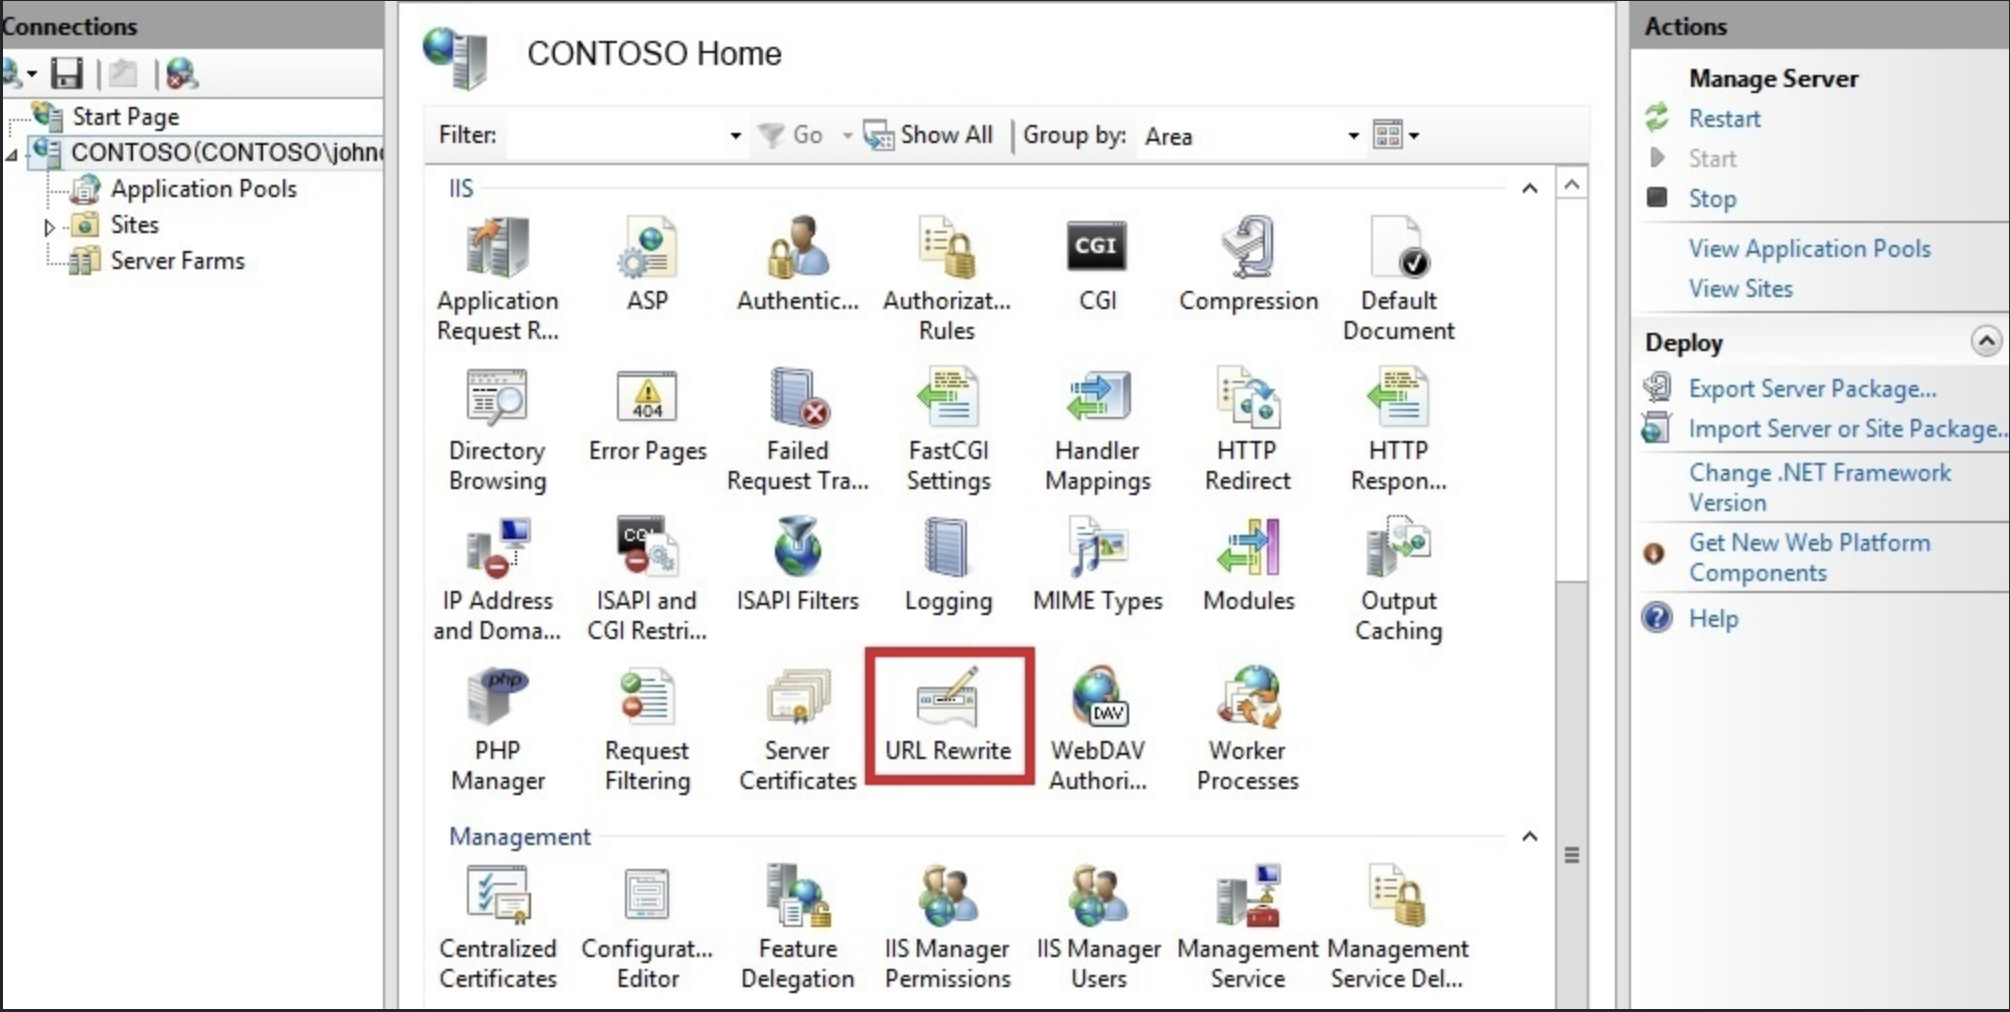
In the server pane, double-click URL Rewrite.
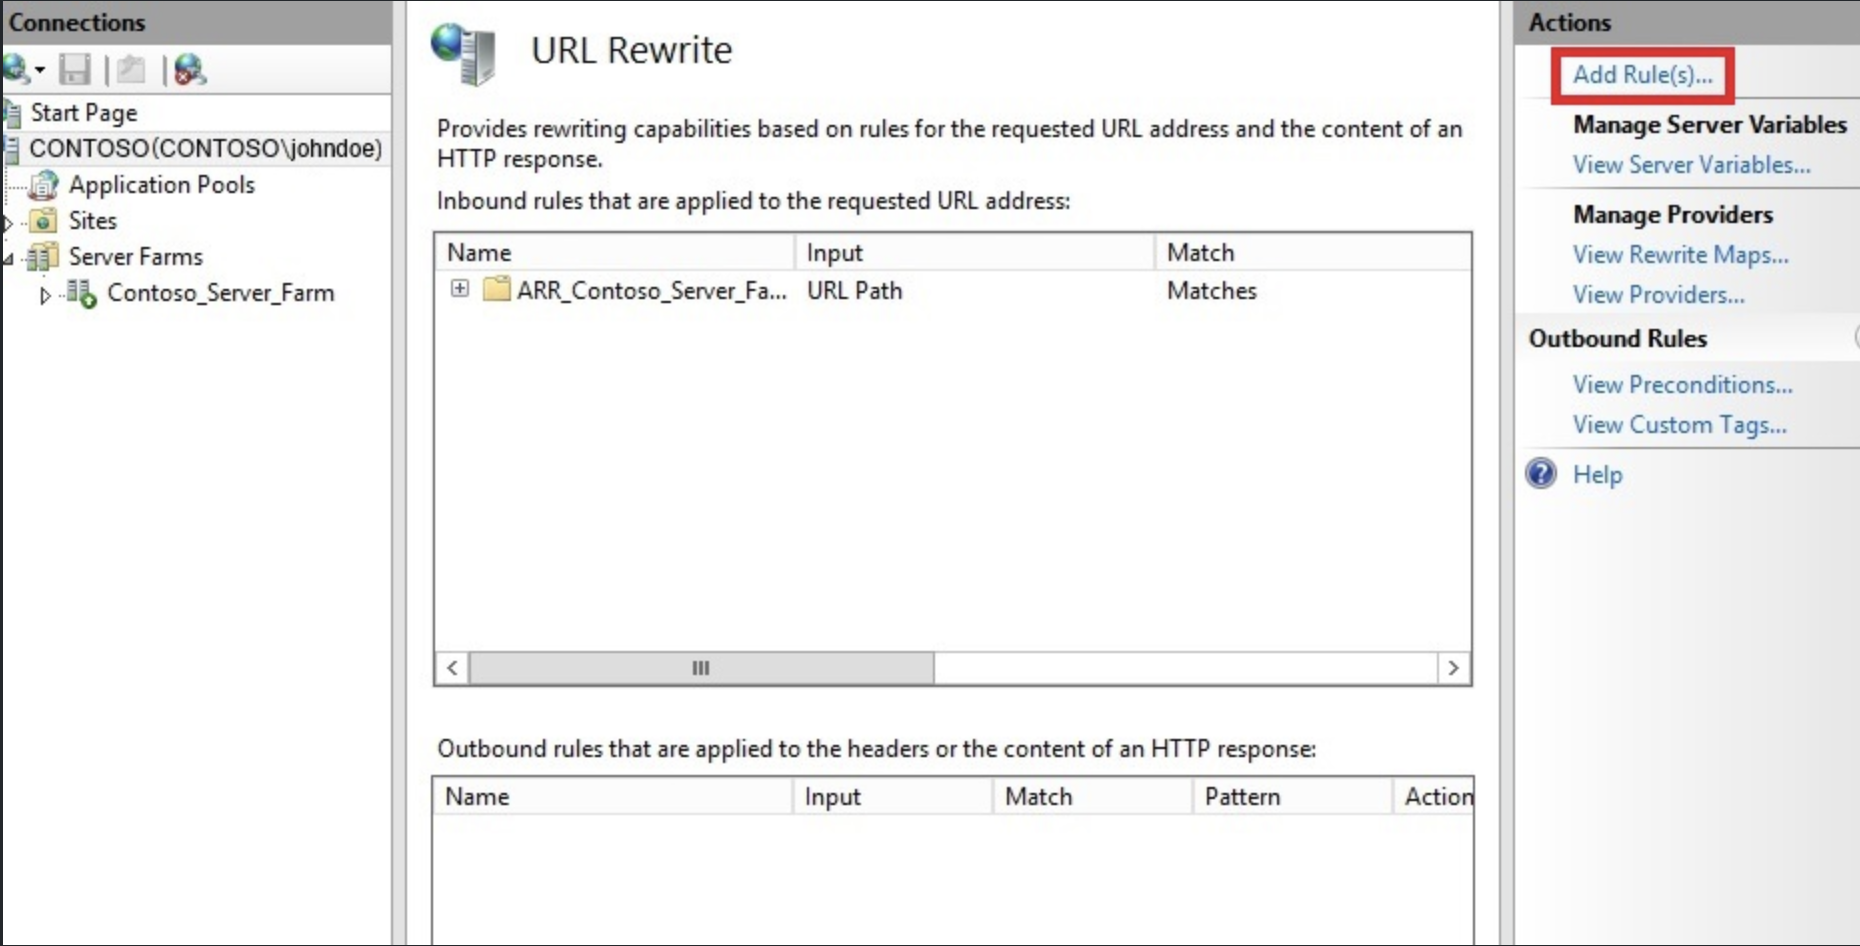
In the Actions pane, click Add Rule(s).
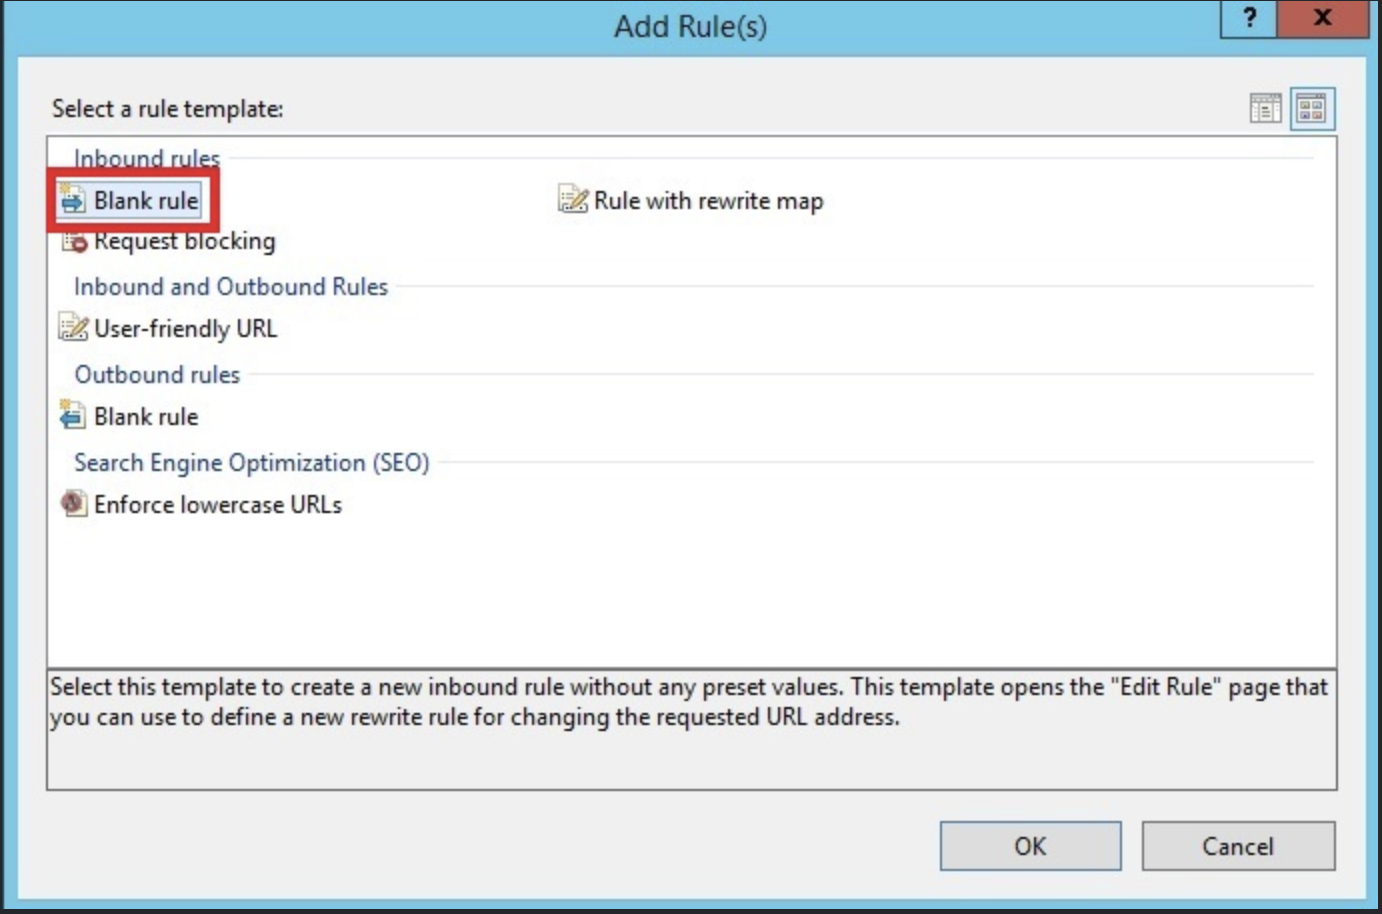
In the Add Rule dialog box, double-click Blank Rule.
Rule Configuration
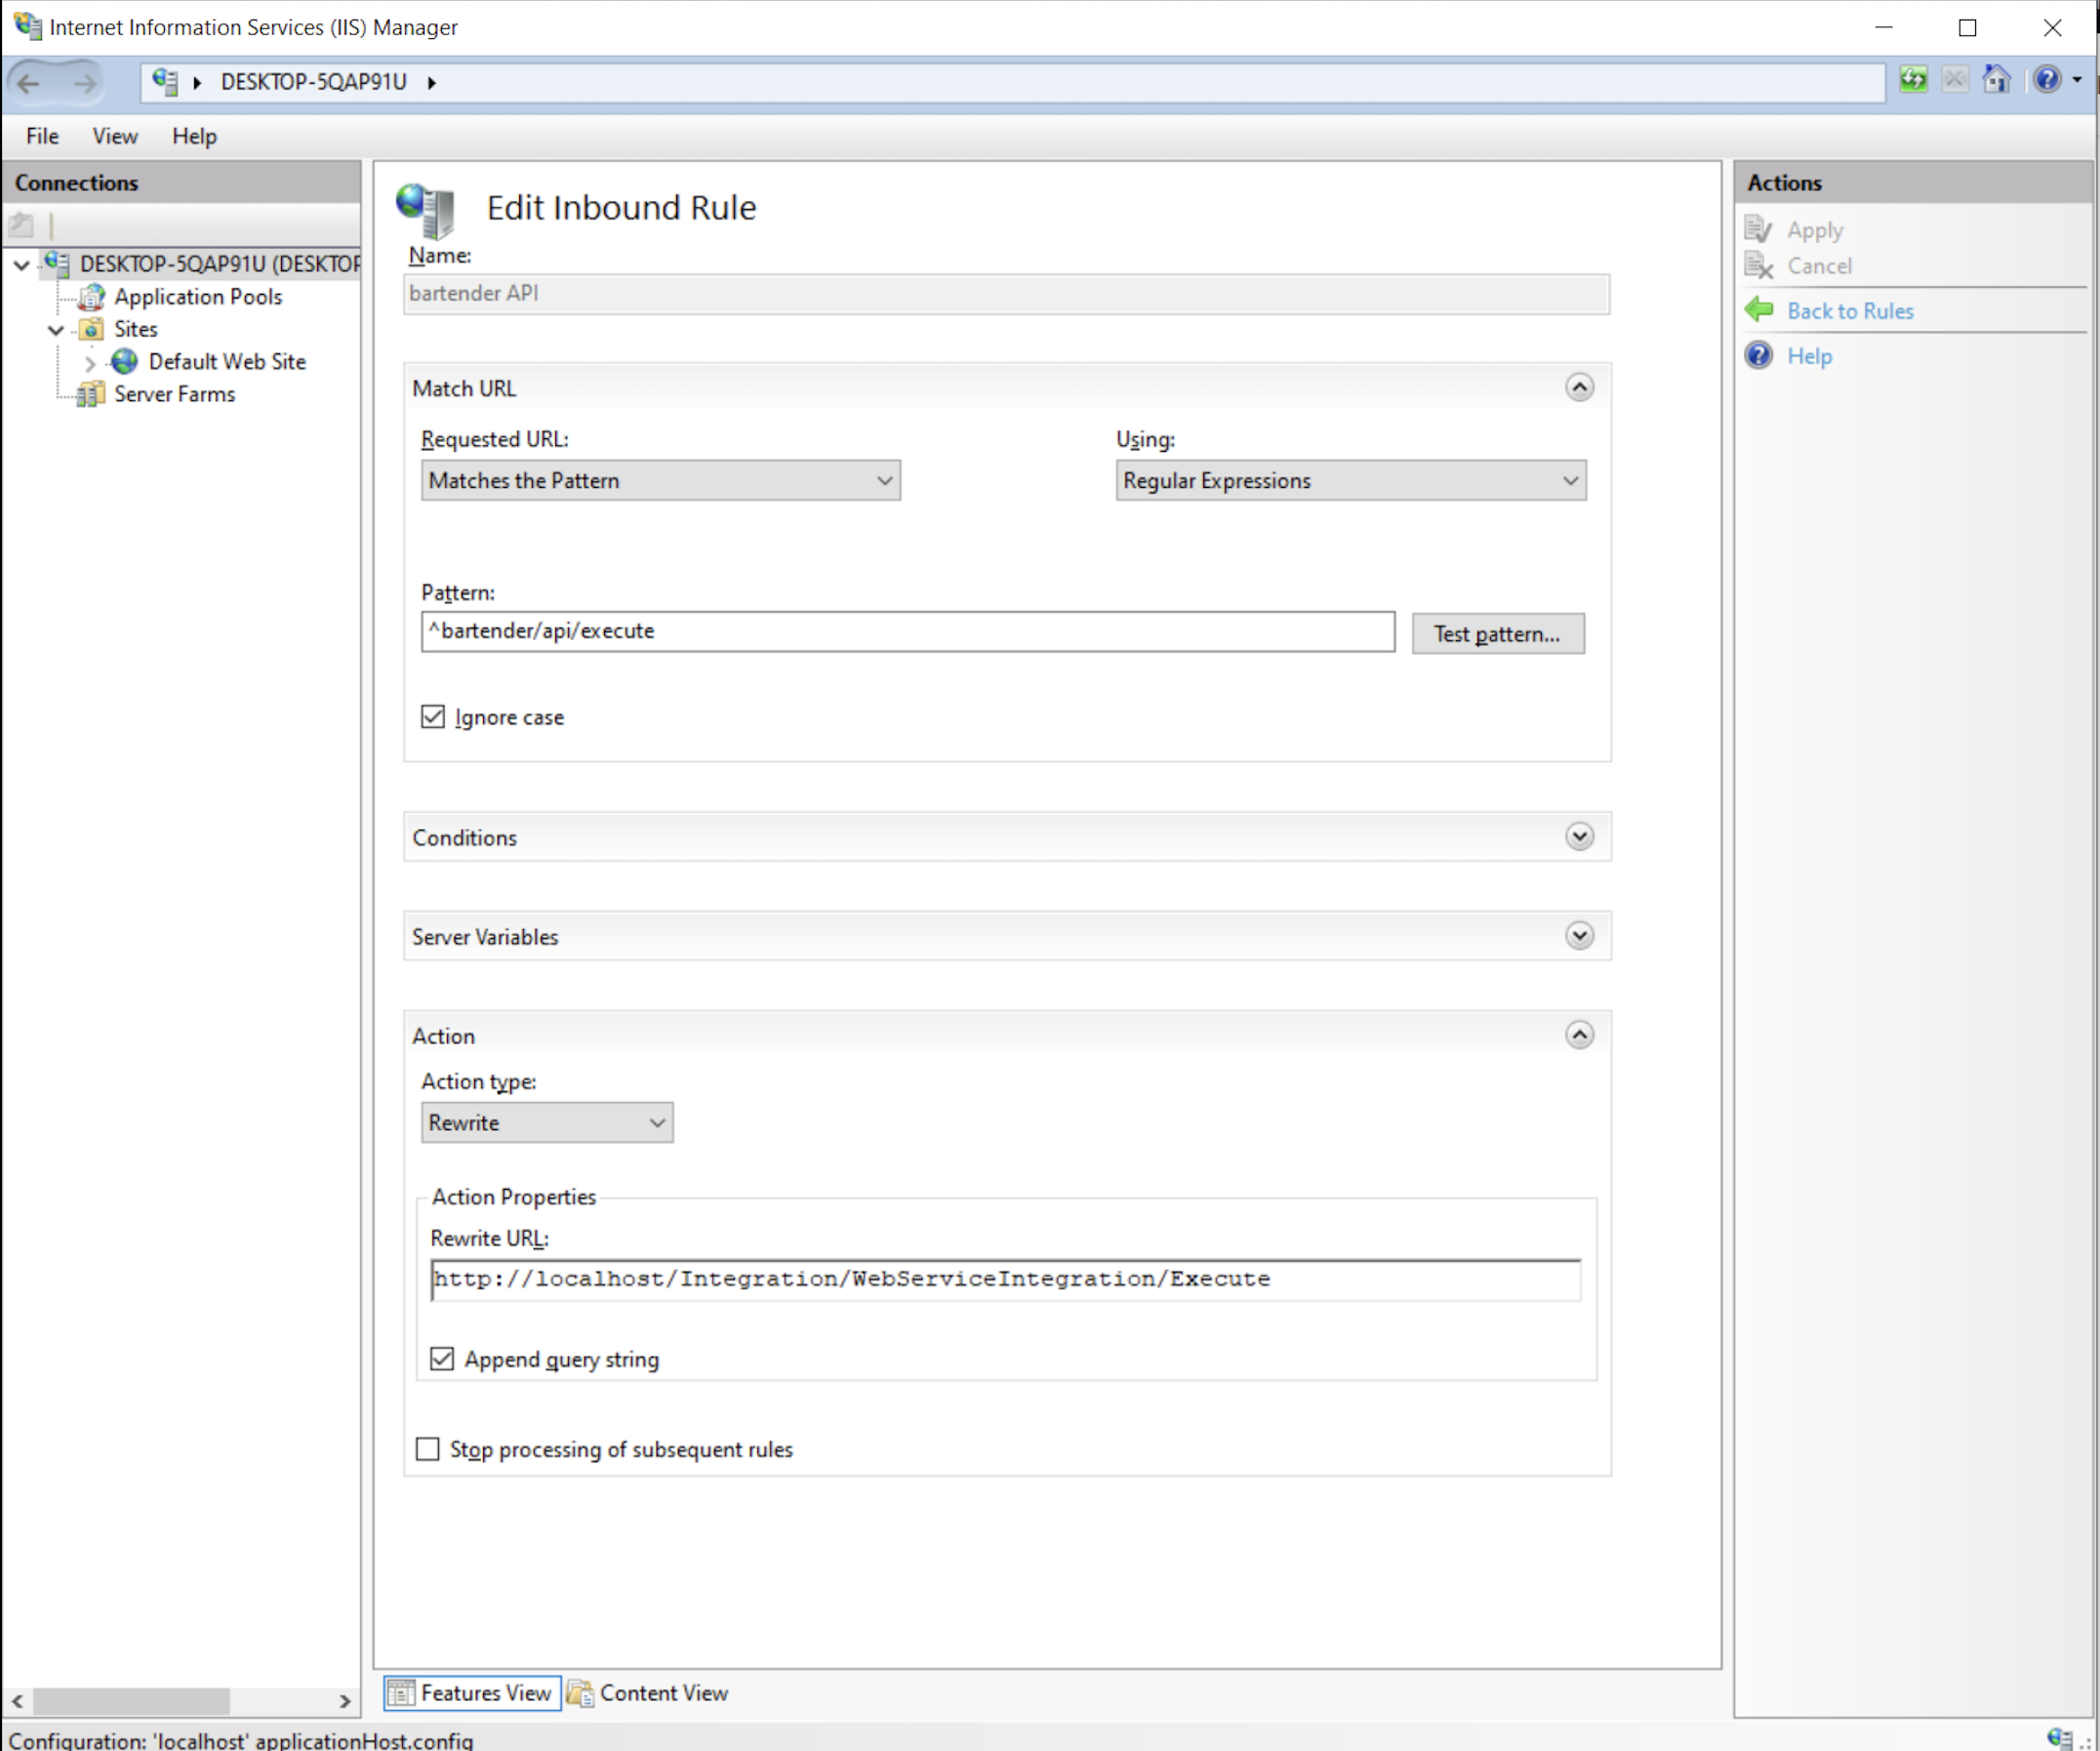
Match URL: Define the conditions under which the rule will be applied, usually based on patterns in the URL.
-
Requested URL:
Matches the Pattern -
Using:
Regular Expression -
Pattern:
^bartender/api/execute
Conditions: Specify additional conditions that must be met for the rule to apply.
-
Action: Define what should happen if the rule's conditions are met. This could involve redirection, rewriting, or other actions.
- In this case, we rewrite the request to the rewrite URL: http://localhost/Integration/WebServiceIntegration/Execute
*Remember to always have a backup of your IIS configuration before making significant changes.
Enable CORS
This step enables CORS to allow web allocations hosted on one domain to make requests from another domain. CORS is important for security reasons and prevents web pages from making unauthorized cross-origin requests. CORS module is configured via a site or applicationweb.config and has its owncors configuration section withinsystem.webserver
*Note**: Remember to always have a backup of your **applicationHost.config** before making significant changes.*
Update the applicationHost.config file to enable CORS for any website on the server.
-
On the server machine, navigate to
C:\Windows\System32\inetsrv\config -
Add the
<cors>section under the<system.webServer>. The value fororiginin the<add>tag must be the client website.
<configuration> <system.webServer> <cors enabled="true" failUnlistedOrigins="true"> <add origin="https://beta.xemelgo.com" allowCredentials="true" maxAge="120"> <allowHeaders allowAllRequestedHeaders="true"> </allowHeaders> <allowMethods> <add method="POST" /> <add method="OPTIONS" /> </allowMethods> </add> </cors> ... </system.webServer> </configuration>
Need further assistance?
The article above couldn't resolve your issue? Use the chat button in the bottom-right corner to contact the support team.